Here is my favorite old fashioned rhubarb crisp recipe, with a simple rhubarb filling sweetened with sugar and warm spices, topped with a buttery oat crumble that bakes up golden and crispy.
This rhubarb crisp is what I make every spring when rhubarb season hits. My kids love it served warm with a scoop of vanilla ice cream on top. It’s the perfect way to use up all that fresh rhubarb from the garden!
Why You’ll Love This Rhubarb Crisp
- Quick and easy dessert – This old fashioned rhubarb crisp comes together in under an hour, making it perfect for last-minute gatherings or weeknight treats.
- Simple pantry ingredients – You probably have most of these staples in your kitchen already – just grab some fresh rhubarb and you’re ready to bake.
- Perfect balance of tart and sweet – The tangy rhubarb paired with the buttery, cinnamon-spiced oat topping creates a classic flavor combination that never gets old.
- Minimal cleanup – With just one baking dish and a couple of mixing bowls, you’ll spend more time enjoying this crisp than cleaning up after it.
What Kind of Rhubarb Should I Use?
Fresh rhubarb is always your best bet for this crisp, and you’ll find it in season during spring and early summer at most grocery stores and farmers markets. The color of the stalks can range from deep red to pale green, and while the red varieties look prettier, they all taste pretty much the same – so don’t worry if you can only find the greener stalks. If fresh rhubarb isn’t available, frozen rhubarb works just fine too, though you’ll want to thaw it first and drain off any excess liquid to prevent your crisp from getting too watery. Just make sure you’re only using the stalks and not the leaves, as rhubarb leaves are actually toxic and should never be eaten.

Options for Substitutions
This classic crisp is pretty forgiving when it comes to swaps:
- Rhubarb: You can mix rhubarb with strawberries (use 2 cups of each) for a sweeter, less tart filling. Apples or peaches also work well, though you might want to reduce the sugar slightly since they’re naturally sweeter than rhubarb.
- Butter: If you need a dairy-free option, coconut oil works great in the topping. Use the same amount and make sure it’s solid when you mix it in. The texture will be just as crumbly.
- Oats: Quick oats and old-fashioned rolled oats both work fine here. Just avoid instant oats as they’ll get too mushy. If you don’t have oats at all, you can use extra flour and add some chopped nuts for texture.
- Brown sugar: Regular white sugar works if that’s what you have on hand. You’ll lose a bit of that molasses flavor, but the crisp will still taste good.
- White sugar in filling: Feel free to adjust the sugar based on how tart your rhubarb is. Start with 3/4 cup and taste the raw mixture – you can always add more if needed.
Watch Out for These Mistakes While Baking
The biggest mistake when making rhubarb crisp is cutting the rhubarb pieces too large or uneven, which leads to some pieces being mushy while others stay tough – aim for uniform 1/2-inch chunks so everything cooks at the same rate.
Another common error is not tossing the rhubarb with sugar and letting it sit for 10-15 minutes before baking, as this draws out excess moisture and prevents a watery filling that can make your topping soggy.
When mixing your crisp topping, be careful not to overmix or press it down too firmly on top of the fruit – you want a crumbly, loose texture that will turn golden and crispy in the oven, not a dense layer.
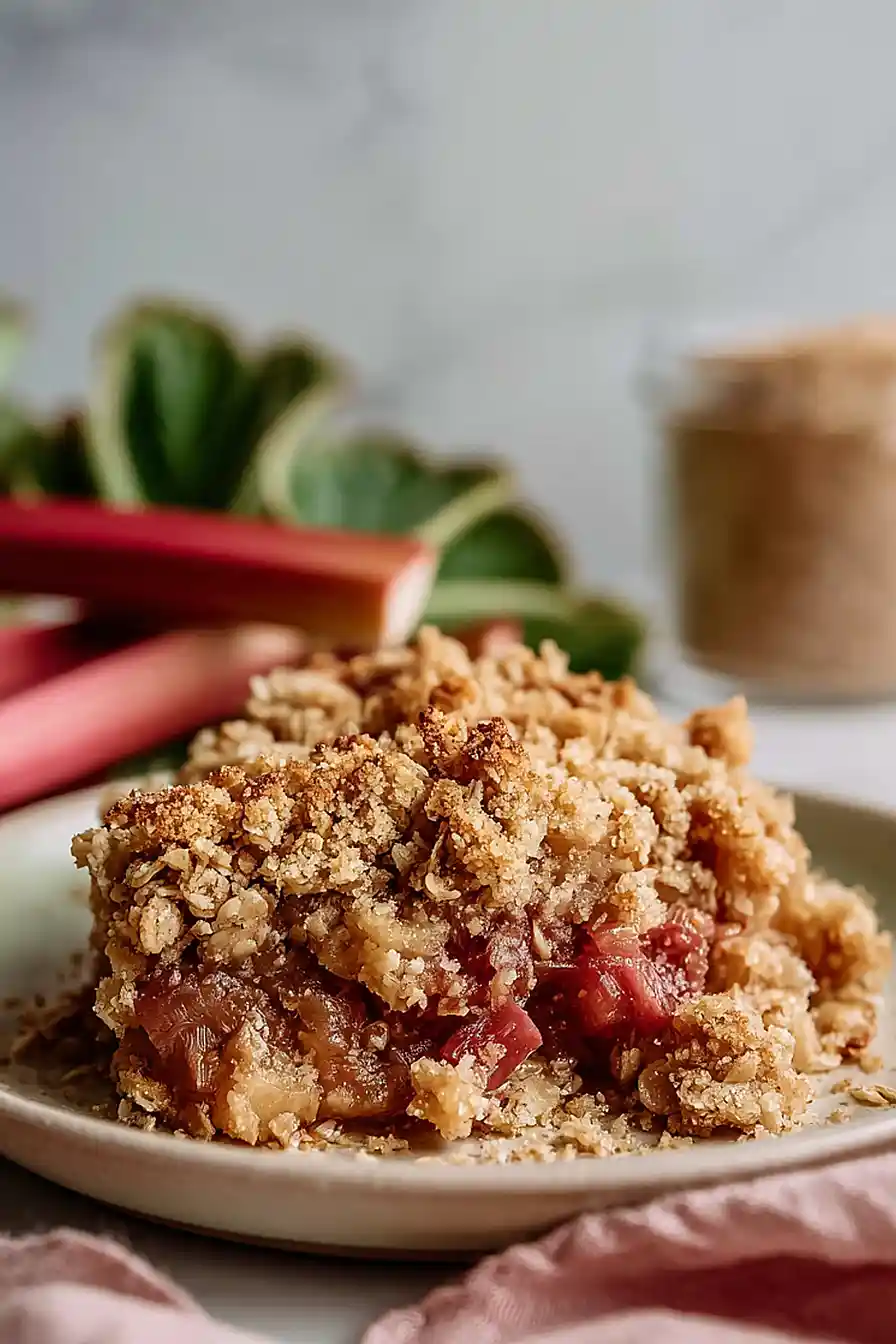
Finally, resist the urge to dig in right away, since letting the crisp cool for at least 20 minutes allows the filling to thicken up and makes serving much cleaner.
What to Serve With Rhubarb Crisp?
Rhubarb crisp is best served warm with a big scoop of vanilla ice cream on top – the cold, creamy ice cream melting into the warm, tart filling is absolutely perfect. If you’re not an ice cream person, a dollop of fresh whipped cream or even some vanilla yogurt works great too. I love serving this for dessert after a simple dinner, and it’s also nice for brunch alongside coffee or tea. The crisp keeps well in the fridge, so you can even enjoy it cold the next morning for breakfast (no judgment here!).
Storage Instructions
Store: Keep your rhubarb crisp covered with foil or plastic wrap in the fridge for up to 4 days. It actually tastes great cold straight from the fridge for breakfast, or you can warm it up again whenever you want a cozy dessert.
Freeze: This crisp freezes really well for up to 3 months. Let it cool completely, then wrap it tightly in plastic wrap and foil before freezing. You can freeze the whole pan or cut it into individual portions for easy grab-and-go servings.
Reheat: Warm it up in a 350°F oven for about 15-20 minutes until heated through and the topping gets crispy again. If you’re reheating from frozen, give it about 30-40 minutes covered with foil, then uncover for the last 10 minutes to crisp up the top.
| Preparation Time | 10-15 minutes |
| Cooking Time | 30-35 minutes |
| Total Time | 40-50 minutes |
| Level of Difficulty | Easy |
| Servings | 8 servings of crisp |
Estimated Nutrition
Estimated nutrition for the whole recipe (without optional ingredients):
- Calories: 2150-2350
- Protein: 16-20 g
- Fat: 70-80 g
- Carbohydrates: 380-410 g
Ingredients
For the filling:
- 4 cups rhubarb (sliced into 1/2-inch thick pieces)
- 1.25 cups sugar
- 0.4 cup flour (I always use King Arthur all-purpose flour)
- 0.75 tsp cinnamon
- 0.25 tsp ground nutmeg
For the topping:
- 0.75 cup butter (I like Kerrygold unsalted butter for this)
- 0.75 cup oats
- 1 cup flour
- 1 cup brown sugar (packed firmly for a better crumble texture)
- 0.5 tsp salt
- 0.75 tsp cinnamon
Step 1: Prepare the Oven and Rhubarb Filling
- 4 cups rhubarb
- 1.25 cups sugar
- 0.4 cup flour
- 0.75 tsp cinnamon
- 0.25 tsp ground nutmeg
Preheat your oven to 375°F.
While it heats, prepare the rhubarb filling by combining the sliced rhubarb, sugar, flour, cinnamon, and nutmeg in a 9×13 inch baking dish (or similar size).
Toss everything together until the rhubarb is evenly coated—the flour will help thicken the juices as the fruit bakes.
I like to let this sit for a minute so the sugar starts to dissolve into the rhubarb.
Step 2: Make the Crispy Oat Topping
- 0.75 cup butter
- 0.75 cup oats
- 1 cup flour
- 1 cup brown sugar
- 0.5 tsp salt
- 0.75 tsp cinnamon
In a separate bowl, combine the butter (cut into small cubes), oats, flour, brown sugar, salt, and cinnamon.
Using a fork or your fingertips, work the cold butter into the dry ingredients until the mixture resembles coarse breadcrumbs with some pea-sized pieces of butter still visible.
Don’t overmix—these little butter pockets create the crispy texture we’re after.
I find using cold butter straight from the fridge makes this step much easier and gives a better crumble.
Step 3: Assemble and Bake
- rhubarb filling from Step 1
- oat topping mixture from Step 2
Evenly distribute the oat topping mixture from Step 2 over the rhubarb filling, breaking up any large clumps as you go but keeping some texture.
Don’t pack it down—let it stay loose so air can circulate and create those crispy bits.
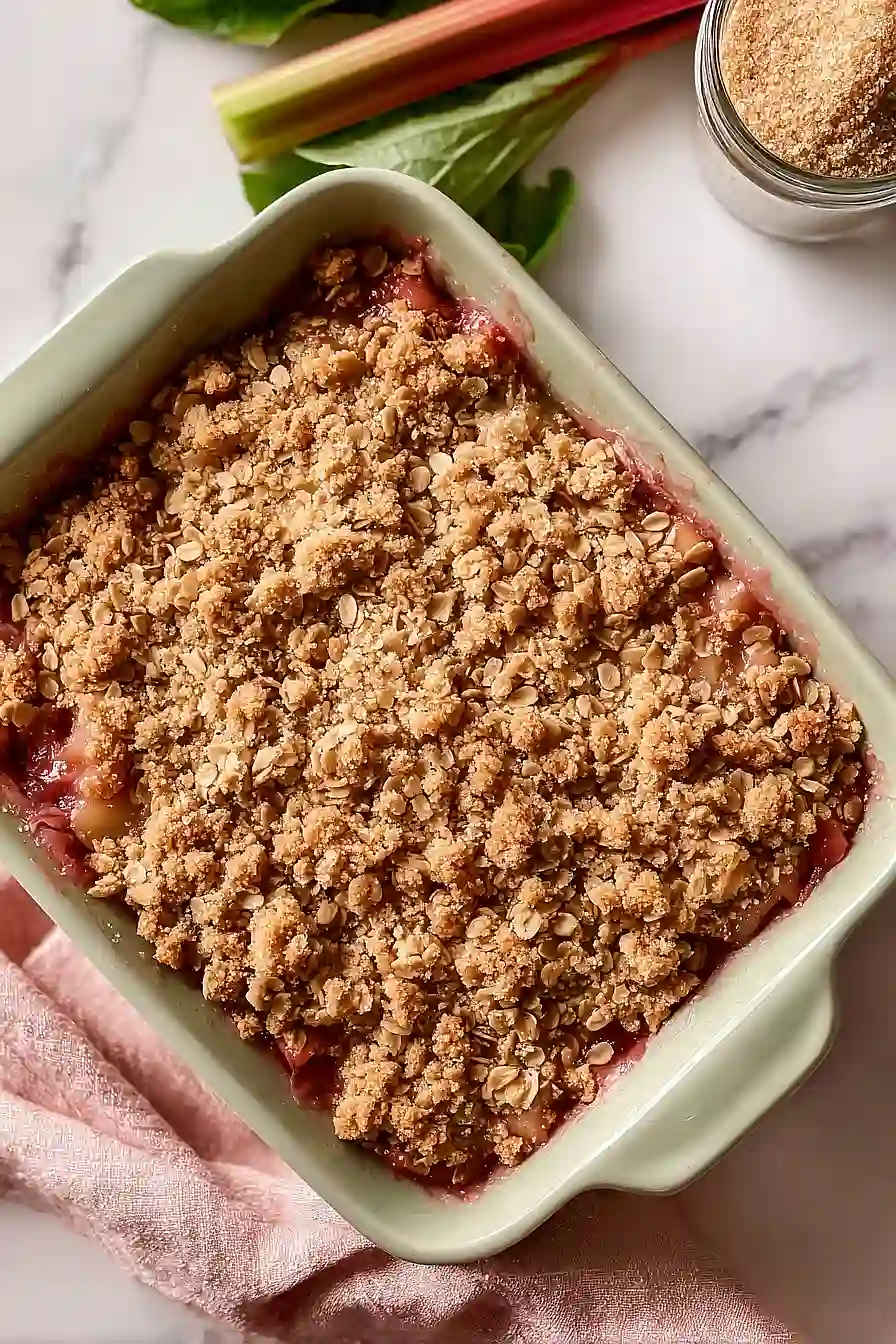
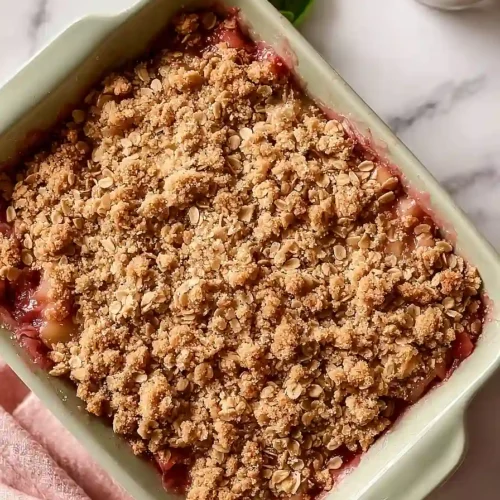
Bake in your preheated 375°F oven for 30-35 minutes, until the topping is golden brown and the rhubarb filling is bubbling at the edges.
The crisp is done when you can see the juices coming up around the sides of the topping.
Step 4: Cool and Serve
Remove the crisp from the oven and let it cool for at least 10-15 minutes before serving.
This allows the filling to set slightly so it won’t be runny, and it gives the topping time to crisp up further as it cools.
Serve warm with vanilla ice cream or whipped cream if desired.
Best Old Fashioned Rhubarb Crisp
Ingredients
For the filling::
- 4 cups rhubarb (sliced into 1/2-inch thick pieces)
- 1.25 cups sugar
- 0.4 cup flour (I always use King Arthur all-purpose flour)
- 0.75 tsp cinnamon
- 0.25 tsp ground nutmeg
For the topping::
- 0.75 cup butter (I like Kerrygold unsalted butter for this)
- 0.75 cup oats
- 1 cup flour
- 1 cup brown sugar (packed firmly for a better crumble texture)
- 0.5 tsp salt
- 0.75 tsp cinnamon
Instructions
- Preheat your oven to 375°F. While it heats, prepare the rhubarb filling by combining the sliced rhubarb, sugar, flour, cinnamon, and nutmeg in a 9x13 inch baking dish (or similar size). Toss everything together until the rhubarb is evenly coated—the flour will help thicken the juices as the fruit bakes. I like to let this sit for a minute so the sugar starts to dissolve into the rhubarb.
- In a separate bowl, combine the butter (cut into small cubes), oats, flour, brown sugar, salt, and cinnamon. Using a fork or your fingertips, work the cold butter into the dry ingredients until the mixture resembles coarse breadcrumbs with some pea-sized pieces of butter still visible. Don't overmix—these little butter pockets create the crispy texture we're after. I find using cold butter straight from the fridge makes this step much easier and gives a better crumble.
- Evenly distribute the oat topping mixture from Step 2 over the rhubarb filling, breaking up any large clumps as you go but keeping some texture. Don't pack it down—let it stay loose so air can circulate and create those crispy bits. Bake in your preheated 375°F oven for 30-35 minutes, until the topping is golden brown and the rhubarb filling is bubbling at the edges. The crisp is done when you can see the juices coming up around the sides of the topping.
- Remove the crisp from the oven and let it cool for at least 10-15 minutes before serving. This allows the filling to set slightly so it won't be runny, and it gives the topping time to crisp up further as it cools. Serve warm with vanilla ice cream or whipped cream if desired.
