Finding a good dairy-free hot cross bun recipe that actually tastes like the real thing can feel nearly impossible. Most store-bought versions are either loaded with dairy or taste like cardboard, and if you’re avoiding dairy for dietary reasons or allergies, you shouldn’t have to miss out on this Easter tradition.
These dairy-free hot cross buns solve that problem completely. They’re soft, fragrant with warm spices, and packed with raisins and currants just like traditional hot cross buns should be. Plus, with options to use rapid-rise yeast, you can have fresh buns on your table faster than you’d think.
Why You’ll Love These Hot Cross Buns
- Dairy-free friendly – These buns work perfectly for anyone avoiding dairy, so you don’t have to miss out on this Easter tradition.
- Aromatic spices and citrus – The combination of cinnamon, nutmeg, orange zest, and lemon zest fills your kitchen with the most amazing smell while they bake.
- Soft, fluffy texture – These buns turn out pillowy soft with a slightly sweet flavor that makes them perfect for breakfast or an afternoon snack.
- Traditional Easter treat – There’s something special about making hot cross buns from scratch, and this recipe brings that bakery-quality result right to your home.
What Kind of Flour Should I Use?
For hot cross buns, all-purpose flour is your best bet and what most bakers reach for when making these traditional treats. Bread flour can also work if that’s what you have on hand, though it will give you a slightly chewier texture due to the higher protein content. If you’re looking for a dairy-free option that’s also gluten-free, you can try a 1:1 gluten-free baking flour blend, but keep in mind the texture will be a bit different from traditional buns. Whatever flour you choose, make sure to measure it properly by spooning it into your measuring cup and leveling it off rather than scooping directly from the bag, which can pack in too much flour and make your buns dense.
Options for Substitutions
This recipe is pretty adaptable, so here are some swaps you can make based on what you have:
- Milk: Since these are dairy-free buns, use your favorite plant-based milk like almond, oat, soy, or coconut milk. They all work well in this recipe.
- Oil: Any neutral oil works here – vegetable, canola, or even melted coconut oil. You could also use melted vegan butter if you prefer.
- Raisins and currants: Not a fan of raisins? Try dried cranberries, chopped dried apricots, or even chocolate chips for a twist. You can also use all raisins or all currants if that’s what you have on hand.
- Orange and lemon zest: If you only have one citrus fruit available, just double up on whichever zest you have. Or skip the zest and add 1/2 teaspoon of orange or lemon extract instead.
- Maple syrup: Honey, agave nectar, or even a simple sugar syrup (equal parts sugar and water heated until dissolved) will give you that nice glaze.
- Yeast: Don’t substitute the yeast – it’s essential for these buns to rise properly and get that soft, fluffy texture.
Watch Out for These Mistakes While Baking
The biggest mistake when making hot cross buns is adding too much flour during kneading, which creates dry, dense buns instead of soft, pillowy ones – the dough should feel slightly sticky to the touch, so resist the urge to keep adding flour.
Another common error is skipping the proofing time or rushing it, as yeast needs the full hour (and then 30 minutes for the second rise) to develop properly and give you that light, airy texture.
Make sure your liquids are warm but not hot when you add them to the yeast – anything above 110°F can kill the yeast and leave you with buns that won’t rise at all.
Finally, wait until the buns are completely cool before piping on the icing crosses, otherwise the icing will melt and run off, leaving you with a messy glaze instead of those classic white crosses.
What to Serve With Hot Cross Buns?
Hot cross buns are perfect for Easter breakfast or brunch, and they’re honestly delicious enough to eat on their own with a pat of dairy-free butter melting on top. I love serving them alongside a fresh fruit salad with berries and citrus to complement the orange and lemon zest in the buns. They also pair really well with scrambled eggs and some crispy bacon or sausage if you’re making a full breakfast spread. For a cozy afternoon treat, enjoy them with a hot cup of tea or coffee – the spices in the buns taste amazing with a strong English breakfast tea.
Storage Instructions
Store: Keep your hot cross buns fresh in an airtight container or bread bag at room temperature for up to 3 days. They’re best enjoyed within the first day or two when they’re still soft and pillowy, but they’ll still taste great after that.
Freeze: These buns freeze really well for longer storage. Let them cool completely, then wrap each one individually in plastic wrap and place them in a freezer bag for up to 3 months. You can freeze them with or without the icing on top.
Refresh: To bring your buns back to life, thaw them at room temperature for about an hour if frozen. Then warm them in a 300°F oven for 5-7 minutes or pop them in the microwave for 15-20 seconds. A quick toast with some dairy-free butter makes them taste freshly baked!
| Preparation Time | 45-60 minutes |
| Cooking Time | 20-25 minutes |
| Total Time | 180-210 minutes |
| Level of Difficulty | Medium |
| Servings | 12 pieces |
Estimated Nutrition
Estimated nutrition for the whole recipe (without optional ingredients):
- Calories: 2900-3200
- Protein: 45-52 g
- Fat: 70-80 g
- Carbohydrates: 540-580 g
Ingredients
For the dough:
- 2 1/4 tsp yeast (I use Fleischmann’s RapidRise for a faster lift)
- 1/2 cup sugar
- 1 tsp sugar
- 1/2 cup water (warm to about 110°F to activate yeast)
- 3/4 cup milk
- 1/3 cup oil
- 3/4 tsp salt
- 2 tsp cinnamon
- 1/2 tsp nutmeg (freshly grated provides a much stronger aroma)
- 1/4 tsp ground cardamom
- 1 tbsp orange zest
- 1 tbsp lemon zest
- 4 1/4 cups flour (I always use King Arthur all-purpose flour)
- 1/2 cup raisins
- 1/4 cup currants
For the glaze:
- 2 tbsp milk
- 1 tbsp maple syrup (adds a beautiful shine and subtle woodsy sweetness)
For the icing:
- 1/2 cup powdered sugar (sifted to remove lumps for a smooth cross)
- 1/4 tsp vanilla essence
- 3 tsp milk
Step 1: Activate the Yeast and Build the Dough Base
- 2 1/4 tsp yeast
- 1 tsp sugar
- 1/2 cup water
- 1/2 cup sugar
- 3/4 tsp salt
- 2 tsp cinnamon
- 1/2 tsp nutmeg
- 1/4 tsp ground cardamom
- 1 tbsp orange zest
- 1 tbsp lemon zest
- 3/4 cup milk
- 1/3 cup oil
- 1 cup flour
In a small bowl, combine the yeast, 1 tsp sugar, and warm water (around 110°F).
Let this mixture sit for 5 minutes until it becomes foamy—this confirms your yeast is active and alive.
In a large mixing bowl (or the bowl of a stand mixer), combine the 1/2 cup sugar, salt, cinnamon, nutmeg, cardamom, orange zest, and lemon zest.
Pour in the foamy yeast mixture, then add the dairy-free milk and oil.
Stir to combine, then add 1 cup of flour and mix until you have a wet, shaggy dough base.
I like to let this mixture rest for a few minutes—it helps hydrate the flour and makes the next kneading phase smoother.
Step 2: Knead the Dough to Proper Texture
- 2 cups flour
- additional flour as needed
- 1/2 cup raisins
- 1/4 cup currants
Add 2 cups of flour to the wet mixture and begin kneading with a stand mixer on medium speed (or by hand on a lightly floured surface).
Knead for about 2 minutes, then assess the dough’s texture—it should be slightly sticky but manageable.
If it’s too sticky, add flour 1/2 cup at a time, mixing between additions until you reach a soft, cohesive dough that holds together without being dense.
Continue kneading for 4 minutes total until the dough becomes smooth and elastic.
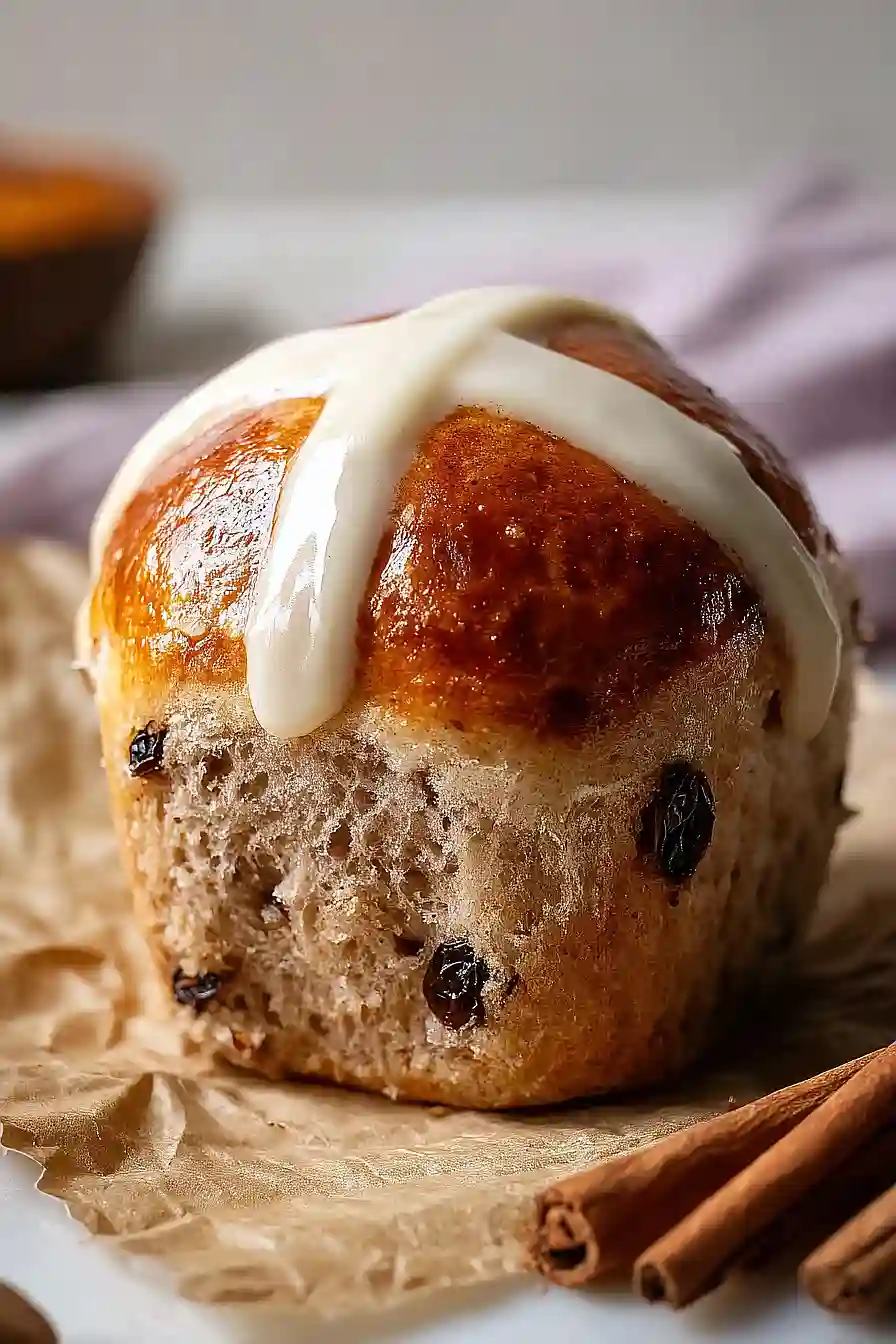
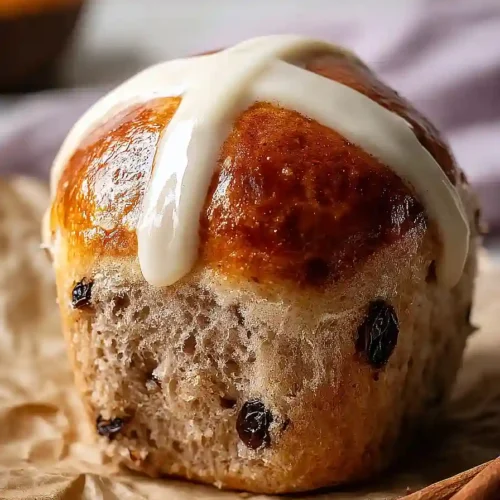
In the final minute of kneading, add the raisins and currants, distributing them evenly throughout the dough.
Step 3: First Rise and Bulk Fermentation
- dough from Step 2
Transfer the kneaded dough from Step 2 to a lightly oiled bowl, turning it once to coat all sides.
Cover the bowl loosely with a clean kitchen towel or plastic wrap and let it rest at room temperature for 1 hour, until the dough roughly doubles in size.
You’ll know it’s ready when a gentle poke leaves a slight indentation that slowly springs back.
Step 4: Shape the Buns and Prepare for Second Rise
- dough from Step 3
While the dough is rising, line a baking pan (approximately 9×13 inches) with parchment paper.
Once the first rise is complete, punch down the dough from Step 3 and knead briefly on a lightly floured surface for about 30 seconds to release excess gas.
Divide the dough into 12 equal pieces (I like to divide it in half, then each half into 6 pieces for even sizing).
Roll each piece into a smooth ball by gently tucking the edges underneath, creating surface tension.
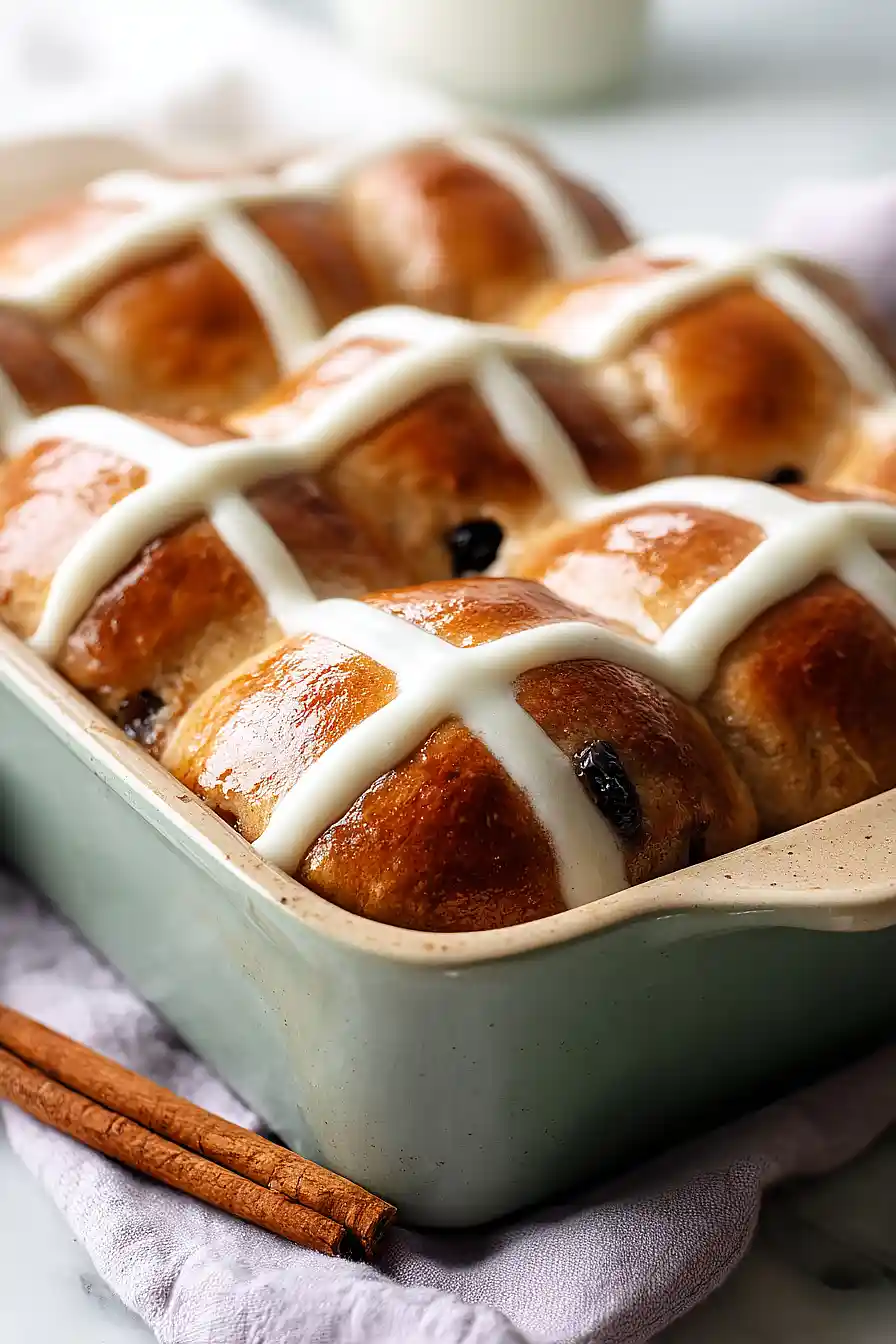
Arrange the 12 buns in the prepared pan in a 3×4 grid pattern, spacing them close enough to just barely touch—this helps them rise together while baking.
Step 5: Second Rise and Oven Preparation
- 2 tbsp milk
- 1 tbsp maple syrup
Cover the pan of buns loosely with a towel and let them rise for 30 minutes at room temperature until they’ve puffed up and are touching each other.
About 10 minutes before they finish rising, preheat your oven to 375°F.
In a small bowl, whisk together the 2 tbsp milk and maple syrup until well combined—the maple syrup adds a beautiful shine and subtle depth to the buns.
Step 6: Bake and Cool the Buns
- milk and maple syrup mixture from Step 5
Brush the milk and maple syrup mixture from Step 5 evenly over the top of each bun, giving them a gentle sheen.
Bake at 375°F for 20 minutes until the buns are golden brown.
Remove from the oven and let the buns cool in the pan for 5 minutes, then transfer them to a wire rack to cool completely before glazing (this takes about 15-20 minutes).
Cooling them completely is important—if you add icing to warm buns, it will melt and won’t set properly.
Step 7: Prepare the Icing and Pipe the Crosses
- 1/2 cup powdered sugar
- 1/4 tsp vanilla essence
- 3 tsp milk
In a small bowl, sift the powdered sugar to remove any lumps, then whisk in the vanilla essence and 3 tsp milk until you have a thick, pipeable icing—it should flow slowly but hold its shape.
Transfer the icing to a piping bag fitted with a small round tip (or use a squeeze bottle for easier application).
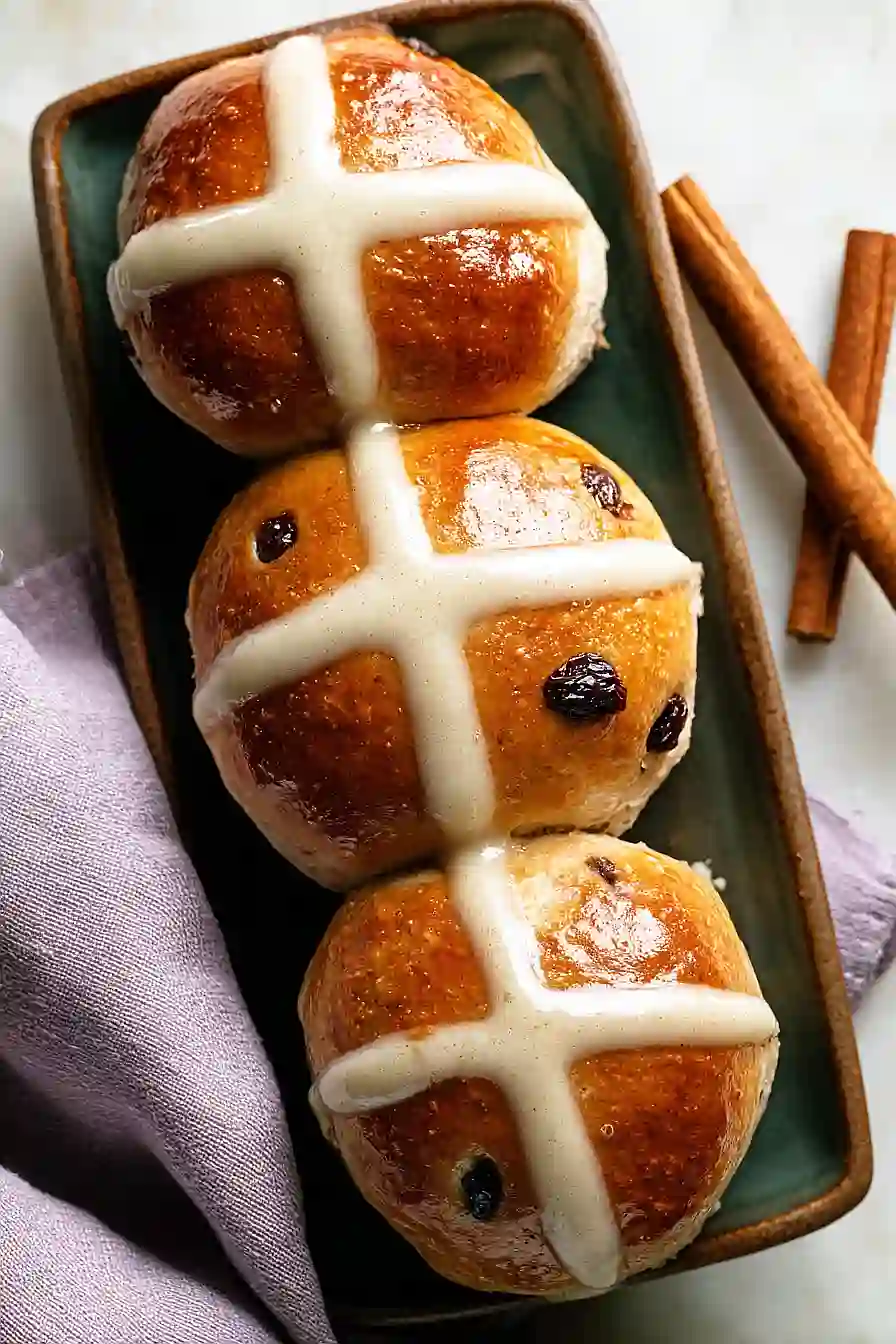
Pipe a cross on top of each cooled bun from Step 6 in two perpendicular lines, letting the icing set for a few minutes before serving.
Best Dairy Free Hot Cross Buns
Ingredients
For the dough
- 2 1/4 tsp yeast (I use Fleischmann's RapidRise for a faster lift)
- 1/2 cup sugar
- 1 tsp sugar
- 1/2 cup water (warm to about 110°F to activate yeast)
- 3/4 cup milk
- 1/3 cup oil
- 3/4 tsp salt
- 2 tsp cinnamon
- 1/2 tsp nutmeg (freshly grated provides a much stronger aroma)
- 1/4 tsp ground cardamom
- 1 tbsp orange zest
- 1 tbsp lemon zest
- 4 1/4 cups flour (I always use King Arthur all-purpose flour)
- 1/2 cup raisins
- 1/4 cup currants
For the glaze
- 2 tbsp milk
- 1 tbsp maple syrup (adds a beautiful shine and subtle woodsy sweetness)
For the icing
- 1/2 cup powdered sugar (sifted to remove lumps for a smooth cross)
- 1/4 tsp vanilla essence
- 3 tsp milk
Instructions
- In a small bowl, combine the yeast, 1 tsp sugar, and warm water (around 110°F). Let this mixture sit for 5 minutes until it becomes foamy—this confirms your yeast is active and alive. In a large mixing bowl (or the bowl of a stand mixer), combine the 1/2 cup sugar, salt, cinnamon, nutmeg, cardamom, orange zest, and lemon zest. Pour in the foamy yeast mixture, then add the dairy-free milk and oil. Stir to combine, then add 1 cup of flour and mix until you have a wet, shaggy dough base. I like to let this mixture rest for a few minutes—it helps hydrate the flour and makes the next kneading phase smoother.
- Add 2 cups of flour to the wet mixture and begin kneading with a stand mixer on medium speed (or by hand on a lightly floured surface). Knead for about 2 minutes, then assess the dough's texture—it should be slightly sticky but manageable. If it's too sticky, add flour 1/2 cup at a time, mixing between additions until you reach a soft, cohesive dough that holds together without being dense. Continue kneading for 4 minutes total until the dough becomes smooth and elastic. In the final minute of kneading, add the raisins and currants, distributing them evenly throughout the dough.
- Transfer the kneaded dough from Step 2 to a lightly oiled bowl, turning it once to coat all sides. Cover the bowl loosely with a clean kitchen towel or plastic wrap and let it rest at room temperature for 1 hour, until the dough roughly doubles in size. You'll know it's ready when a gentle poke leaves a slight indentation that slowly springs back.
- While the dough is rising, line a baking pan (approximately 9x13 inches) with parchment paper. Once the first rise is complete, punch down the dough from Step 3 and knead briefly on a lightly floured surface for about 30 seconds to release excess gas. Divide the dough into 12 equal pieces (I like to divide it in half, then each half into 6 pieces for even sizing). Roll each piece into a smooth ball by gently tucking the edges underneath, creating surface tension. Arrange the 12 buns in the prepared pan in a 3x4 grid pattern, spacing them close enough to just barely touch—this helps them rise together while baking.
- Cover the pan of buns loosely with a towel and let them rise for 30 minutes at room temperature until they've puffed up and are touching each other. About 10 minutes before they finish rising, preheat your oven to 375°F. In a small bowl, whisk together the 2 tbsp milk and maple syrup until well combined—the maple syrup adds a beautiful shine and subtle depth to the buns.
- Brush the milk and maple syrup mixture from Step 5 evenly over the top of each bun, giving them a gentle sheen. Bake at 375°F for 20 minutes until the buns are golden brown. Remove from the oven and let the buns cool in the pan for 5 minutes, then transfer them to a wire rack to cool completely before glazing (this takes about 15-20 minutes). Cooling them completely is important—if you add icing to warm buns, it will melt and won't set properly.
- In a small bowl, sift the powdered sugar to remove any lumps, then whisk in the vanilla essence and 3 tsp milk until you have a thick, pipeable icing—it should flow slowly but hold its shape. Transfer the icing to a piping bag fitted with a small round tip (or use a squeeze bottle for easier application). Pipe a cross on top of each cooled bun from Step 6 in two perpendicular lines, letting the icing set for a few minutes before serving.
