I’ve always loved finding new ways to make lunch more exciting. While salads are great, sometimes you need something you can really grab and go with. That’s exactly why these air fryer chicken caesar salad wraps have become a regular in my weekly lineup. They’re perfect for those busy days when I want something that feels fresh but fills me up too.
What I really like about these wraps is how simple they are to put together. The air fryer does the heavy lifting with the chicken, and while that’s cooking, I can prep everything else. No complicated steps or fancy ingredients needed – just good food that works for lunch at home or packing for the office.
The best part? You can prep most of the ingredients ahead of time, so when hunger hits, you’re just minutes away from a satisfying meal. If you’re tired of the same old sandwich routine, these wraps might be exactly what you’re looking for.
Why You’ll Love These Chicken Caesar Wraps
- Quick and convenient – Using your air fryer means perfectly cooked chicken in just minutes, making these wraps an ideal choice for busy weeknight dinners.
- Healthier alternative – Air frying uses minimal oil compared to traditional frying, while still giving you that satisfying crispy chicken texture you crave.
- Easy customization – You can adjust the seasonings, swap spinach for romaine, or add extra veggies to make these wraps exactly how you like them.
- Meal prep friendly – You can cook the chicken ahead of time and assemble the wraps when needed, perfect for lunch boxes or quick dinners.
What Kind of Chicken Should I Use?
For these air fryer wraps, boneless chicken breasts or thighs both work great, though chicken breasts tend to be the more popular choice since they’re leaner and cook evenly. If you’re using chicken breasts, try to pick ones that are similar in size so they’ll cook at the same rate in your air fryer. While you can use pre-cut chicken strips, I recommend starting with whole pieces and cutting them yourself – this helps ensure the chicken stays juicy and doesn’t dry out during cooking. Just make sure your chicken pieces are about the same thickness (around 1/2 inch) so they cook evenly and don’t get tough in some spots while staying raw in others.
Options for Substitutions
This wrap recipe is super adaptable and you can make several easy swaps based on what you have in your kitchen:
- Tortillas: Regular flour tortillas work great, but feel free to use whole wheat, spinach, or even low-carb tortillas. Just make sure they’re large enough to wrap your filling. You could also use lavash bread or large lettuce leaves for a low-carb option.
- Caesar dressing: While caesar dressing gives these wraps their signature flavor, you can swap it with ranch, greek yogurt-based dressing, or even a creamy avocado dressing. Each will give you a different but tasty result.
- Fresh spinach: Not a fan of spinach? Regular romaine lettuce works perfectly (it is a caesar wrap after all!), or try mixed greens, arugula, or even shredded iceberg lettuce.
- Vegetable oil: Any neutral cooking oil works here – try canola, avocado, or even olive oil. Just avoid oils with strong flavors like sesame oil.
- Seasonings: The spice mix is flexible – if you’re missing one, don’t worry! Italian seasoning can replace the basil and parsley, and onion powder works in place of garlic powder. The paprika adds nice color, but you can skip it if needed.
Watch Out for These Mistakes While Cooking
The biggest mistake when making air fryer chicken wraps is overcrowding the air fryer basket – instead, cook the chicken pieces in a single layer with space between them to ensure even cooking and crispy results. Another common error is not patting the chicken dry before seasoning, which can prevent the spices from sticking properly and lead to less flavorful meat – take a minute to thoroughly dry the chicken with paper towels first. To prevent soggy wraps, avoid adding too much dressing at once and consider laying a bed of spinach first to create a barrier between the tortilla and the chicken. For the best texture, let the cooked chicken rest for 5 minutes before slicing, and warm your tortillas slightly to make them more pliable and less likely to tear when wrapping.
What to Serve With Chicken Caesar Wraps?
These chicken caesar wraps make a fantastic lunch or light dinner, and there are lots of tasty sides that go perfectly with them! A handful of crispy potato chips or some sweet potato fries add a nice crunch that complements the creamy wrap filling. If you’re keeping things on the lighter side, try a fresh fruit salad with berries and melon, or some crunchy raw veggies with ranch dip. For a more filling meal, a cup of tomato soup or a small bowl of minestrone makes these wraps feel extra special and complete.
Storage Instructions
Keep Fresh: If you’ve made extra chicken for these wraps, you can keep it in an airtight container in the fridge for up to 3 days. For the best results, store the cooked chicken, fresh spinach, and dressing separately – this prevents the wraps from getting soggy and keeps the spinach crisp.
Prep Ahead: These wraps are perfect for meal prep! Cook the chicken ahead of time and slice it up. When you’re ready to eat, just warm up the chicken (if you want), assemble your wrap with fresh spinach and dressing, and you’re good to go. The seasoned chicken actually tastes even better the next day after the flavors have had time to develop.
Pack for Lunch: Taking these wraps to work or school? Pack the ingredients separately in small containers and assemble your wrap at lunchtime. This way, your tortilla stays fresh and your spinach remains crispy. If you’re bringing a pre-made wrap, try wrapping it in foil or parchment paper to keep it together.
| Preparation Time | 15-30 minutes |
| Cooking Time | 20-25 minutes |
| Total Time | 35-55 minutes |
| Level of Difficulty | Easy |
Estimated Nutrition
Estimated nutrition for the whole recipe (without optional ingredients):
- Calories: 1500-1700
- Protein: 90-100 g
- Fat: 90-100 g
- Carbohydrates: 80-90 g
Ingredients
- 4 large flour tortillas
- 1 cup creamy caesar salad dressing
- 4 to 6 boneless chicken pieces
- 2 cups baby spinach leaves
- 2 to 3 tbsp vegetable oil
- 2 tbsp smoked paprika
- 2 tbsp garlic powder
- 2 tsp dried basil
- 1 tbsp dried parsley flakes
- Salt and black pepper, to taste
Step 1: Prepare the Chicken and Marinade
- 4 to 6 boneless chicken pieces
- 2 to 3 tbsp vegetable oil
- 2 tbsp smoked paprika
- 2 tbsp garlic powder
- 2 tsp dried basil
- 1 tbsp dried parsley flakes
- salt and black pepper, to taste
Lay the chicken pieces out on a paper towel and pat them dry.
In a medium bowl, combine the vegetable oil, smoked paprika, garlic powder, dried basil, dried parsley flakes, and a generous pinch of salt and black pepper.
Mix well to form a marinade.
Add the chicken pieces to the bowl, tossing thoroughly to coat each piece completely in the spice mixture.
Let the chicken marinate in the refrigerator for 10-20 minutes to absorb the flavors.
Step 2: Air Fry the Chicken
- marinated chicken from Step 1
Preheat your air fryer to 375°F (190°C).
Arrange the marinated chicken from Step 1 in the air fryer basket in a single layer, making sure not to overcrowd the basket.
Cook the chicken for 20 minutes, turning them every 5-10 minutes to ensure even crisping.
If you like the chicken extra crispy, air fry for a couple of additional minutes as needed.
I like to check the chicken’s doneness by making sure the juices run clear—it helps keep them juicy without overcooking.
Step 3: Prepare the Tortillas and Spinach
- 4 large flour tortillas
- 1 cup creamy caesar salad dressing
- 2 cups baby spinach leaves
While the chicken is cooking, wash and dry the baby spinach leaves thoroughly.
Lay out the flour tortillas on a clean surface.
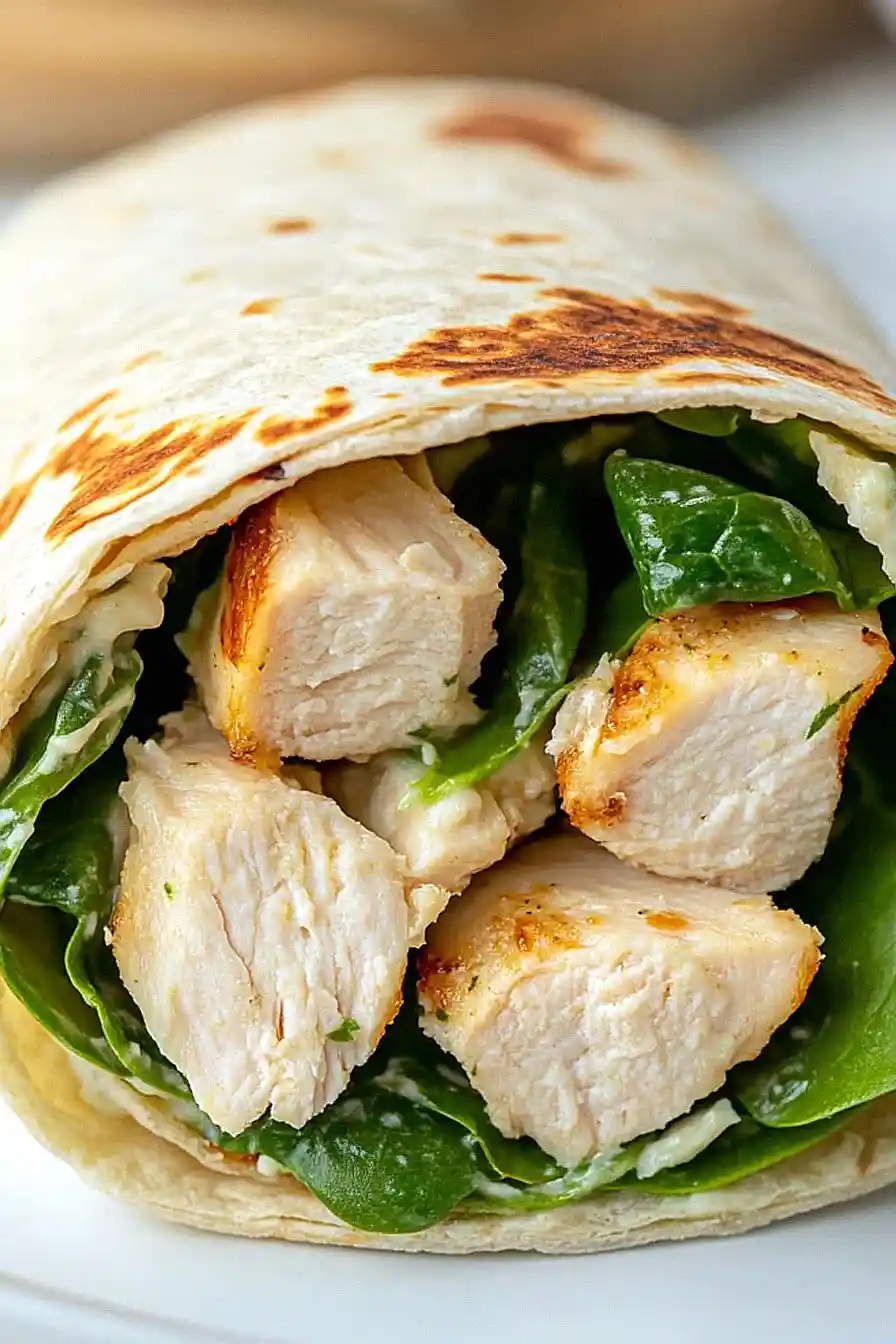
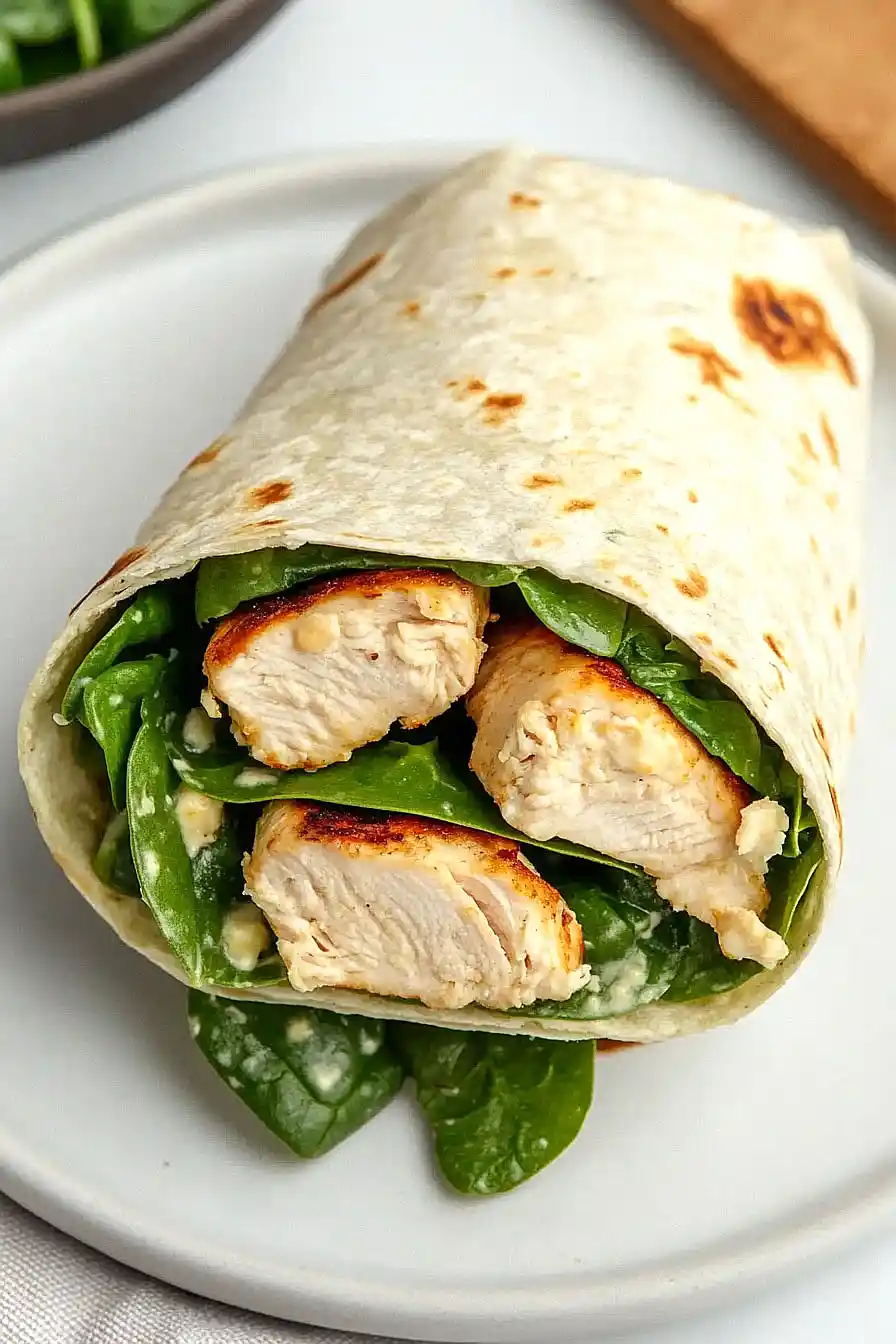
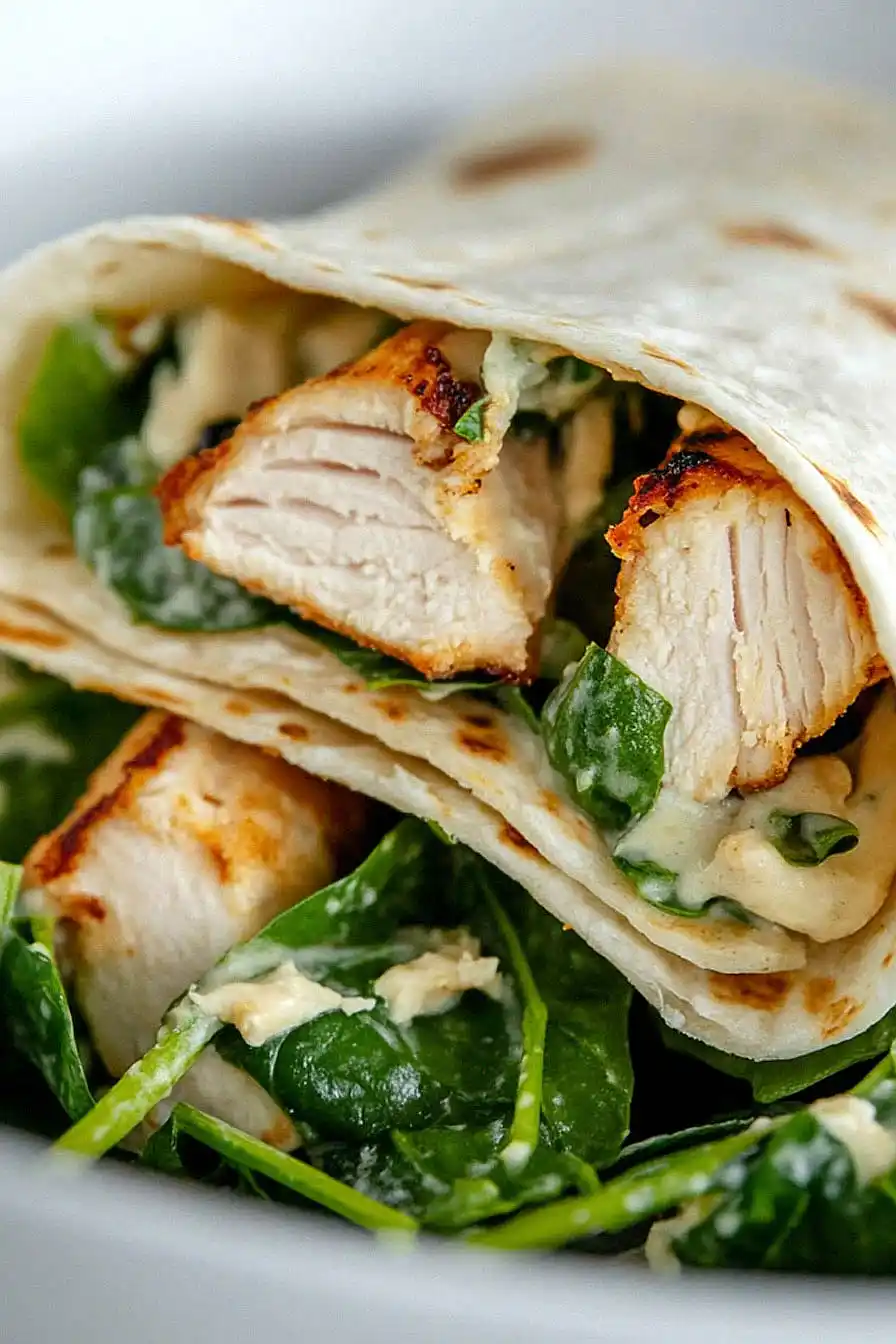
Spread an even layer of creamy caesar salad dressing across each tortilla, then arrange the cleaned baby spinach leaves evenly over the dressing to create a flavorful and fresh base for the wraps.
Step 4: Assemble the Wraps
- cooked chicken from Step 2
- prepared tortillas with dressing and spinach from Step 3
Once the chicken is fully cooked and crispy, cut the chicken into small bite-sized pieces.
Place an even portion of the chicken in the center of each prepared tortilla with dressing and spinach (from Step 3).
Fold and roll each tortilla tightly to close the wraps.
Step 5: Crisp the Wraps and Serve
Place the assembled wraps back into the air fryer for 1-2 minutes to crisp up the tortillas and warm everything through.
Serve the wraps warm for the best texture and flavor.
For even more flavor, I sometimes add a bit of extra caesar dressing inside before closing the wrap.
