If you ask me, dill pickle kraut is pure comfort food magic.
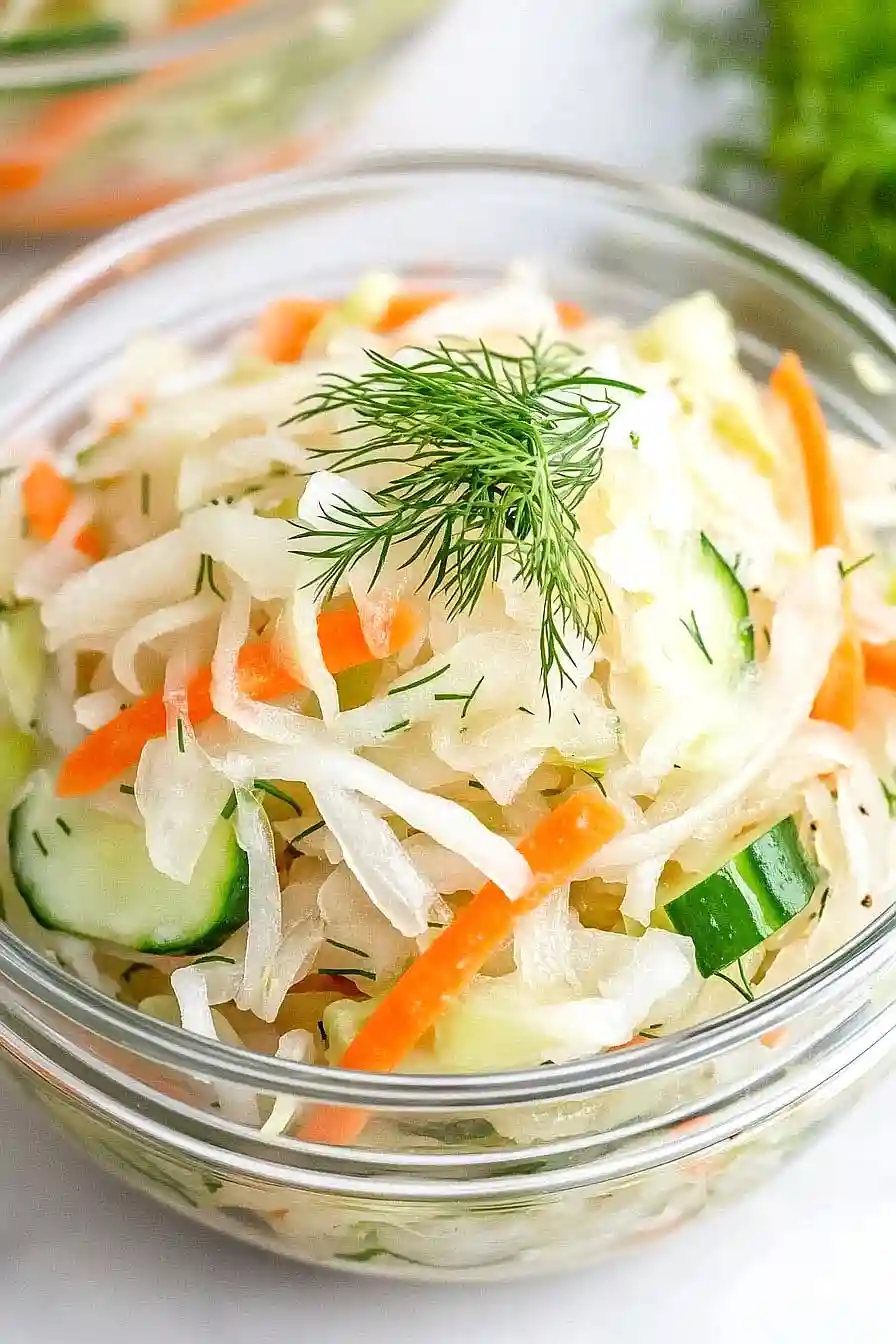
This tangy fermented side dish brings together the best of two worlds – traditional sauerkraut and that addictive dill pickle flavor we all crave. Crisp cabbage gets the pickle treatment with garlic, dill, and that signature sour punch.
It ferments on your counter for just a few days, developing those gut-friendly probiotics while filling your kitchen with an amazing aroma. The result is something that’s part pickle, part kraut, and completely irresistible.
It’s the perfect condiment for sandwiches, burgers, or straight from the jar when no one’s looking.

Why You’ll Love This Dill Pickle Kraut
- Just two ingredients – You only need a fermented vegetable kit and quality sea salt to create this tangy, probiotic-rich condiment at home.
- Gut-healthy probiotics – Fermented foods like this kraut are packed with beneficial bacteria that support digestive health and overall wellness.
- Set-it-and-forget-it process – Once you mix everything together, the fermentation happens naturally over 7-14 days with minimal effort from you.
- Fresh, tangy flavor – The dill pickle taste is bright and zesty, making it a perfect topping for sandwiches, burgers, or eating straight from the jar.
- Cost-effective – Making your own fermented vegetables costs a fraction of what you’d pay for store-bought versions, and you control exactly what goes into it.
What Kind of Salt Should I Use?
For fermenting your dill pickle kraut, the type of salt you choose really matters for a successful fermentation. You’ll want to stick with pure, unrefined salts like the grey Celtic sea salt mentioned in this recipe, or other options like Himalayan pink salt or kosher salt. The key is avoiding regular table salt, which contains iodine and anti-caking agents that can actually interfere with the fermentation process and prevent your good bacteria from doing their job. Grey Celtic sea salt is a great choice because it’s mineral-rich and completely natural, which helps create the perfect environment for your kraut to develop that tangy, fermented flavor you’re after.

Options for Substitutions
This simple fermented recipe has room for a few tweaks, though some ingredients are pretty important:
- Grey Celtic sea salt: While grey Celtic sea salt is ideal for fermentation, you can use other high-quality sea salts or kosher salt. Just avoid table salt with iodine or anti-caking agents, as these can interfere with the fermentation process.
- Fermented vegetable kit: If you don’t have a kit, you can make this with fresh cabbage (about 2 pounds) and add your own dill and pickling spices. You’ll need about 1-2 tablespoons of dill seeds or fresh dill, plus pickling spices like mustard seeds, coriander, and peppercorns.
- Dill flavoring: For the dill component, fresh dill works great, but dried dill or dill seeds are fine substitutes. You can also experiment with other herbs like caraway seeds or fennel for a different flavor profile.
Watch Out for These Mistakes While Fermenting
The biggest mistake when making dill pickle kraut is using regular table salt instead of pure sea salt, as iodized salt can interfere with the fermentation process and create off-flavors in your kraut. Make sure your vegetables stay submerged under the brine at all times – any pieces floating above the surface can develop mold, so use a fermentation weight or clean stone to keep everything pressed down. Temperature control is crucial too, as fermenting in a spot that’s too warm (above 75°F) can cause your kraut to become mushy, while too cool (below 65°F) will slow fermentation to a crawl. Always taste your kraut after a few days and trust your senses – it should smell tangy and pleasant, not funky or off-putting, and if you see any fuzzy growth on top, it’s time to start over.
What to Serve With Dill Pickle Kraut?
This tangy, fermented kraut is perfect as a side dish for hearty meats like bratwurst, grilled sausages, or pulled pork sandwiches. The sour, briny flavor cuts through rich foods beautifully, so I love piling it on top of burgers or hot dogs for that extra zing. It also makes a great addition to a charcuterie board alongside some sharp cheeses and crusty bread. For a lighter option, try mixing it into grain bowls or serving it with roasted chicken – the probiotics and bold flavor really complement simple, wholesome meals.
Storage Instructions
Refrigerate: Once your dill pickle kraut is done fermenting, move it to the fridge where it’ll keep for months. The cold temperature slows down the fermentation process, so your kraut will stay at that perfect tangy flavor you worked so hard to achieve.
Keep Submerged: Always make sure your kraut stays under the brine liquid to prevent any unwanted mold from forming on top. If the liquid level gets low, you can add a bit of salt water to keep everything covered properly.
Serve: Use clean utensils every time you scoop out your kraut to keep it fresh longer. I love adding this tangy goodness to sandwiches, salads, or just eating it straight from the jar as a probiotic snack!
| Preparation Time | 15-20 minutes |
| Cooking Time | 0 minutes |
| Total Time | 7-14 days (fermentation time) |
| Level of Difficulty | Medium |
Estimated Nutrition
Estimated nutrition for the whole recipe (without optional ingredients):
- Calories: 0-0
- Protein: 0-0 g
- Fat: 0-0 g
- Carbohydrates: 0-0 g
Ingredients
- 1 fermented vegetable starter kit
- Grey celtic sea salt, as required
Step 1: Prepare the Cabbage
Place the sliced cabbage in a large mixing bowl.
This creates the base for your fermented vegetables and ensures the cabbage is ready to absorb the flavors from the salt and starter.
Step 2: Add Salt and Starter, Massage and Pound
- 1 fermented vegetable starter kit
- grey Celtic sea salt, as required
Add the fermented vegetable starter kit and enough grey Celtic sea salt to the cabbage in the bowl.
Mix thoroughly with clean hands, making sure to massage the salt and starter into the cabbage.
Use a Cabbage Crusher or potato masher to pound the mixture for about 5 minutes, which helps draw out the cabbage’s natural juices and initiates the fermentation process.
I like to massage the cabbage really well—it helps jumpstart the brine production and produces a softer sauerkraut.
Step 3: Pack the Cabbage into the Jar
Transfer the salted cabbage mixture into a clean glass jar, packing it down firmly to eliminate air pockets.
Make sure that the brine covers the vegetables by at least 1 inch.
If needed, add more brine (a simple mixture of water and a pinch of salt) to cover the cabbage completely.
Step 4: Cover and Ferment
Cover the jar with a tight-fitting lid, an airlock lid, or a coffee filter secured with a rubber band.
Allow the jar to ferment at room temperature (preferably between 60-70°F) until the sauerkraut develops your desired flavor and texture.
If using a tight lid, be sure to burp the jar daily to release any built-up pressure from the fermentation gases.
Step 5: Store the Finished Sauerkraut
Once fermentation is complete and you’re happy with the taste and texture, seal the jar with a tight lid and move it to cold storage, such as a refrigerator.
The sauerkraut’s flavor will continue to develop and improve as it ages.
For a deeper flavor, I like to let mine age for several weeks before digging in.
