Finding a crowd-pleasing appetizer that works for your keto lifestyle can feel like an impossible task. Between counting carbs, keeping everyone happy, and actually having time to prepare something, it’s easy to just skip the appetizer course altogether or reach for the same old cheese and crackers.
That’s where these keto deviled eggs come in handy: they’re naturally low-carb and high in protein, take less than 30 minutes from start to finish, and they’re always the first thing to disappear at any gathering. Plus, they’re easy to customize with whatever seasonings you already have in your pantry.
Why You’ll Love These Deviled Eggs
- Keto-friendly and low-carb – These deviled eggs are naturally high in protein and fat with almost zero carbs, making them perfect for anyone following a keto diet or watching their carb intake.
- Quick and easy – You can have these ready in about 30 minutes, making them a great option for last-minute gatherings or meal prep.
- Simple ingredients – You probably already have everything you need in your fridge and pantry—no special shopping trip required.
- Perfect for any occasion – Whether you’re bringing them to a potluck, serving them as an appetizer, or just enjoying them as a snack, these deviled eggs always hit the spot.
What Kind of Eggs Should I Use?
Any standard large eggs from your grocery store will work perfectly for deviled eggs, whether you go for conventional, cage-free, or organic. The main thing to consider is freshness – slightly older eggs (about a week old) are actually easier to peel after boiling than super fresh ones, so if you just bought eggs yesterday, you might want to wait a few days. If you’re looking to make your deviled eggs stand out, pasture-raised eggs tend to have richer, more golden yolks that make for a prettier presentation. Just make sure your eggs are stored properly in the fridge and aren’t past their expiration date.

Options for Substitutions
These deviled eggs are pretty straightforward, but here are some swaps you can make:
- Mayo: You can use Greek yogurt or sour cream instead of mayo for a tangier flavor. If you go with Greek yogurt, add an extra splash of vinegar to keep that creamy texture.
- Dijon mustard: Regular yellow mustard works fine here – just use the same amount. Whole grain mustard is another option if you want a bit more texture.
- Vinegar: White vinegar, apple cider vinegar, or even lemon juice will all give you that acidic kick you need. They’re pretty much interchangeable in this recipe.
- Garlic powder: Fresh minced garlic (about half a clove) can replace the powder, but make sure to mince it really fine so you don’t get chunks in your filling.
- Paprika: Smoked paprika adds a nice depth if you have it, or you can skip the paprika altogether and use cayenne pepper for some heat instead.
- Parsley: Chives, dill, or green onions make great substitutes for parsley. Fresh is always better, but dried herbs work too – just use about a third of the amount.
Watch Out for These Mistakes While Cooking
The biggest mistake people make with deviled eggs is overcooking them, which creates that ugly green ring around the yolk and a rubbery texture – stick to the 13-15 minute timing and immediately transfer the eggs to an ice bath to stop the cooking process.
Another common error is trying to peel eggs that are too fresh, so use eggs that are at least a week old for easier peeling, and gently crack them all over before peeling under cold running water.
To get a smooth, creamy filling instead of a lumpy one, mash the yolks thoroughly with a fork before adding the mayo, or use a food processor for an extra silky texture.
Finally, don’t skip chilling the filled eggs for at least 30 minutes before serving – this helps the filling set properly and makes them taste much better than serving them at room temperature.
What to Serve With Deviled Eggs?
Deviled eggs are perfect for parties and gatherings, so I like to serve them alongside other finger foods and appetizers that people can grab and go. They pair really well with a charcuterie board loaded with deli meats, cheeses, olives, and pickles, or you can set them out with veggie sticks and ranch dip for a lighter spread. If you’re making them for a cookout or picnic, they’re great next to grilled chicken wings, pulled pork sliders, or a simple coleslaw. Since these are keto-friendly, you can round out the meal with other low-carb options like bacon-wrapped jalapeños, cheese crisps, or a fresh cucumber salad.
Storage Instructions
Store: Keep your deviled eggs in an airtight container in the fridge for up to 3 days. I like to place them on a plate with a piece of plastic wrap pressed gently over the top so they don’t dry out. They’re perfect for making ahead when you’re prepping for a party or just want a quick snack ready to go.
Make Ahead: You can totally prep these in advance! Boil and peel the eggs up to 2 days ahead, then store them whole in the fridge. Mix up the filling the day before and keep it separate, then just pipe or spoon it into the egg whites about an hour before serving. This keeps everything fresh and prevents the whites from getting watery.
| Preparation Time | 15-20 minutes |
| Cooking Time | 15-20 minutes |
| Total Time | 30-40 minutes |
| Level of Difficulty | Easy |
| Servings | 12 halves |
Estimated Nutrition
Estimated nutrition for the whole recipe (without optional ingredients):
- Calories: 620-700
- Protein: 32-36 g
- Fat: 48-54 g
- Carbohydrates: 4-6 g
Ingredients
For the base:
- 6 eggs (I always use Eggland’s Best for the most vibrant yellow yolks)
For the filling:
- 1/3 cup mayo (I prefer Hellmann’s for the creamiest texture)
- 1 tsp vinegar
- 1.5 tsp dijon mustard (I use Grey Poupon to add a sophisticated tang)
- 1/8 tsp garlic powder
- 1/8 tsp onion powder
- salt
- pepper
For the garnish:
- 1/2 tsp paprika
- parsley (finely chopped, about 1/8-inch pieces for a professional look)
Step 1: Cook and Cool the Eggs
- 6 eggs
Place eggs in a pot and cover with cold water by about an inch.
Bring to a boil over high heat, then immediately remove from heat and cover the pot with a lid.
Let the eggs sit undisturbed for 13-15 minutes—this gentle carryover cooking creates perfectly set yolks without that green ring.
Transfer the eggs to an ice bath (a bowl with ice water) and let them cool for at least 5 minutes, which stops the cooking process and makes them easier to peel.
Step 2: Prepare the Yolk Filling
- 1/3 cup mayo
- 1 tsp vinegar
- 1.5 tsp dijon mustard
- 1/8 tsp garlic powder
- 1/8 tsp onion powder
- salt
- pepper
While the eggs cool, combine mayo, vinegar, Dijon mustard, garlic powder, and onion powder in a small bowl.
Whisk together until smooth and well-blended.
Taste and season with salt and pepper to your preference—I find a light hand with salt works best here since the yolks are already richly flavored.
This allows you to build the filling while the eggs finish cooling, keeping your workflow efficient.
Step 3: Halve the Eggs and Extract the Yolks
- cooked eggs from Step 1
Gently peel the cooled eggs under cool running water, starting from the wider end where the air pocket makes removal easier.
Pat them dry with a paper towel.
Carefully slice each egg in half lengthwise and use a small spoon to scoop out the yolks into a separate bowl, being gentle to keep the whites intact and the edges clean for a polished presentation.
Step 4: Combine Yolks with Filling Mixture
- yolks from Step 3
- yolk filling mixture from Step 2
Add the scooped yolks to the prepared filling from Step 2 and mash together with a fork until you reach your desired consistency—I prefer leaving it slightly chunky for texture, but you can make it as smooth as you like.
If the mixture seems too thick, add a touch more mayo, one teaspoon at a time.
Taste again and adjust seasonings if needed.
Step 5: Pipe and Garnish the Deviled Eggs
- egg whites from Step 3
- yolk mixture from Step 4
- 1/2 tsp paprika
- parsley
Transfer the yolk mixture to a piping bag fitted with a star tip or a small zip-top bag with the corner snipped off for easier filling.
Pipe the mixture generously into each egg white cavity, creating an attractive mound.
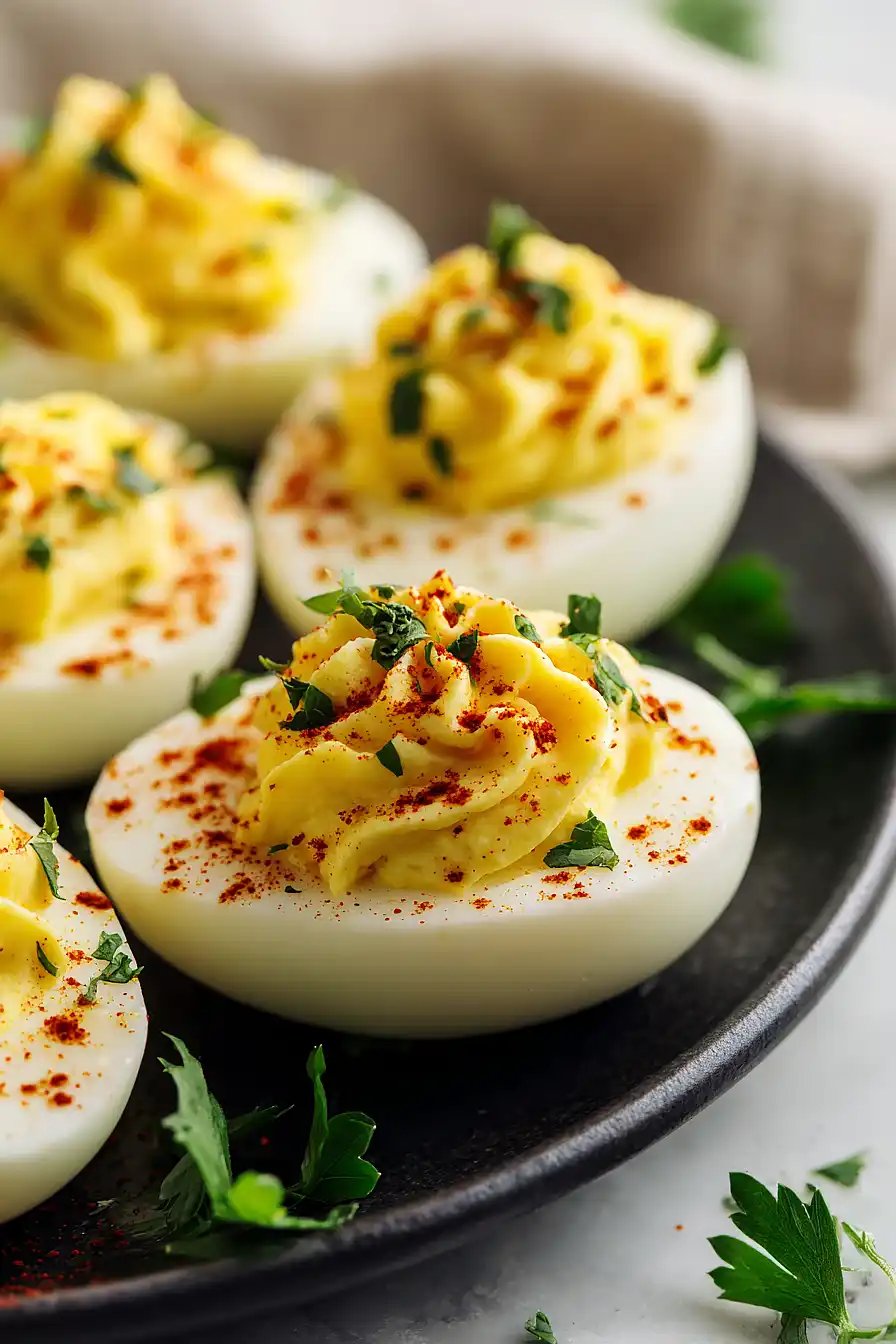
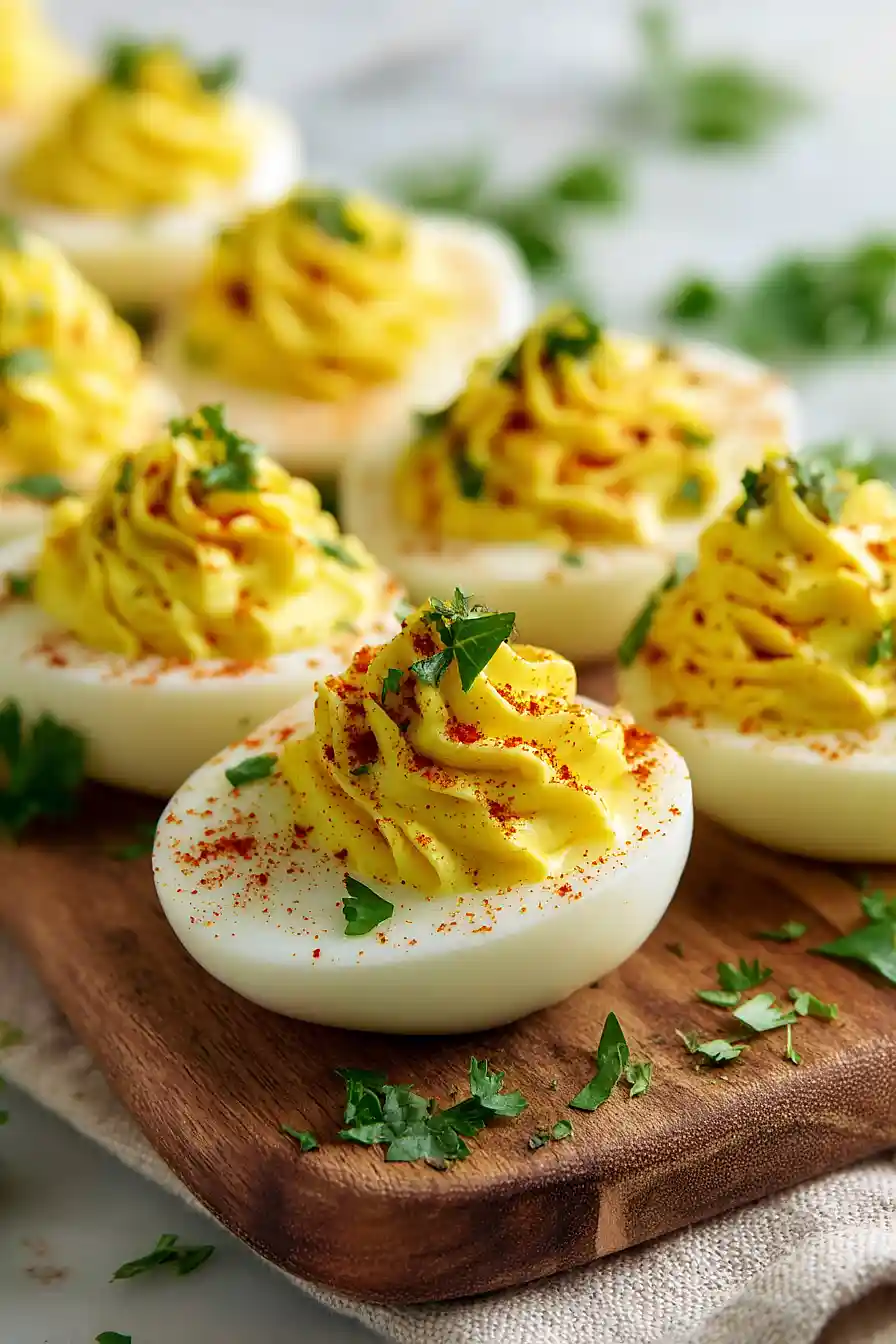
Sprinkle the tops evenly with paprika and finish with finely chopped parsley for color and a fresh flavor note.
Serve immediately or refrigerate until ready to serve.

Tangy Keto Deviled Eggs
Ingredients
For the base::
- 6 eggs (I always use Eggland's Best for the most vibrant yellow yolks)
For the filling::
- 1/3 cup mayo (I prefer Hellmann's for the creamiest texture)
- 1 tsp vinegar
- 1.5 tsp dijon mustard (I use Grey Poupon to add a sophisticated tang)
- 1/8 tsp garlic powder
- 1/8 tsp onion powder
- salt
- pepper
For the garnish::
- 1/2 tsp paprika
- parsley (finely chopped, about 1/8-inch pieces for a professional look)
Instructions
- Place eggs in a pot and cover with cold water by about an inch. Bring to a boil over high heat, then immediately remove from heat and cover the pot with a lid. Let the eggs sit undisturbed for 13-15 minutes—this gentle carryover cooking creates perfectly set yolks without that green ring. Transfer the eggs to an ice bath (a bowl with ice water) and let them cool for at least 5 minutes, which stops the cooking process and makes them easier to peel.
- While the eggs cool, combine mayo, vinegar, Dijon mustard, garlic powder, and onion powder in a small bowl. Whisk together until smooth and well-blended. Taste and season with salt and pepper to your preference—I find a light hand with salt works best here since the yolks are already richly flavored. This allows you to build the filling while the eggs finish cooling, keeping your workflow efficient.
- Gently peel the cooled eggs under cool running water, starting from the wider end where the air pocket makes removal easier. Pat them dry with a paper towel. Carefully slice each egg in half lengthwise and use a small spoon to scoop out the yolks into a separate bowl, being gentle to keep the whites intact and the edges clean for a polished presentation.
- Add the scooped yolks to the prepared filling from Step 2 and mash together with a fork until you reach your desired consistency—I prefer leaving it slightly chunky for texture, but you can make it as smooth as you like. If the mixture seems too thick, add a touch more mayo, one teaspoon at a time. Taste again and adjust seasonings if needed.
- Transfer the yolk mixture to a piping bag fitted with a star tip or a small zip-top bag with the corner snipped off for easier filling. Pipe the mixture generously into each egg white cavity, creating an attractive mound. Sprinkle the tops evenly with paprika and finish with finely chopped parsley for color and a fresh flavor note. Serve immediately or refrigerate until ready to serve.
