Taco night is always a winner at our house, but sometimes I want all that cheesy, crispy goodness without standing over the stove flipping tortillas one by one. That’s where these mini baked chicken tacos come in. I can fill two dozen of these little guys, pop them in the oven, and walk away to help with homework or fold a load of laundry.
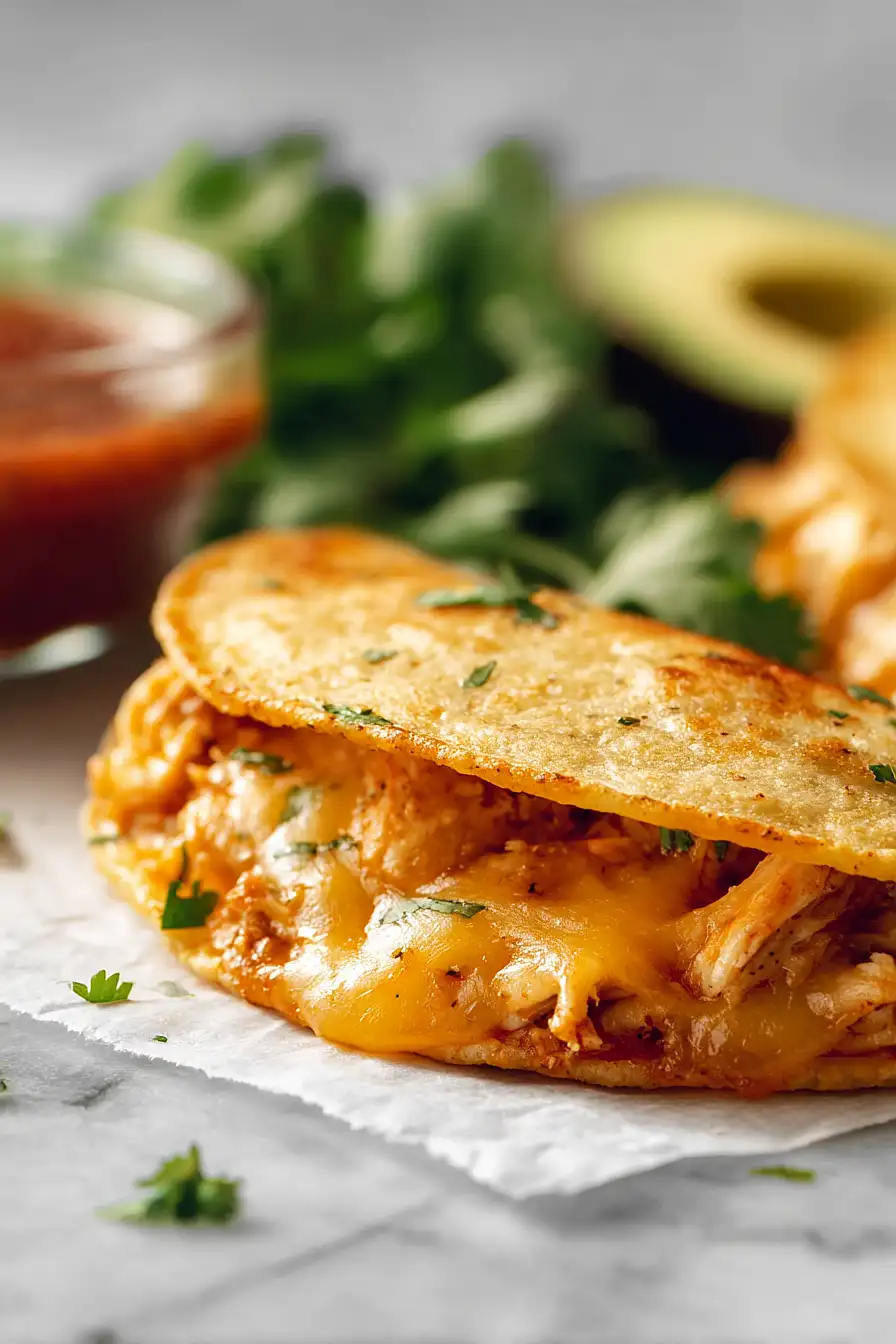
The best part? Everyone gets their tacos hot and ready at the same time. No more “Mom, mine’s cold!” complaints from whoever’s eating last. These bake up crispy on the edges with melted cheese oozing out the sides. Just set out bowls of sour cream, salsa, and cilantro, and let everyone top their own.
Want an easy weeknight dinner that feels a little special? These mini tacos are it. Plus, leftovers actually reheat well, which rarely happens with regular tacos.

Why You’ll Love These Mini Baked Chicken Tacos
- Quick weeknight dinner – Ready in just 30-40 minutes, these mini tacos are perfect when you need something fast but still want a homemade meal the whole family will enjoy.
- Kid-friendly – The bite-sized portions make these tacos fun for little hands, and kids love the crispy shells with melty cheese.
- Simple ingredients – You only need a handful of basic ingredients that you probably already have in your kitchen or can easily grab at any grocery store.
- Baked, not fried – These tacos get crispy in the oven without any frying, making them a lighter option that’s still packed with flavor and that satisfying crunch.
- Great for meal prep – Make a big batch and reheat them throughout the week for easy lunches or snacks whenever a taco craving hits.
What Kind of Chicken Should I Use?
For these mini baked tacos, you have a few options when it comes to chicken. Boneless, skinless chicken breasts are the leanest choice and work great, but chicken thighs will give you a juicier, more flavorful result since they have a bit more fat. You can even use a rotisserie chicken from the store to save time – just shred the meat and you’re ready to go. If you’re meal prepping or short on time, leftover cooked chicken works perfectly too, making this recipe a great way to use up what you already have in the fridge.
Options for Substitutions
This recipe is pretty forgiving when it comes to swapping ingredients:
- Chicken: Ground turkey or ground beef work great here if you don’t have chicken. You can also use rotisserie chicken to save time – just shred it up and you’re good to go.
- Colby jack cheese: Any melting cheese will do the trick. Try cheddar, monterey jack, pepper jack for some heat, or even a Mexican blend if that’s what you have in the fridge.
- Corn tortillas: Flour tortillas can work, but they’ll give you a different texture and taste. If using flour tortillas, you might want to use smaller ones since they’re typically larger than corn. Just know that corn tortillas are really what make these tacos crispy and authentic.
- Sour cream: Greek yogurt makes a good substitute if you’re looking for something lighter, or you can use Mexican crema for a thinner, tangier option.
- Salsa: Use whatever salsa you like – red, green, pico de gallo, or even hot sauce mixed with diced tomatoes will work fine.
Watch Out for These Mistakes While Baking
The biggest mistake when making baked tacos is not warming your corn tortillas enough before folding them, which causes them to crack and break instead of bending into that perfect taco shape – make sure they’re pliable and slightly softened from the first bake before you try to fold them.
Another common error is overfilling the tacos with too much chicken and cheese, which makes them impossible to fold and causes all the filling to spill out during the second bake, so stick to about 2 tablespoons of filling per tortilla.
To get truly crispy tacos instead of chewy ones, don’t skip the oil on both sides of the tortillas, and if you want extra insurance against sogginess, prop the folded tacos against each other in a standing position during the final bake so air can circulate around them.
Finally, resist the urge to pull them out too early – they need the full 12-15 minutes to get that satisfying crunch that makes baked tacos worth it.

What to Serve With Mini Baked Chicken Tacos?
These mini tacos are perfect for a party or weeknight dinner, and they pair really well with classic Mexican sides. I love serving them with a big bowl of chips and guacamole or some refried beans on the side for a more filling meal. A simple Mexican rice or cilantro lime rice makes a great addition too, and you can’t go wrong with a fresh corn salad or pico de gallo to add some crunch. If you want to keep things easy, just set out extra sour cream, salsa, and maybe some pickled jalapeños so everyone can customize their tacos however they like.
Storage Instructions
Store: Keep your leftover baked chicken tacos in an airtight container in the fridge for up to 3 days. They’re great for quick lunches or dinners throughout the week. I like to store the sour cream and salsa separately so the tacos don’t get soggy.
Freeze: These tacos freeze really well for up to 2 months. Let them cool completely, then wrap them individually in foil or place them in a freezer-safe container with parchment paper between layers. This way you can grab just what you need for a quick meal.
Reheat: Pop the tacos in a 350°F oven for about 10 minutes until they’re heated through and crispy again. You can also use the microwave for about a minute, but they won’t be quite as crispy. Add fresh toppings like cilantro, sour cream, and salsa right before serving.
| Preparation Time | 15-20 minutes |
| Cooking Time | 15-20 minutes |
| Total Time | 30-40 minutes |
| Level of Difficulty | Easy |
| Servings | 12 servings |
Estimated Nutrition
Estimated nutrition for the whole recipe (without optional ingredients):
- Calories: 3300-3700
- Protein: 180-200 g
- Fat: 175-195 g
- Carbohydrates: 250-280 g
Ingredients
For the tacos:
- 1.25 lbs chicken (shredded into 1/2-inch pieces for easier filling)
- 10 oz colby jack cheese (I prefer Tillamook for a better melt)
- 24 corn tortillas (street taco size, about 4.5-inches)
- olive oil
- 1 tsp chili powder
For the garnish:
- sour cream (I like Daisy brand for its clean flavor)
- salsa
- fresh cilantro
Step 1: Prepare Mise en Place and Heat Oven
- 1.25 lbs chicken, shredded into ½-inch pieces
- 10 oz Colby Jack cheese, shredded
- sour cream
- salsa
- fresh cilantro
Preheat your oven to 425°F.
While it heats, shred the chicken into ½-inch pieces and set aside.
Shred the Colby Jack cheese and place in a bowl—I find pre-shredding makes the assembly process much faster and ensures even melting.
Have your sour cream, salsa, and fresh cilantro ready for serving later.
Step 2: Oil and Toast the Tortillas
- 24 corn tortillas
- olive oil
- 1 tsp chili powder
Arrange the 24 corn tortillas on baking sheets (you may need two sheets).
Brush both sides of each tortilla lightly with olive oil—this is crucial for getting them crispy later.
Sprinkle the chili powder evenly over all the tortillas.
Bake at 425°F for 2-3 minutes until the tortillas are pliable but just beginning to warm through, making them easier to fold without cracking.
Step 3: Fill and Pre-Melt Cheese
- shredded chicken from Step 1
- shredded Colby Jack cheese from Step 1
Remove the warmed tortillas from the oven and place them on a clean work surface.
Working quickly, place about 1 tablespoon of shredded chicken and 1 tablespoon of shredded cheese from Step 1 onto the lower half of each tortilla.
Return the filled tortillas to the baking sheets and bake for 2 minutes at 425°F—just long enough for the cheese to melt slightly and hold everything together.
Step 4: Fold and Crisp the Tacos
Remove the baking sheets from the oven and immediately fold each tortilla in half over the filling, creating a half-moon shape.
I like to nestle them fold-side-down so they hold their shape and get maximum crispiness on the exterior.
Return to the 425°F oven and bake for 12-15 minutes until the tortillas are golden and crispy, rotating the baking sheets halfway through for even browning.
Step 5: Finish and Serve
- sour cream from Step 1
- salsa from Step 1
- fresh cilantro from Step 1
Remove the tacos from the oven and let them cool for 2-3 minutes so the filling sets slightly and they’re easier to handle.
Transfer to a serving platter and serve immediately with sour cream, salsa, and fresh cilantro for topping.
The tacos are best enjoyed while still warm and crispy.

Cheesy Mini Baked Chicken Tacos
Ingredients
For the tacos::
- 1.25 lbs chicken (shredded into 1/2-inch pieces for easier filling)
- 10 oz colby jack cheese (I prefer Tillamook for a better melt)
- 24 corn tortillas (street taco size, about 4.5-inches)
- olive oil
- 1 tsp chili powder
For the garnish::
- sour cream (I like Daisy brand for its clean flavor)
- salsa
- fresh cilantro
Instructions
- Preheat your oven to 425°F. While it heats, shred the chicken into ½-inch pieces and set aside. Shred the Colby Jack cheese and place in a bowl—I find pre-shredding makes the assembly process much faster and ensures even melting. Have your sour cream, salsa, and fresh cilantro ready for serving later.
- Arrange the 24 corn tortillas on baking sheets (you may need two sheets). Brush both sides of each tortilla lightly with olive oil—this is crucial for getting them crispy later. Sprinkle the chili powder evenly over all the tortillas. Bake at 425°F for 2-3 minutes until the tortillas are pliable but just beginning to warm through, making them easier to fold without cracking.
- Remove the warmed tortillas from the oven and place them on a clean work surface. Working quickly, place about 1 tablespoon of shredded chicken and 1 tablespoon of shredded cheese from Step 1 onto the lower half of each tortilla. Return the filled tortillas to the baking sheets and bake for 2 minutes at 425°F—just long enough for the cheese to melt slightly and hold everything together.
- Remove the baking sheets from the oven and immediately fold each tortilla in half over the filling, creating a half-moon shape. I like to nestle them fold-side-down so they hold their shape and get maximum crispiness on the exterior. Return to the 425°F oven and bake for 12-15 minutes until the tortillas are golden and crispy, rotating the baking sheets halfway through for even browning.
- Remove the tacos from the oven and let them cool for 2-3 minutes so the filling sets slightly and they're easier to handle. Transfer to a serving platter and serve immediately with sour cream, salsa, and fresh cilantro for topping. The tacos are best enjoyed while still warm and crispy.
