I have a confession to make. I’ve spent way too much money at Crumbl over the past year, and their red velvet cookies are mostly to blame. There’s something about that soft, cake-like texture with the tangy cream cheese frosting that keeps me coming back. But at $4+ per cookie, my wallet finally staged an intervention.
That’s when I decided to figure out how to make these at home. After several batches and a lot of taste-testing (someone had to do it), I finally nailed the recipe. The secret is getting that perfect balance of cocoa and red color, plus making sure your cream cheese frosting is thick enough to pile on top without sliding off.
Want a cookie that tastes just like the real thing but costs a fraction of the price? This copycat recipe is for you. Make a batch on Sunday, and you’ll have treats for the whole week. Or let’s be honest, maybe just a couple days.

Why You’ll Love These Red Velvet Cookies
- Crumbl copycat recipe – You can enjoy those famous bakery-style cookies at home without the long lines or hefty price tag.
- Quick and easy – These cookies come together in under an hour, making them perfect for last-minute dessert cravings or unexpected guests.
- Simple ingredients – Everything you need is probably already in your pantry and fridge, so no special shopping trip required.
- Cream cheese frosting – The tangy, sweet frosting on top takes these cookies to the next level and makes them taste just like the real thing.
- Perfect for any occasion – Whether it’s Valentine’s Day, a birthday party, or just a regular Tuesday, these eye-catching cookies always impress.
What Kind of Cocoa Powder Should I Use?
For red velvet cookies, you can use either natural cocoa powder or Dutch-processed cocoa, though natural cocoa is the traditional choice. Natural cocoa has a lighter, more acidic flavor that pairs really well with the vinegar in the recipe, giving you that classic red velvet taste. Dutch-processed cocoa will work too, but it’s been treated to neutralize the acidity, so your cookies might taste slightly different – a bit mellower and less tangy. Whichever you choose, make sure your cocoa powder is fresh and hasn’t been sitting in your pantry for years, as old cocoa can taste flat and won’t give you the rich chocolate undertone that makes red velvet special.
Options for Substitutions
Here are some swaps you can make if you’re missing a few ingredients:
- Red food color: You can use gel food coloring instead of liquid – just use less since it’s more concentrated. Or skip it entirely for chocolate cookies, though they won’t have that classic red velvet look.
- Vinegar: White vinegar is traditional, but apple cider vinegar or lemon juice work just as well. The acid reacts with the baking soda to help the cookies rise and adds that slight tang.
- Brown sugar: If you’re out of brown sugar, mix 1/3 cup white sugar with 1 teaspoon of molasses. Or just use all white sugar – your cookies will be slightly less chewy but still tasty.
- Cream cheese: Make sure to use full-fat cream cheese for the frosting – low-fat versions won’t give you that thick, creamy texture. There’s really no good substitute here since cream cheese is what makes cream cheese frosting special.
- Cocoa powder: Use natural cocoa powder rather than Dutch-processed for this recipe. The natural cocoa reacts better with the vinegar and baking soda.
Watch Out for These Mistakes While Baking
The biggest mistake with red velvet cookies is overbaking them, which turns these soft, chewy treats into dry hockey pucks – pull them from the oven when the edges are just set but the centers still look slightly underdone, as they’ll continue cooking on the hot pan.
Skipping the chilling step might seem like a time-saver, but warm dough spreads too much in the oven and results in thin, flat cookies instead of thick, bakery-style ones.
Make sure your butter and cream cheese for the frosting are at room temperature before mixing, otherwise you’ll end up with lumpy frosting no matter how long you beat it.
Finally, don’t go overboard with the red food coloring thinking more is better – too much can actually affect the taste and texture, so stick to the 2 teaspoons called for in the recipe.

What to Serve With Red Velvet Cookies?
These red velvet cookies are pretty rich on their own with that cream cheese frosting, so I like to keep things simple and serve them with a cold glass of milk or a hot cup of coffee. If you’re putting together a dessert spread for a party, they pair nicely with vanilla ice cream or some fresh strawberries on the side. You could also crumble them over vanilla pudding or use them to make ice cream sandwiches – just let the frosting set in the fridge first so it doesn’t squish out everywhere. For a fun presentation, serve them on a platter with some chocolate-covered strawberries or brownies to give your guests a variety of treats to choose from.
Storage Instructions
Store: Keep these cookies in an airtight container at room temperature for up to 3 days, or in the fridge for up to a week. If you’re storing them in the fridge, just let them sit out for about 10 minutes before eating so the cream cheese frosting softens up a bit.
Freeze: You can freeze the unfrosted cookies for up to 3 months in a freezer-safe container with parchment paper between layers. I like to frost them fresh after thawing for the best texture and taste.
Make Ahead: The cookie dough can be made ahead and refrigerated for up to 2 days before baking. You can also scoop the dough into balls and freeze them, then bake straight from frozen by adding a couple extra minutes to the baking time.
| Preparation Time | 30-45 minutes |
| Cooking Time | 10-15 minutes |
| Total Time | 40-60 minutes |
| Level of Difficulty | Medium |
| Servings | 6 cookies |
Estimated Nutrition
Estimated nutrition for the whole recipe (without optional ingredients):
- Calories: 2250-2400
- Protein: 18-22 g
- Fat: 140-155 g
- Carbohydrates: 250-270 g
Ingredients
For the cookies:
- 1/2 cup butter (I like Kerrygold unsalted butter for this)
- 1/3 cup sugar
- 1/4 cup brown sugar (packed tightly for better moisture)
- 1 egg (room temperature, about 70°F)
- 1 tsp vinegar
- 2 tsp red food color (I use McCormick red food color)
- 1 tsp vanilla
- 1 1/2 cups flour (I always use King Arthur all-purpose flour)
- 4 tbsp cocoa
- 1/2 tsp baking soda
- 1/4 tsp baking powder
- 1/4 tsp salt
For the frosting:
- 7 tbsp butter
- 6 oz cream cheese (I prefer Philadelphia full-fat for thickness)
- 1 cup icing sugar (sifted to remove lumps)
- 3/4 tsp vanilla
Step 1: Prepare Mise en Place and Preheat Oven
- 1 1/2 cups flour
- 4 tbsp cocoa
- 1/2 tsp baking soda
- 1/4 tsp baking powder
- 1/4 tsp salt
- 1 egg
Start by preheating your oven to 375°F so it’s ready when you need it.
While it heats, measure out all your dry ingredients (flour, cocoa, baking soda, baking powder, and salt) into a small bowl and whisk them together to distribute the leavening agents evenly.
Bring your egg to room temperature by letting it sit on the counter—this helps it incorporate better into the butter mixture and creates a more cohesive dough.
Step 2: Cream Butter and Sugars
- 1/2 cup butter
- 1/3 cup sugar
- 1/4 cup brown sugar
In a large mixing bowl, beat together the butter, white sugar, and packed brown sugar for 2-3 minutes until light and fluffy.
The brown sugar adds moisture and helps create a chewier cookie texture, which is essential for that signature Crumbl cookie quality.
This creaming process incorporates air into the mixture, which helps the cookies rise and develop the right texture.
Step 3: Build the Red Velvet Cookie Dough
- 1 egg
- 1 tsp vinegar
- 2 tsp red food color
- 1 tsp vanilla
- dry ingredient mixture from Step 1
Add the room temperature egg to the creamed butter mixture and beat until fully incorporated, about 30 seconds.
Then add the vinegar, red food color, and vanilla, mixing until the color is evenly distributed throughout—you want a consistent red hue with no streaks.
Gently fold in the dry ingredient mixture from Step 1 using a spatula or wooden spoon until just combined; don’t overmix, as this can lead to tough cookies.
I like to mix until I just barely see a few flour streaks, then stop—overmixing is the enemy of tender cookies.
Step 4: Chill and Shape Cookie Dough
- cookie dough from Step 3
Refrigerate the dough for 15-20 minutes to firm it up and allow the flavors to develop.
While the dough chills, line a baking sheet with parchment paper.
Once chilled, scoop the dough into 5 large balls (these will be your main cookies) and reserve a small piece (about the size of a walnut) for crumbling later.
Press each large dough ball flat onto the prepared baking sheet, spacing them about 3 inches apart to allow for spreading.
Step 5: Bake the Cookies
- shaped dough from Step 4
Bake the pressed cookie dough at 375°F for 10-11 minutes—they should be set on the edges but still slightly soft in the center when you remove them from the oven.
The small reserved piece of dough can go on the baking sheet during the last 5-6 minutes of baking so it’s ready to crumble.
Let all cookies cool on the baking sheet for 5 minutes to firm up slightly, then transfer to a wire rack to cool completely.
Step 6: Make the Cream Cheese Frosting
- 7 tbsp butter
- 6 oz cream cheese
- 1 cup icing sugar
- 3/4 tsp vanilla
While the cookies cool, prepare the frosting by beating together the softened butter and cream cheese until smooth and creamy, about 1-2 minutes.
Gradually add the sifted powdered sugar (sifting removes lumps for a smooth frosting texture) and vanilla, beating until light and fluffy.
I prefer to use Philadelphia full-fat cream cheese because it creates a thicker, richer frosting that pipes beautifully and holds its shape on the cookie.
Step 7: Frost and Finish the Cookies
- cooled cookies from Step 5
- cream cheese frosting from Step 6
- baked cookie crumbles from Step 5
Once the cookies are completely cooled, transfer the frosting to a piping bag fitted with your desired tip and pipe a generous swirl onto each cookie.
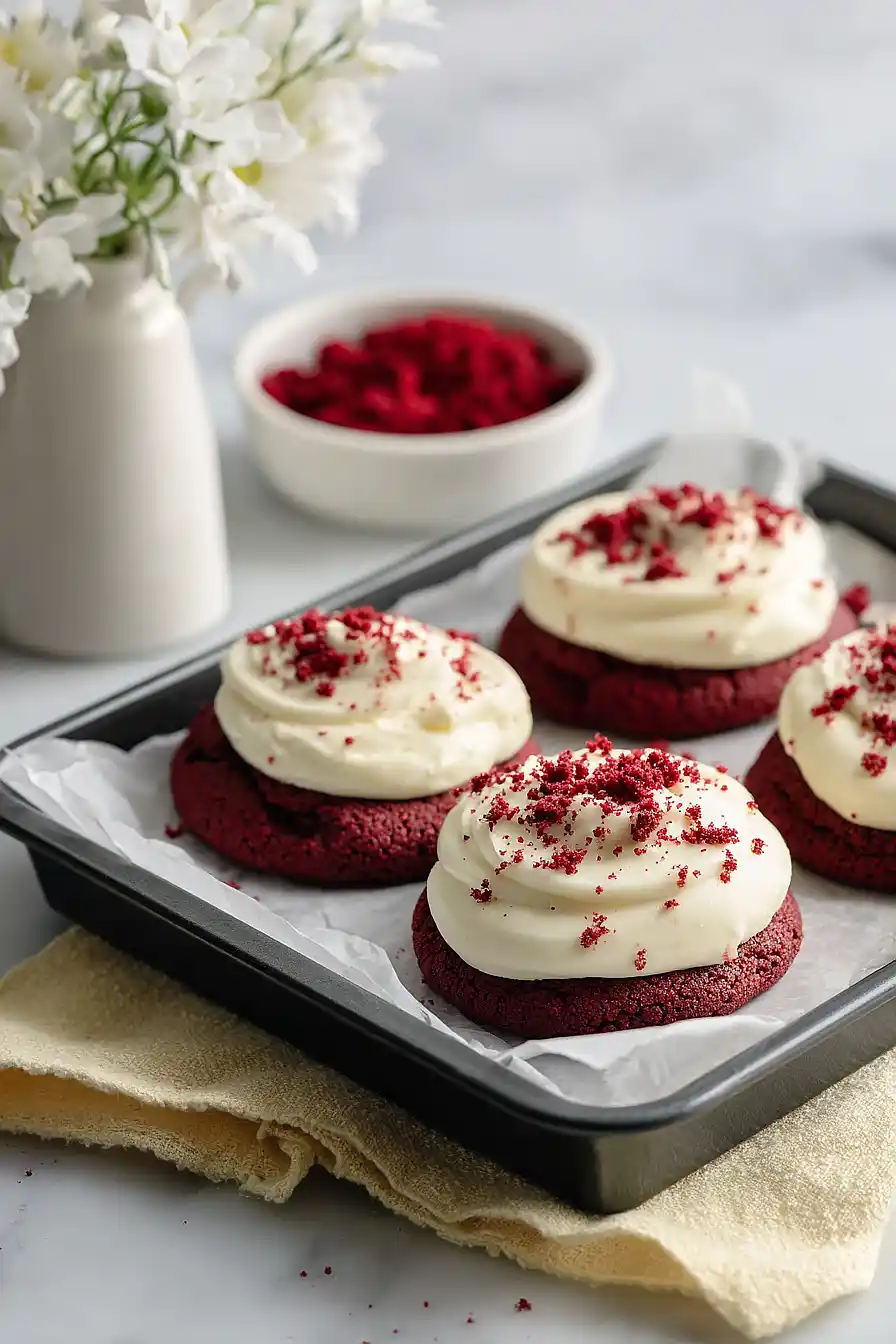
Crumble the small baked cookie piece from Step 5 over the top of each frosted cookie to add texture and enhance that authentic Crumbl appearance.
Let the frosting set for a few minutes before serving.
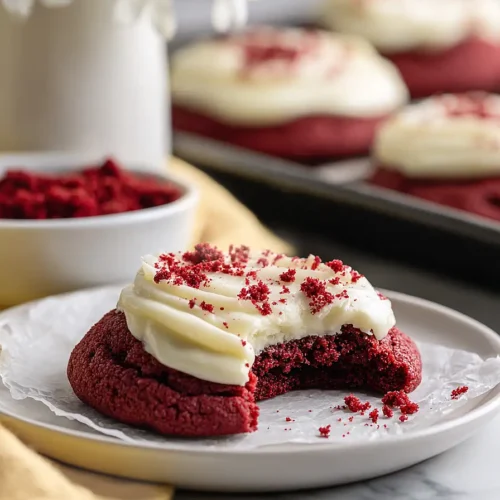
Classic Crumbl Copycat Red Velvet Cookies
Ingredients
For the cookies::
- 1/2 cup butter (I like Kerrygold unsalted butter for this)
- 1/3 cup sugar
- 1/4 cup brown sugar (packed tightly for better moisture)
- 1 egg (room temperature, about 70°F)
- 1 tsp vinegar
- 2 tsp red food color (I use McCormick red food color)
- 1 tsp vanilla
- 1 1/2 cups flour (I always use King Arthur all-purpose flour)
- 4 tbsp cocoa
- 1/2 tsp baking soda
- 1/4 tsp baking powder
- 1/4 tsp salt
For the frosting::
- 7 tbsp butter
- 6 oz cream cheese (I prefer Philadelphia full-fat for thickness)
- 1 cup icing sugar (sifted to remove lumps)
- 3/4 tsp vanilla
Instructions
- Start by preheating your oven to 375°F so it's ready when you need it. While it heats, measure out all your dry ingredients (flour, cocoa, baking soda, baking powder, and salt) into a small bowl and whisk them together to distribute the leavening agents evenly. Bring your egg to room temperature by letting it sit on the counter—this helps it incorporate better into the butter mixture and creates a more cohesive dough.
- In a large mixing bowl, beat together the butter, white sugar, and packed brown sugar for 2-3 minutes until light and fluffy. The brown sugar adds moisture and helps create a chewier cookie texture, which is essential for that signature Crumbl cookie quality. This creaming process incorporates air into the mixture, which helps the cookies rise and develop the right texture.
- Add the room temperature egg to the creamed butter mixture and beat until fully incorporated, about 30 seconds. Then add the vinegar, red food color, and vanilla, mixing until the color is evenly distributed throughout—you want a consistent red hue with no streaks. Gently fold in the dry ingredient mixture from Step 1 using a spatula or wooden spoon until just combined; don't overmix, as this can lead to tough cookies. I like to mix until I just barely see a few flour streaks, then stop—overmixing is the enemy of tender cookies.
- Refrigerate the dough for 15-20 minutes to firm it up and allow the flavors to develop. While the dough chills, line a baking sheet with parchment paper. Once chilled, scoop the dough into 5 large balls (these will be your main cookies) and reserve a small piece (about the size of a walnut) for crumbling later. Press each large dough ball flat onto the prepared baking sheet, spacing them about 3 inches apart to allow for spreading.
- Bake the pressed cookie dough at 375°F for 10-11 minutes—they should be set on the edges but still slightly soft in the center when you remove them from the oven. The small reserved piece of dough can go on the baking sheet during the last 5-6 minutes of baking so it's ready to crumble. Let all cookies cool on the baking sheet for 5 minutes to firm up slightly, then transfer to a wire rack to cool completely.
- While the cookies cool, prepare the frosting by beating together the softened butter and cream cheese until smooth and creamy, about 1-2 minutes. Gradually add the sifted powdered sugar (sifting removes lumps for a smooth frosting texture) and vanilla, beating until light and fluffy. I prefer to use Philadelphia full-fat cream cheese because it creates a thicker, richer frosting that pipes beautifully and holds its shape on the cookie.
- Once the cookies are completely cooled, transfer the frosting to a piping bag fitted with your desired tip and pipe a generous swirl onto each cookie. Crumble the small baked cookie piece from Step 5 over the top of each frosted cookie to add texture and enhance that authentic Crumbl appearance. Let the frosting set for a few minutes before serving.

Just to confirm you really mean the King Arthur GF all purpose flour, not the measure for measure flour, correct?