Finding the perfect holiday cookie that looks as impressive as it tastes can be tricky. You want something festive and eye-catching for your cookie platters, but you don’t want to spend hours decorating or dealing with complicated frosting techniques.
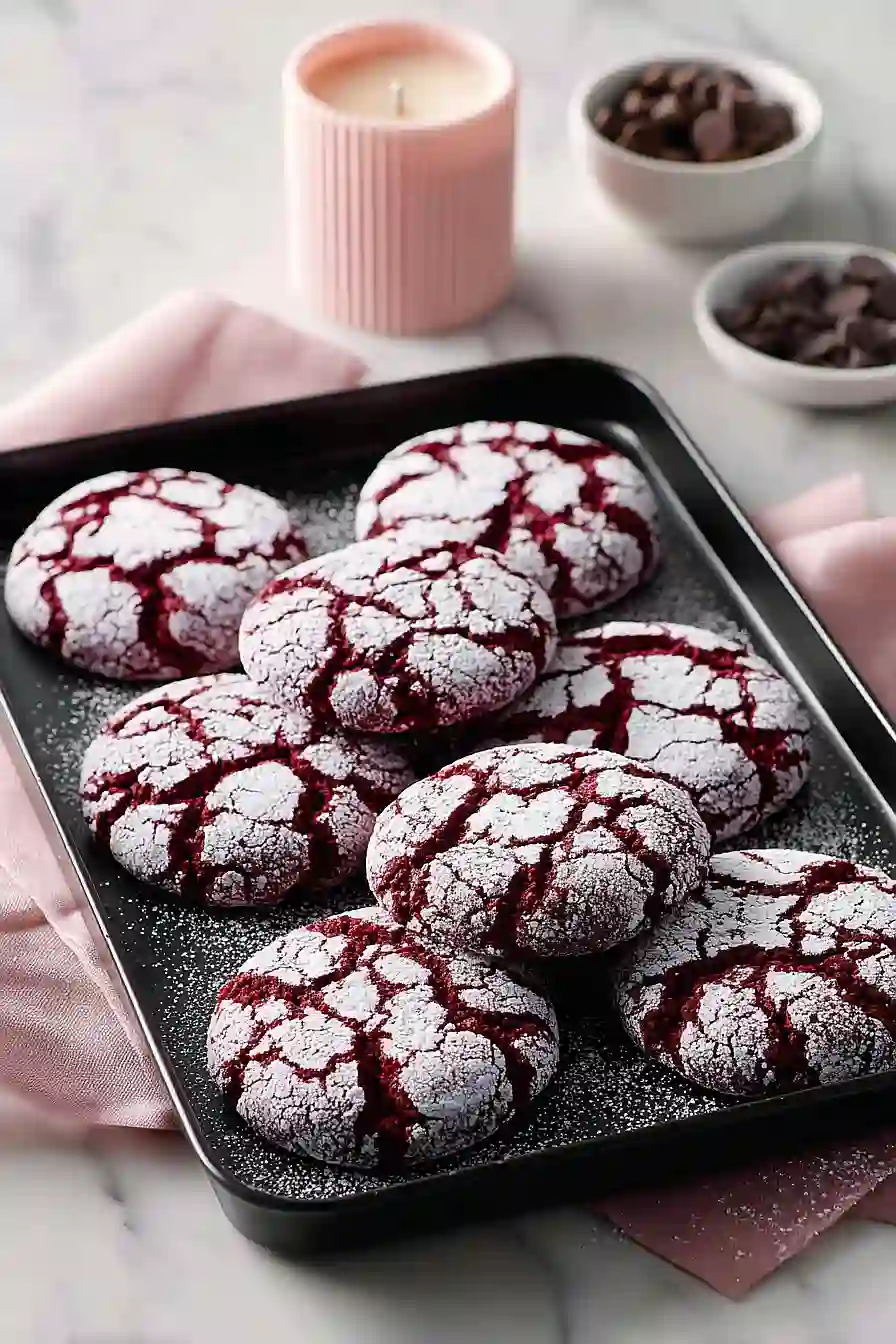
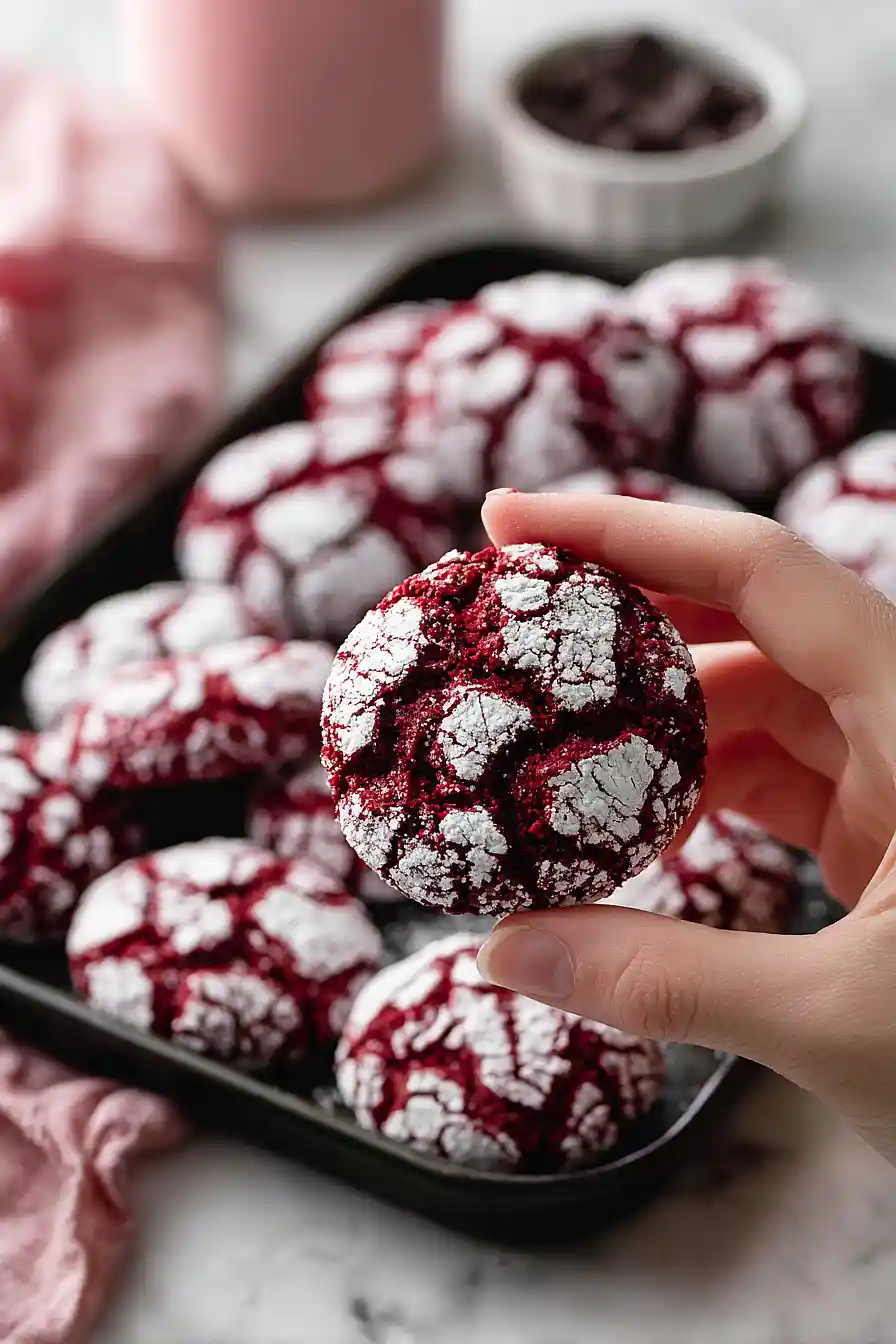
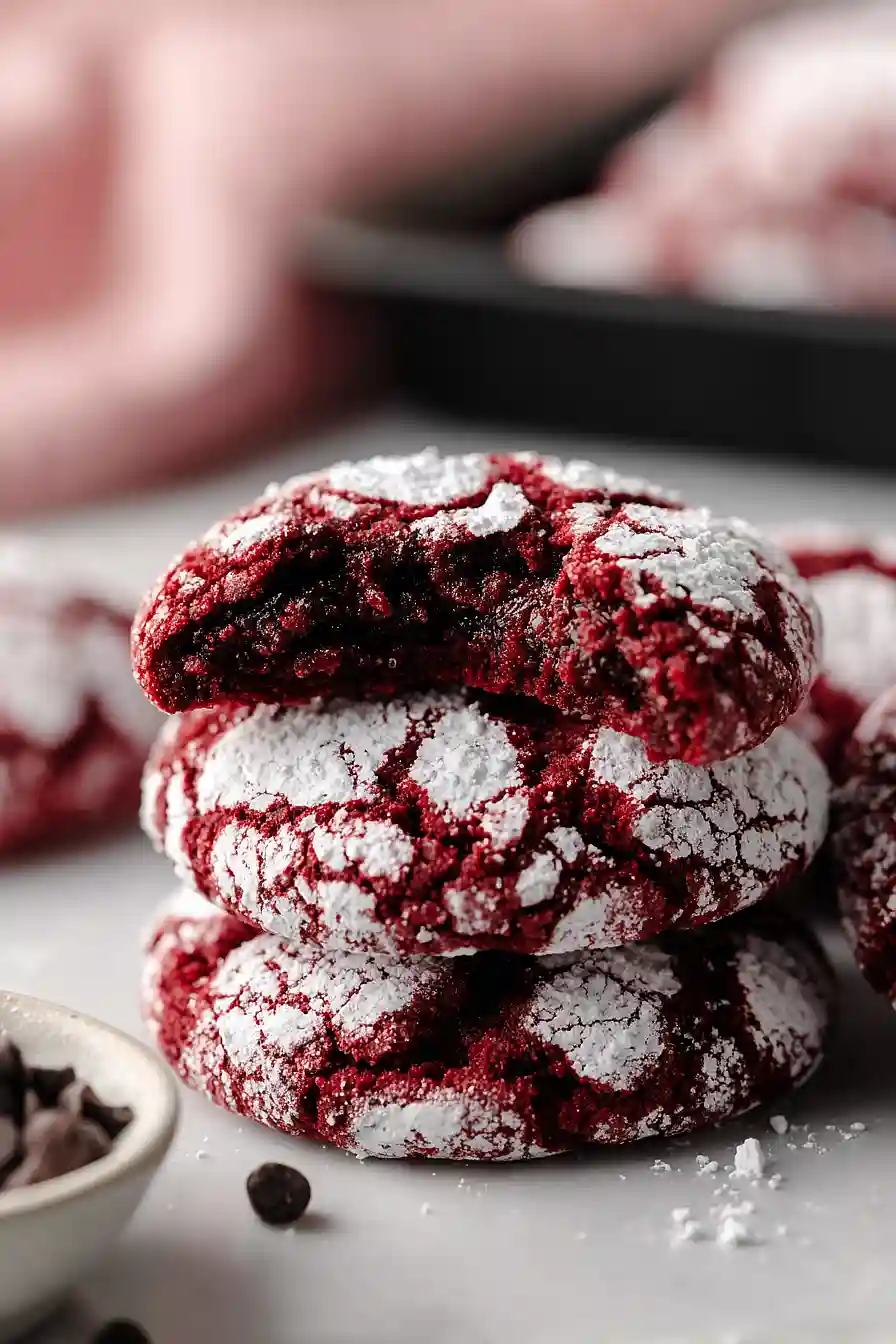
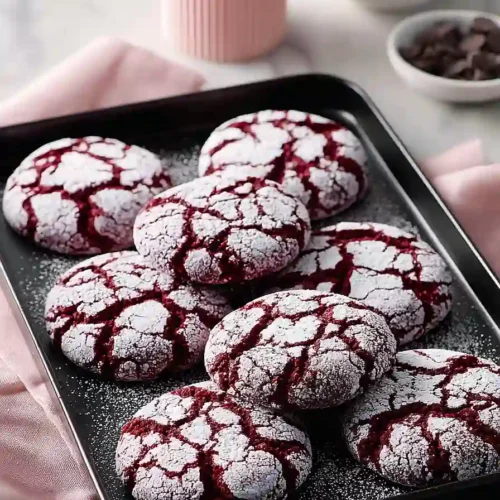
That’s where these red velvet crinkle cookies come in. They’ve got that classic red velvet flavor with a hint of cocoa, and the crackled powdered sugar coating gives them a beautiful snowy appearance without any fussy decorating required. Plus, they’re soft, chewy, and disappear faster than any other cookie I’ve made.
Why You’ll Love These Red Velvet Crinkle Cookies
- Quick and easy – These cookies come together in under 45 minutes, making them perfect for last-minute gatherings or when you need a sweet treat fast.
- Eye-catching presentation – The classic crinkle pattern with powdered sugar creates a beautiful contrast against the deep red color, making these cookies look bakery-worthy without any extra effort.
- Simple ingredients – You probably already have most of these pantry staples on hand, so no special trip to the store required.
- Perfect for holidays and parties – The festive red and white colors make these cookies ideal for Christmas, Valentine’s Day, or any celebration where you want to impress your guests.
What Kind of Cocoa Should I Use?
For red velvet crinkle cookies, you can use either natural cocoa powder or Dutch-processed cocoa, though each will give you slightly different results. Natural cocoa powder has a more acidic, fruity flavor that’s traditional in red velvet recipes, while Dutch-processed cocoa is smoother and mellower. Either way, make sure you’re using unsweetened cocoa powder and not hot chocolate mix or sweetened cocoa. If your cocoa has been sitting in the pantry for a while, give it a sniff before using – fresh cocoa should smell rich and chocolatey, not flat or stale.
Options for Substitutions
These cookies are pretty forgiving when it comes to swaps, so here are some options if you need them:
- Butter: You can use margarine or vegetable shortening in place of butter, though butter gives the best flavor. If using oil, stick with 1/3 cup instead of 1/2 cup.
- Brown sugar: If you’re out of brown sugar, mix 3/4 cup white sugar with 1 tablespoon of molasses. Or just use all white sugar – your cookies will be slightly less chewy but still tasty.
- Eggs: For each egg, you can substitute 1/4 cup applesauce or mashed banana, though the texture will be a bit denser. Flax eggs (1 tablespoon ground flaxseed mixed with 3 tablespoons water per egg) also work.
- Food coloring: Red food coloring is what makes these cookies ‘red velvet,’ but you can skip it if you prefer a chocolate crinkle cookie. Beet powder or beet juice can work as a natural alternative, though the color won’t be as bright.
- Cocoa powder: Dutch-process cocoa gives a richer color, but regular unsweetened cocoa works just fine. Don’t substitute with hot chocolate mix as it contains sugar and milk powder.
- Powdered sugar: The powdered sugar coating is really what makes these crinkle cookies look special, so I wouldn’t skip it. But if you’re in a bind, you can make your own by blending regular sugar with a bit of cornstarch in a blender.
Watch Out for These Mistakes While Baking
The biggest mistake with red velvet crinkle cookies is skipping the chilling step – if your dough feels too soft or sticky to roll, pop it in the fridge for 30 minutes to an hour so the cookies hold their shape and develop those signature cracks.
Rolling your dough balls too small will give you flat, crispy cookies instead of soft, chewy ones, so aim for balls about 1.5 inches in diameter for the best texture.
When coating in sugar, make sure to roll generously in the white sugar first and then the powdered sugar – this double coating creates the beautiful crinkle effect as the cookies spread in the oven.
Finally, don’t overbake these cookies, as they’ll continue to firm up as they cool on the pan, so pull them out when the edges are set but the centers still look slightly underdone.
What to Serve With Red Velvet Crinkle Cookies?
These cookies are perfect alongside a tall glass of cold milk or a hot cup of coffee for dunking. I love setting them out at holiday parties with a hot chocolate bar where everyone can customize their own drink – the red and white colors make them look really festive on a dessert table. They also pair nicely with vanilla ice cream if you want to make them into an ice cream sandwich, or you can serve them with fresh berries and whipped cream for a simple dessert platter. For a cozy afternoon treat, try them with chai tea or a vanilla latte.
Storage Instructions
Store: Keep your red velvet crinkle cookies in an airtight container at room temperature for up to 5 days. I like to layer them with parchment paper so they don’t stick together and the powdered sugar coating stays pretty.
Freeze: These cookies freeze really well! Stack them in a freezer-safe container with parchment between layers and they’ll keep for up to 3 months. You can also freeze the dough balls before baking if you want fresh cookies anytime.
Serve: If you’re serving frozen cookies, just let them thaw at room temperature for about 20 minutes. They taste amazing straight from the freezer too if you like a firmer texture. You might want to dust them with a bit more powdered sugar before serving to freshen up their look.
| Preparation Time | 20-30 minutes |
| Cooking Time | 10-15 minutes |
| Total Time | 30-45 minutes |
| Level of Difficulty | Easy |
| Servings | 24 cookies |
Estimated Nutrition
Estimated nutrition for the whole recipe (without optional ingredients):
- Calories: 2900-3200
- Protein: 28-34 g
- Fat: 130-150 g
- Carbohydrates: 410-450 g
Ingredients
For the dough:
- 1/2 cup unsalted butter (I like Kerrygold for a richer taste)
- 3/4 cup brown sugar (packed firmly for better moisture)
- 1/2 cup granulated sugar
- 2 eggs (room temperature, about 70°F)
- 2.5 tsp vanilla extract
- 1 tsp red food coloring (I use Wilton No-Taste Red for vibrant color)
- 2 1/4 cups all-purpose flour (I always use King Arthur)
- 1/2 cup unsweetened cocoa powder
- 1.5 tsp baking powder
- 1/2 tsp fine sea salt
For the coating:
- 2/3 cup granulated sugar
- 2/3 cup powdered sugar (sifted to remove lumps for a snowy look)
Step 1: Prepare Mise en Place and Preheat
- 2/3 cup granulated sugar
- 2/3 cup powdered sugar
Preheat your oven to 350°F and line a baking sheet with parchment paper.
Sift the powdered sugar into a shallow bowl to remove any lumps—this ensures an even, snowy coating on your cookies.
Pour the granulated sugar into another shallow bowl for the first coating.
These prep steps ensure you’re ready to move quickly once the dough is made.
Step 2: Cream Butter and Sugars
- 1/2 cup unsalted butter
- 3/4 cup brown sugar
- 1/2 cup granulated sugar
In a large bowl, combine the softened unsalted butter, packed brown sugar, and granulated sugar.
Beat on medium speed for 2-3 minutes until the mixture is light, fluffy, and pale—this creaming process incorporates air and develops a tender cookie texture.
I like to use Kerrygold butter for a richer, more luxurious flavor that really stands out in these cookies.
Step 3: Build Wet Ingredient Mixture
- 2 eggs
- 2.5 tsp vanilla extract
- 1 tsp red food coloring
Add the room-temperature eggs one at a time to the creamed butter and sugar, beating well after each addition.
Pour in the vanilla extract and red food coloring, then mix on medium speed for 1-2 minutes until the mixture is smooth and vibrant red.
I use Wilton No-Taste Red because it delivers an intense, true red color without any odd flavor undertones that some food colorings can bring.
Step 4: Whisk Dry Ingredients
- 2 1/4 cups all-purpose flour
- 1/2 cup unsweetened cocoa powder
- 1.5 tsp baking powder
- 1/2 tsp fine sea salt
In a separate bowl, whisk together the all-purpose flour, unsweetened cocoa powder, baking powder, and fine sea salt until well combined and no lumps remain.
Whisking rather than just stirring ensures the leavening agents and cocoa are evenly distributed throughout the flour, which guarantees consistent rise and flavor in every cookie.
Step 5: Combine and Chill Dough
- wet ingredient mixture from Step 3
- dry ingredient mixture from Step 4
Add the dry ingredient mixture from Step 4 to the wet ingredient mixture from Step 3, folding gently with a spatula until just combined—do not overmix, as this can lead to tough cookies.
The dough should be thick and slightly sticky.
If the dough feels too soft to handle, refrigerate it for 15-20 minutes until it firms up slightly, making rolling easier.
Step 6: Roll, Coat, and Arrange Cookies
- prepared dough from Step 5
- granulated sugar coating from Step 1
- powdered sugar coating from Step 1
Working with a small portion of dough at a time, roll it into 1-inch balls between your palms.
Roll each ball first in the granulated sugar from Step 1, then immediately in the sifted powdered sugar, pressing gently so the coating adheres.
Place the coated balls 2 inches apart on the prepared baking sheet—they’ll spread slightly as they bake and develop those signature crinkles as the powdered sugar coating cracks.
Step 7: Bake and Cool
Bake at 350°F for 9-11 minutes, until the edges are set but the centers still look slightly underbaked—the cookies will continue to cook on the pan as they cool.
Remove from the oven and let the cookies rest on the baking sheet for 5 minutes to firm up, then transfer to a wire rack to cool completely.
This resting period prevents them from breaking apart when moving and allows the texture to set properly.
Perfect Red Velvet Crinkle Cookies
Ingredients
For the dough
- 1/2 cup unsalted butter (I like Kerrygold for a richer taste)
- 3/4 cup brown sugar (packed firmly for better moisture)
- 1/2 cup granulated sugar
- 2 eggs (room temperature, about 70°F)
- 2.5 tsp vanilla extract
- 1 tsp red food coloring (I use Wilton No-Taste Red for vibrant color)
- 2 1/4 cups all-purpose flour (I always use King Arthur)
- 1/2 cup unsweetened cocoa powder
- 1.5 tsp baking powder
- 1/2 tsp fine sea salt
For the coating
- 2/3 cup granulated sugar
- 2/3 cup powdered sugar (sifted to remove lumps for a snowy look)
Instructions
- Preheat your oven to 350°F and line a baking sheet with parchment paper. Sift the powdered sugar into a shallow bowl to remove any lumps—this ensures an even, snowy coating on your cookies. Pour the granulated sugar into another shallow bowl for the first coating. These prep steps ensure you're ready to move quickly once the dough is made.
- In a large bowl, combine the softened unsalted butter, packed brown sugar, and granulated sugar. Beat on medium speed for 2-3 minutes until the mixture is light, fluffy, and pale—this creaming process incorporates air and develops a tender cookie texture. I like to use Kerrygold butter for a richer, more luxurious flavor that really stands out in these cookies.
- Add the room-temperature eggs one at a time to the creamed butter and sugar, beating well after each addition. Pour in the vanilla extract and red food coloring, then mix on medium speed for 1-2 minutes until the mixture is smooth and vibrant red. I use Wilton No-Taste Red because it delivers an intense, true red color without any odd flavor undertones that some food colorings can bring.
- In a separate bowl, whisk together the all-purpose flour, unsweetened cocoa powder, baking powder, and fine sea salt until well combined and no lumps remain. Whisking rather than just stirring ensures the leavening agents and cocoa are evenly distributed throughout the flour, which guarantees consistent rise and flavor in every cookie.
- Add the dry ingredient mixture from Step 4 to the wet ingredient mixture from Step 3, folding gently with a spatula until just combined—do not overmix, as this can lead to tough cookies. The dough should be thick and slightly sticky. If the dough feels too soft to handle, refrigerate it for 15-20 minutes until it firms up slightly, making rolling easier.
- Working with a small portion of dough at a time, roll it into 1-inch balls between your palms. Roll each ball first in the granulated sugar from Step 1, then immediately in the sifted powdered sugar, pressing gently so the coating adheres. Place the coated balls 2 inches apart on the prepared baking sheet—they'll spread slightly as they bake and develop those signature crinkles as the powdered sugar coating cracks.
- Bake at 350°F for 9-11 minutes, until the edges are set but the centers still look slightly underbaked—the cookies will continue to cook on the pan as they cool. Remove from the oven and let the cookies rest on the baking sheet for 5 minutes to firm up, then transfer to a wire rack to cool completely. This resting period prevents them from breaking apart when moving and allows the texture to set properly.
