I’ll be honest – I used to think kale chips were one of those health food things that couldn’t possibly taste good. Like, how could baked leaves compete with a bag of regular chips? Then one day I grabbed a bag of salt and vinegar kale chips at the store, and I was hooked. That tangy, salty crunch was exactly what I wanted.
The problem? Those store-bought bags are expensive and disappear way too fast in my house. So I started making my own at home, and it turns out they’re really easy. You just need a bunch of kale, some olive oil, apple cider vinegar, and a few other ingredients you probably already have. The best part is you can make a huge batch for less than what one small bag costs at the store.
If you love that sharp, tangy flavor of salt and vinegar chips but want something a little lighter, these kale chips are worth trying. They’re crispy, they’re satisfying, and they actually taste like a snack you want to eat.
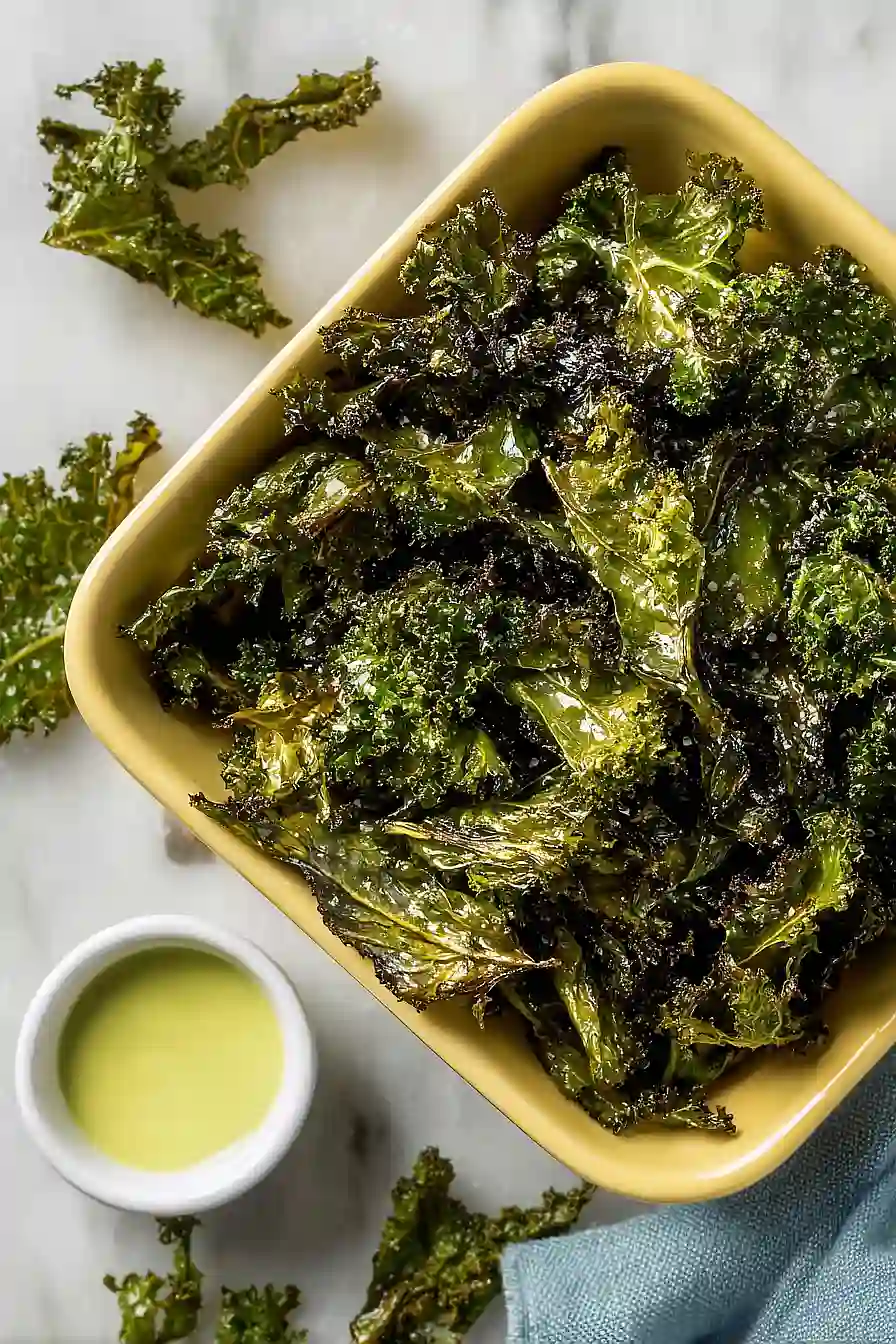
Why You’ll Love These Kale Chips
- Healthy snack alternative – These crispy kale chips give you that satisfying crunch you crave from potato chips, but with way more nutrients and fewer calories.
- Quick and easy – Ready in just 30-40 minutes with minimal prep work, making them perfect for when you need a snack fast.
- Simple ingredients – You only need four basic ingredients that you probably already have in your kitchen.
- Tangy, addictive flavor – The combination of apple cider vinegar and salt creates that classic salt and vinegar taste that’s hard to stop munching on.
What Kind of Kale Should I Use?
Any variety of kale will work for making chips, but curly kale and lacinato kale (also called dinosaur kale) are your best bets. Curly kale creates crispier, crunchier chips with more surface area for the seasoning to stick to, while lacinato kale makes flatter, more uniform chips that some people find easier to eat. Whichever type you choose, look for bunches with firm, dark green leaves and avoid any that are yellowing or wilted. Before you get started, make sure to thoroughly wash and completely dry your kale – any moisture left on the leaves will prevent them from getting crispy in the oven.

Options for Substitutions
While kale chips are pretty straightforward, here are some swaps you can make:
- Kale: Don’t substitute the kale – it’s really the star here and other greens won’t crisp up the same way. Curly kale works best, but lacinato (dinosaur) kale is fine too. Just make sure to remove the tough stems before baking.
- Apple cider vinegar: White vinegar or white wine vinegar will give you that same tangy punch. You could also try malt vinegar if you want a more traditional salt and vinegar chip flavor.
- Olive oil: Any neutral oil like avocado, grapeseed, or vegetable oil works fine. Just avoid oils with low smoke points like flaxseed oil.
- Salt: Regular table salt is perfect, but you can use sea salt or kosher salt if that’s what you have. With kosher salt, you might want to add a pinch more since the crystals are larger.
Watch Out for These Mistakes While Baking
The biggest mistake when making kale chips is not drying the leaves thoroughly after washing – even a little moisture will cause them to steam instead of crisp up, leaving you with limp, chewy chips instead of crunchy ones.
Overcrowding the baking sheet is another common error that leads to uneven cooking, so spread the kale pieces in a single layer with space between them, and use two pans if needed.
Keep a close eye on your chips during the last few minutes of baking since they can go from perfectly crispy to burnt in less than a minute, and remember that they’ll continue to crisp up slightly as they cool on the pan.
If you want extra flavor, wait until after baking to add any additional salt since the chips will taste saltier once the moisture evaporates.

What to Serve With Kale Chips?
Kale chips make a great snack on their own, but they’re also perfect alongside your favorite sandwich or wrap for a crunchy alternative to regular potato chips. I love munching on them with a turkey and avocado sandwich or a veggie-packed hummus wrap. They’re also really good served with dips like ranch, tzatziki, or even a spicy sriracha mayo if you want to balance out the tangy vinegar flavor. If you’re putting together a lunch box or picnic spread, throw in some fresh veggies, cheese cubes, and these kale chips for a satisfying meal.
Storage Instructions
Store: Kale chips are best enjoyed fresh and crispy, but you can store them in an airtight container at room temperature for up to 2 days. Make sure they’re completely cool before storing, and toss in a small piece of paper towel to absorb any moisture that might make them soggy.
Revive: If your kale chips lose their crunch after storing, just pop them back in the oven at 250°F for about 5 minutes to crisp them back up. Keep an eye on them so they don’t burn, and let them cool before munching!
| Preparation Time | 10-15 minutes |
| Cooking Time | 20-25 minutes |
| Total Time | 30-40 minutes |
| Level of Difficulty | Easy |
| Servings | 4 servings |
Estimated Nutrition
Estimated nutrition for the whole recipe (without optional ingredients):
- Calories: 230-270
- Protein: 7-10 g
- Fat: 14-16 g
- Carbohydrates: 18-22 g
Ingredients
- 1 bunch kale (stems removed and torn into 2-inch pieces for even crisping)
- 3 tbsp olive oil (I prefer Bertolli Extra Virgin for a milder taste)
- 3 tbsp apple cider vinegar (I always use Bragg for the best tang)
- 1/2 tsp salt
- 1 tbsp nutritional yeast
Step 1: Prepare the Oven and Kale
- 1 bunch kale
Preheat your oven to 300°F and line two baking sheets with parchment paper.
While the oven heats, wash the kale thoroughly under cold water and pat it completely dry with paper towels or a clean kitchen towel—this is crucial for crispiness, as any moisture will create steam and make the chips soggy rather than crispy.
Remove the tough center stems and tear the leaves into roughly 2-inch pieces, aiming for uniform size so everything crisps evenly.
Step 2: Coat and Season the Kale
- 3 tbsp olive oil
- 3 tbsp apple cider vinegar
- 1/2 tsp salt
- kale from Step 1
In a large bowl, combine the torn kale with the olive oil, apple cider vinegar, and salt.
Using your hands or two spoons, toss everything together for 1 to 2 minutes, making sure every piece of kale gets evenly coated with the oil and vinegar mixture.
I like to massage the kale a bit with my hands—this helps the seasonings really stick and begins to break down the leaves slightly, which improves texture.
Don’t skip this step; thorough coating is what gives these chips their signature tangy, salty flavor.
Step 3: Spread and Bake the Chips
- seasoned kale from Step 2
- 1 tbsp nutritional yeast
Spread the seasoned kale in a single layer across your prepared baking sheets, making sure pieces don’t overlap too much—crowding them will trap steam and prevent crisping.
Bake for 18 to 22 minutes, checking around the 15-minute mark.
The chips are done when the leaves are completely dry and crispy to the touch; they should shatter easily when you break one.
Remove from the oven and let cool for 1 to 2 minutes on the pan, then sprinkle with the nutritional yeast for an extra layer of umami and a subtle cheesy note.
Step 4: Serve and Store
Transfer the kale chips to a serving plate or bowl and enjoy immediately while they’re at their crispiest.
If you have leftovers, store them in an airtight container at room temperature for up to 3 days—I’ve found that keeping them in a container with a small silica packet helps them stay crispy longer.
Irresistible Salt and Vinegar Kale Chips
Ingredients
- 1 bunch kale (stems removed and torn into 2-inch pieces for even crisping)
- 3 tbsp olive oil (I prefer Bertolli Extra Virgin for a milder taste)
- 3 tbsp apple cider vinegar (I always use Bragg for the best tang)
- 1/2 tsp salt
- 1 tbsp nutritional yeast
Instructions
- Preheat your oven to 300°F and line two baking sheets with parchment paper. While the oven heats, wash the kale thoroughly under cold water and pat it completely dry with paper towels or a clean kitchen towel—this is crucial for crispiness, as any moisture will create steam and make the chips soggy rather than crispy. Remove the tough center stems and tear the leaves into roughly 2-inch pieces, aiming for uniform size so everything crisps evenly.
- In a large bowl, combine the torn kale with the olive oil, apple cider vinegar, and salt. Using your hands or two spoons, toss everything together for 1 to 2 minutes, making sure every piece of kale gets evenly coated with the oil and vinegar mixture. I like to massage the kale a bit with my hands—this helps the seasonings really stick and begins to break down the leaves slightly, which improves texture. Don't skip this step; thorough coating is what gives these chips their signature tangy, salty flavor.
- Spread the seasoned kale in a single layer across your prepared baking sheets, making sure pieces don't overlap too much—crowding them will trap steam and prevent crisping. Bake for 18 to 22 minutes, checking around the 15-minute mark. The chips are done when the leaves are completely dry and crispy to the touch; they should shatter easily when you break one. Remove from the oven and let cool for 1 to 2 minutes on the pan, then sprinkle with the nutritional yeast for an extra layer of umami and a subtle cheesy note.
- Transfer the kale chips to a serving plate or bowl and enjoy immediately while they're at their crispiest. If you have leftovers, store them in an airtight container at room temperature for up to 3 days—I've found that keeping them in a container with a small silica packet helps them stay crispy longer.

