There’s something about gingerbread that makes me feel like the holidays are really here. The smell of ginger and cinnamon baking in the oven takes me right back to decorating gingerbread houses with my kids when they were little. But sometimes you want that same cozy flavor without all the fuss of rolling out dough and using cookie cutters.
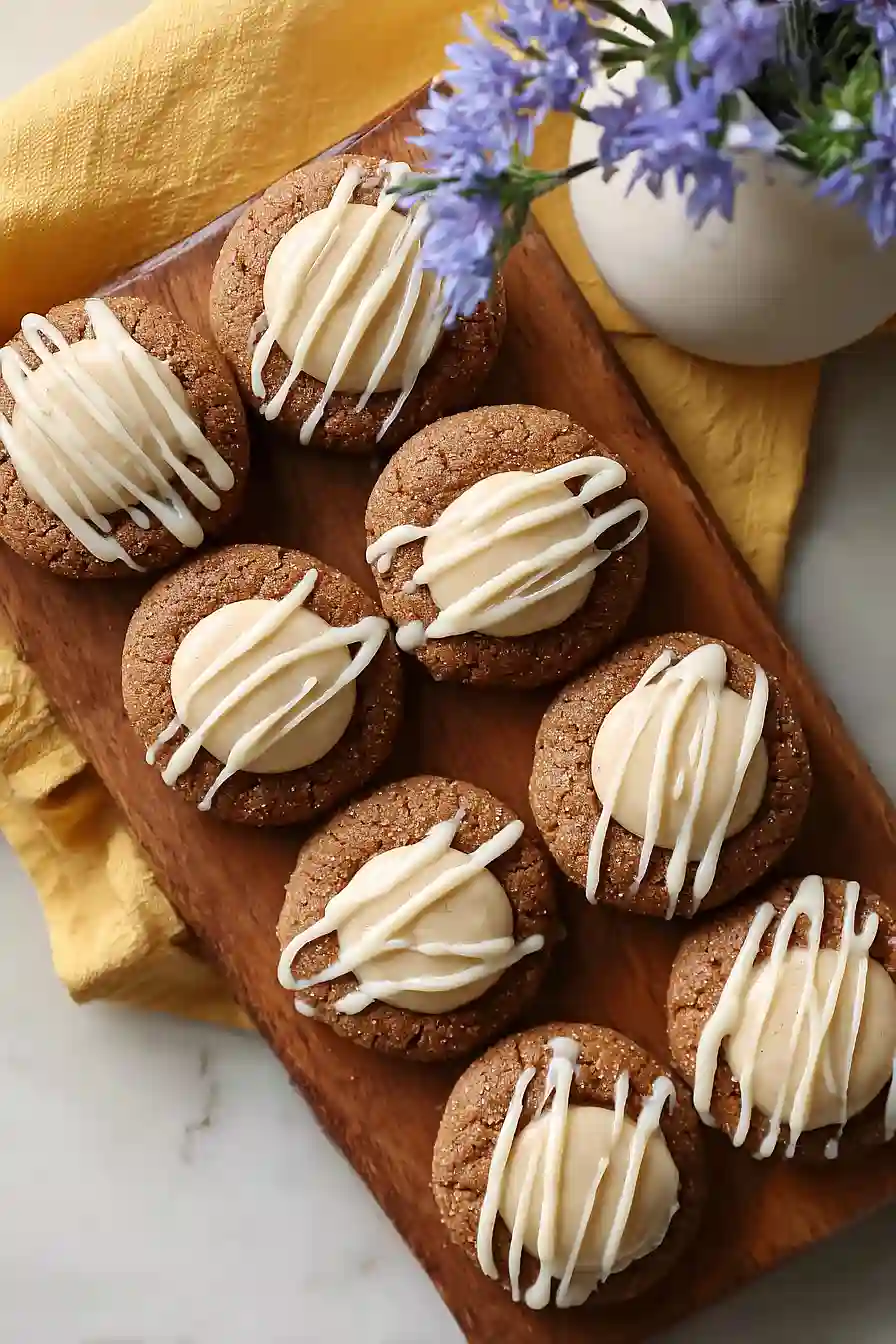
That’s where thumbprint cookies come in. They’re so much easier than rolled cookies, and the little indent in the middle is perfect for filling with something special. I decided to fill mine with a spiced white chocolate that picks up all those warm gingerbread flavors. You just roll the dough into balls, press your thumb in the center, and you’re done.
Want a cookie that tastes like the holidays but won’t keep you in the kitchen all day? These gingerbread thumbprints are it. Plus, they look pretty on a cookie tray without any extra work.
Why You’ll Love These Gingerbread Thumbprint Cookies
- Perfect holiday treat – These cookies bring all the warm spices of gingerbread with a sweet white chocolate filling that makes them feel extra special for Christmas cookie trays or gift-giving.
- Fun to make with kids – The thumbprint part is always a hit with little helpers, and they’ll love watching you fill each cookie with the spiced white chocolate.
- Flexible sweetener options – You can use regular sugar or swap in sugar alternatives like SPLENDA® Naturals if you’re watching your sugar intake without sacrificing flavor.
- Classic gingerbread flavor – The combination of molasses, ginger, cinnamon, and nutmeg gives you that cozy, nostalgic taste we all crave during the holidays.
What Kind of Molasses Should I Use?
For gingerbread cookies, you’ll want to stick with either light or dark molasses – both will give you that classic gingerbread flavor we all love. Light molasses (sometimes called mild molasses) is a bit sweeter and less intense, while dark molasses has a deeper, more robust flavor that really stands out. I’d avoid blackstrap molasses for this recipe since it can be pretty bitter and might overpower the other spices. Most grocery stores carry molasses in the baking aisle near the syrups, and a bottle will last you through plenty of holiday baking since a little goes a long way.
Options for Substitutions
These cookies are pretty forgiving when it comes to swaps, so here are some options if you need to make changes:
- Molasses: Molasses is really what gives these cookies their signature gingerbread flavor, so I wouldn’t recommend skipping it. However, if you only have dark molasses, use half the amount and add honey or corn syrup for the rest.
- Spices: Don’t have all the individual spices? You can use 1 tablespoon of gingerbread spice mix or pumpkin pie spice instead of measuring out each one separately.
- All-purpose flour: You can substitute up to half the all-purpose flour with whole wheat flour for a nuttier flavor, but keep in mind the cookies will be slightly denser.
- Unsalted butter: Salted butter works fine – just reduce the added salt in the recipe to ¼ teaspoon instead of ½ teaspoon.
- White chocolate chips: Feel free to use cream cheese frosting, vanilla buttercream, or even caramel for the filling instead. You can also try dark chocolate if you prefer a less sweet option.
- Granulated sugar: The recipe already includes options for SPLENDA® blends if you’re looking to reduce sugar, or you can use all brown sugar for a deeper molasses flavor.
Watch Out for These Mistakes While Baking
The biggest mistake with thumbprint cookies is making the indentation after they’ve cooled, which causes the cookies to crack and crumble – press your thumb into each cookie immediately after removing them from the oven while they’re still warm and pliable.
Another common error is making the thumbprint too shallow, so aim for a deep enough well (about halfway through the cookie) to hold a generous amount of filling without it spilling over the sides.
Overmixing the dough once you add the flour can lead to tough, dense cookies instead of the tender texture you want, so mix just until the flour disappears and no white streaks remain.
Finally, don’t skip chilling the dough for at least 30 minutes before rolling – warm dough spreads too much in the oven and makes it harder to create clean, defined thumbprints that hold their shape.

What to Serve With Gingerbread Thumbprint Cookies?
These gingerbread thumbprint cookies are perfect alongside a warm mug of coffee, hot chocolate, or spiced chai tea – the warming spices in the cookies really complement those cozy drinks. I love setting them out on a platter with other holiday cookies for a cookie exchange or party, since they add a nice spiced flavor that balances out sweeter treats like sugar cookies or chocolate chip. If you’re putting together a dessert spread, try pairing them with vanilla ice cream or a simple whipped cream for dipping, which cools down the ginger and cinnamon notes. They also make a great afternoon snack with a glass of cold milk, especially when you want something sweet but not too heavy.
Storage Instructions
Store: These gingerbread thumbprint cookies stay fresh in an airtight container at room temperature for up to 5 days. Just make sure the white chocolate filling is completely set before stacking them, or use parchment paper between layers to keep them looking pretty.
Freeze: You can freeze these cookies for up to 3 months in a freezer-safe container. I like to freeze them unfilled and add the white chocolate after thawing, but they also freeze well already filled if you separate the layers with parchment paper.
Make Ahead: The cookie dough can be made up to 2 days ahead and kept wrapped tightly in the fridge. Let it sit at room temperature for about 15 minutes before rolling and baking so it’s easier to work with.
| Preparation Time | 90-120 minutes |
| Cooking Time | 7-9 minutes |
| Total Time | 97-129 minutes |
| Level of Difficulty | Medium |
Estimated Nutrition
Estimated nutrition for the whole recipe (without optional ingredients):
- Calories: 3400-3700
- Protein: 32-38 g
- Fat: 150-170 g
- Carbohydrates: 470-520 g
Ingredients
For the cookies:
- 3 cups all-purpose flour (I use King Arthur all-purpose flour)
- 1 large egg (room temperature)
- 1 tsp pure vanilla extract
- 1 tsp baking soda
- 2 tbsp packed brown sugar
- 3/4 cup unsalted butter (softened to room temperature)
- 1/2 cup molasses (unsulfured preferred)
- 3/4 cup granulated sugar
- 1 tsp ground cinnamon
- 2 tsp ground ginger (freshly ground preferred)
- 1/2 tsp salt
- 1/4 tsp pumpkin pie spice
- 1/4 tsp ground nutmeg
- 1/3 cup granulated sugar for dusting
For the ginger-molasses filling:
- 4.5 tsp milk
- 1 cup white chocolate chips (I prefer Ghirardelli)
- 2 dashes ground nutmeg
- 1/8 tsp ground ginger
- 1/8 tsp ground cinnamon
- 1 tsp molasses
For the white chocolate drizzle:
- 2 tsp milk
- 1/3 cup white chocolate chips (finely chopped for smoother melting)
Step 1: Prepare Mise en Place and Dry Ingredients
- 3 cups all-purpose flour
- 2 tsp ground ginger
- 1 tsp ground cinnamon
- 1/4 tsp ground nutmeg
- 1/4 tsp pumpkin pie spice
- 1/2 tsp salt
- 1 tsp baking soda
Gather all ingredients and bring butter and egg to room temperature—this ensures smooth mixing and better texture.
In a medium bowl, whisk together flour, ground ginger, cinnamon, nutmeg, pumpkin pie spice, salt, and baking soda.
Set this dry mixture aside.
I find that whisking the dry ingredients together helps distribute the spices evenly throughout the dough, which is crucial for consistent gingerbread flavor in every bite.
Step 2: Cream Butter and Sugars
- 3/4 cup unsalted butter
- 3/4 cup granulated sugar
- 2 tbsp packed brown sugar
In a large mixing bowl, beat the softened butter with granulated sugar and packed brown sugar for about 4 minutes on medium speed until the mixture is light, fluffy, and noticeably paler in color.
This creaming process incorporates air into the dough, which helps the cookies rise properly and develop a tender crumb structure.
Step 3: Build the Wet Mixture
- 1/2 cup molasses
- 1 large egg
- 1 tsp pure vanilla extract
Add molasses, egg, and vanilla extract to the creamed butter and sugar mixture.
Beat on medium speed for about 2 minutes until everything is fully combined and the mixture looks smooth and cohesive.
The molasses adds both deep flavor and moisture to the dough.
Step 4: Combine and Chill Dough
- dry ingredient mixture from Step 1
- wet mixture from Step 3
Add the dry ingredient mixture from Step 1 to the wet mixture from Step 3, beating on low speed for about 1 minute until just combined—don’t overmix, as this can lead to tough cookies.
Cover the dough with plastic wrap and refrigerate for at least 1.5 hours.
This resting time allows the flavors to meld and helps prevent the dough from spreading too much during baking.
Step 5: Shape and Bake Cookies
- chilled dough from Step 4
- 1/3 cup granulated sugar
Preheat oven to 350°F and line a baking sheet with parchment paper.
Remove dough from refrigerator and scoop tablespoon-sized portions, then halve each portion and roll into balls.
Roll the balls in the 1/3 cup granulated sugar for dusting.
Place balls on prepared baking sheet spaced about 2 inches apart and bake for 7-9 minutes until the edges are set but the centers still look slightly underdone.
I like to bake these cookies just until they’re set on the outside but still soft in the middle, which keeps them tender and chewy.
Step 6: Create Indentations and Fill with Spiced White Chocolate
- 1 cup white chocolate chips
- 4.5 tsp milk
- 2 dashes ground nutmeg
- 1/8 tsp ground ginger
- 1/8 tsp ground cinnamon
- 1 tsp molasses
Remove cookies from the oven and while they’re still warm, use the back of a spoon to gently press an indentation into the center of each cookie—this creates the thumbprint.
Let cookies cool on the baking sheet for 2-3 minutes.
Meanwhile, melt 1 cup white chocolate chips with 4.5 tsp milk in a heatproof bowl over gently simmering water or in 30-second microwave intervals, stirring between intervals.
Stir in the 2 dashes ground nutmeg, 1/8 tsp ground ginger, 1/8 tsp ground cinnamon, and 1 tsp molasses to create a spiced chocolate filling.
Spoon 1 teaspoon of this spiced chocolate mixture into each cookie’s indentation.
Step 7: Add Final White Chocolate Drizzle
- 1/3 cup white chocolate chips
- 2 tsp milk
Once the spiced chocolate in the thumbprints has cooled slightly, melt the remaining 1/3 cup finely chopped white chocolate chips with 2 tsp milk using the same gentle method as Step 6.
Transfer to a small piping bag or drizzle bottle and create decorative lines or patterns over the cooled cookies.
Allow the chocolate to set at room temperature before serving or storing.
Irresistible Gingerbread Thumbprint Cookies
Ingredients
For the cookies:
- 3 cups all-purpose flour (I use King Arthur all-purpose flour)
- 1 large egg (room temperature)
- 1 tsp pure vanilla extract
- 1 tsp baking soda
- 2 tbsp packed brown sugar
- 3/4 cup unsalted butter (softened to room temperature)
- 1/2 cup molasses (unsulfured preferred)
- 3/4 cup granulated sugar
- 1 tsp ground cinnamon
- 2 tsp ground ginger (freshly ground preferred)
- 1/2 tsp salt
- 1/4 tsp pumpkin pie spice
- 1/4 tsp ground nutmeg
- 1/3 cup granulated sugar for dusting
For the ginger-molasses filling:
- 4.5 tsp milk
- 1 cup white chocolate chips (I prefer Ghirardelli)
- 2 dashes ground nutmeg
- 1/8 tsp ground ginger
- 1/8 tsp ground cinnamon
- 1 tsp molasses
For the white chocolate drizzle:
- 2 tsp milk
- 1/3 cup white chocolate chips (finely chopped for smoother melting)
Instructions
- Gather all ingredients and bring butter and egg to room temperature—this ensures smooth mixing and better texture. In a medium bowl, whisk together flour, ground ginger, cinnamon, nutmeg, pumpkin pie spice, salt, and baking soda. Set this dry mixture aside. I find that whisking the dry ingredients together helps distribute the spices evenly throughout the dough, which is crucial for consistent gingerbread flavor in every bite.
- In a large mixing bowl, beat the softened butter with granulated sugar and packed brown sugar for about 4 minutes on medium speed until the mixture is light, fluffy, and noticeably paler in color. This creaming process incorporates air into the dough, which helps the cookies rise properly and develop a tender crumb structure.
- Add molasses, egg, and vanilla extract to the creamed butter and sugar mixture. Beat on medium speed for about 2 minutes until everything is fully combined and the mixture looks smooth and cohesive. The molasses adds both deep flavor and moisture to the dough.
- Add the dry ingredient mixture from Step 1 to the wet mixture from Step 3, beating on low speed for about 1 minute until just combined—don't overmix, as this can lead to tough cookies. Cover the dough with plastic wrap and refrigerate for at least 1.5 hours. This resting time allows the flavors to meld and helps prevent the dough from spreading too much during baking.
- Preheat oven to 350°F and line a baking sheet with parchment paper. Remove dough from refrigerator and scoop tablespoon-sized portions, then halve each portion and roll into balls. Roll the balls in the 1/3 cup granulated sugar for dusting. Place balls on prepared baking sheet spaced about 2 inches apart and bake for 7-9 minutes until the edges are set but the centers still look slightly underdone. I like to bake these cookies just until they're set on the outside but still soft in the middle, which keeps them tender and chewy.
- Remove cookies from the oven and while they're still warm, use the back of a spoon to gently press an indentation into the center of each cookie—this creates the thumbprint. Let cookies cool on the baking sheet for 2-3 minutes. Meanwhile, melt 1 cup white chocolate chips with 4.5 tsp milk in a heatproof bowl over gently simmering water or in 30-second microwave intervals, stirring between intervals. Stir in the 2 dashes ground nutmeg, 1/8 tsp ground ginger, 1/8 tsp ground cinnamon, and 1 tsp molasses to create a spiced chocolate filling. Spoon 1 teaspoon of this spiced chocolate mixture into each cookie's indentation.
- Once the spiced chocolate in the thumbprints has cooled slightly, melt the remaining 1/3 cup finely chopped white chocolate chips with 2 tsp milk using the same gentle method as Step 6. Transfer to a small piping bag or drizzle bottle and create decorative lines or patterns over the cooled cookies. Allow the chocolate to set at room temperature before serving or storing.
