If you ask me, Halloween cookies are pure magic in the kitchen.
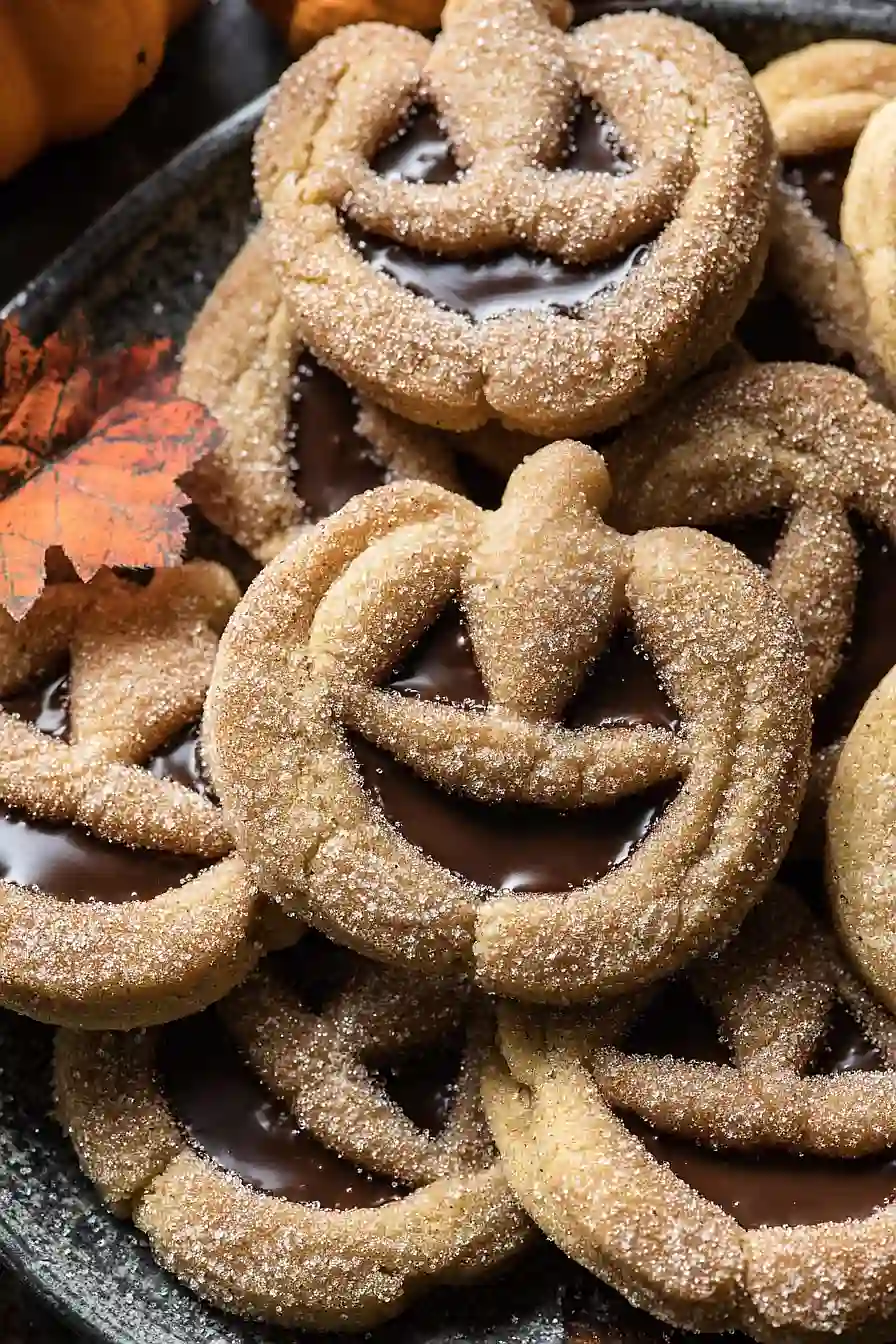
These milk chocolate stuffed jack o’ lantern cookies bring together two things kids love most – cookies and candy. Each cookie is packed with melty chocolate that oozes out when you take a bite.
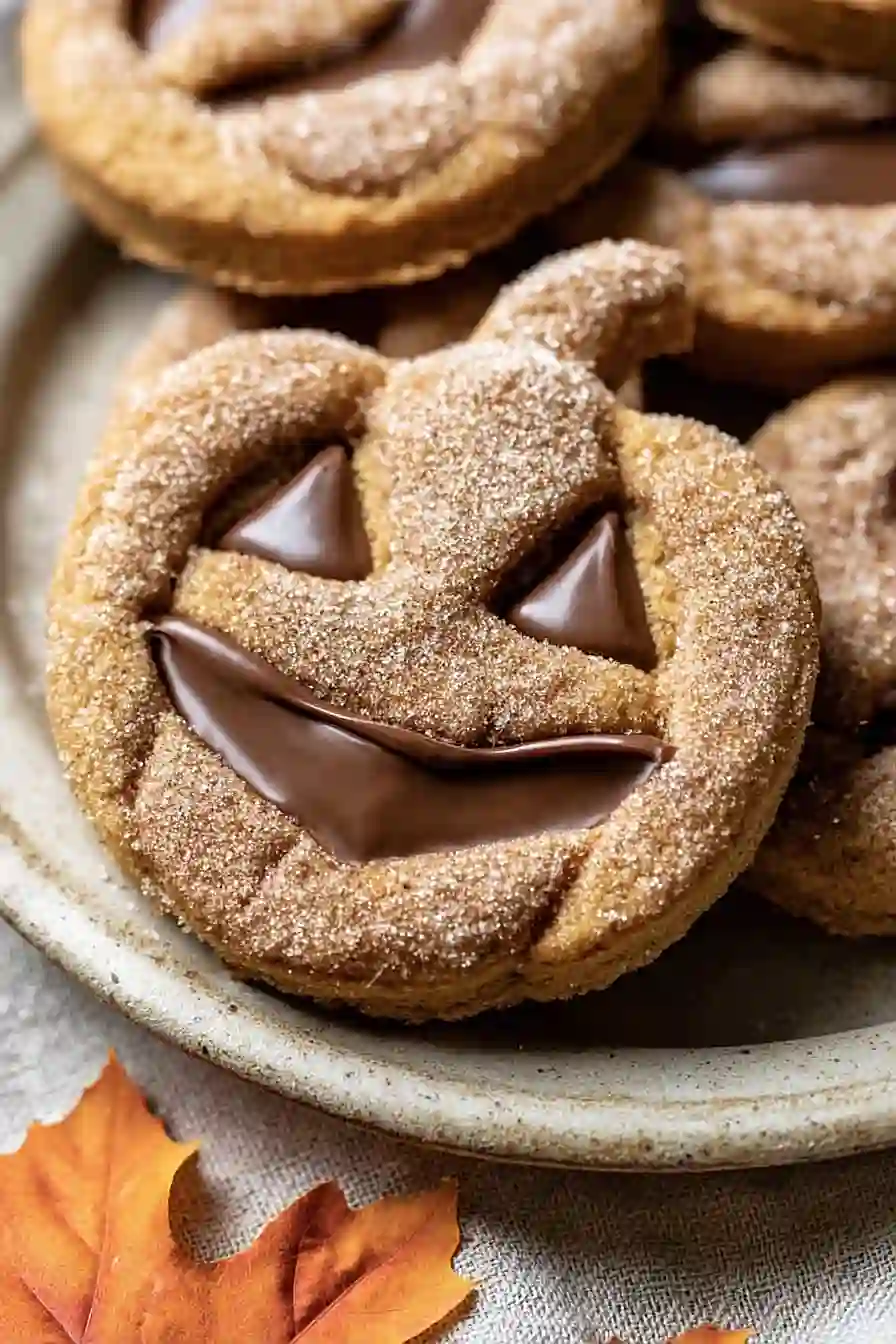
They’re shaped like friendly jack o’ lanterns with carved-out faces that let the chocolate peek through. A simple sugar cookie dough gets rolled out, cut, and filled before baking to golden perfection.
They’re the kind of treat that makes Halloween extra special, perfect for trick-or-treaters or classroom parties.

Why You’ll Love These Jack O’ Lantern Halloween Cookies
- Fun Halloween activity – These cookies are perfect for making with kids or getting into the spooky spirit – the jack o’ lantern faces make decorating easy and entertaining.
- Milk chocolate surprise – Each cookie has a gooey milk chocolate center that creates a delicious surprise when you bite into them.
- Warm spice flavors – The combination of cinnamon, ginger, and nutmeg gives these cookies that cozy fall taste that pairs perfectly with the season.
- Quick baking time – Ready in under an hour, these cookies are perfect when you need a festive treat without spending all day in the kitchen.
- Party-ready presentation – The cute jack o’ lantern design makes these cookies perfect for Halloween parties, school events, or trick-or-treat handouts.
What Kind of Milk Chocolate Should I Use?
For these stuffed Halloween cookies, you’ll want to use good quality milk chocolate that melts smoothly and has a nice creamy texture. Chocolate chips work perfectly fine, but if you want to step it up a notch, try using a chocolate bar broken into pieces – brands like Ghirardelli, Lindt, or even Hershey’s milk chocolate bars will give you great results. Avoid using chocolate with a high cocoa percentage since milk chocolate’s sweetness pairs best with the spiced cookie dough. When melting your chocolate, go slow and steady using a double boiler or microwave in 30-second intervals to prevent it from seizing up on you.
Options for Substitutions
These festive cookies are pretty forgiving when it comes to swaps, so here are some options if you need to make changes:
- Salted butter: You can use unsalted butter instead – just add an extra 1/4 teaspoon of salt to the dough. Margarine works too, though the texture might be slightly different.
- Light brown sugar: Dark brown sugar will give you a richer molasses flavor, or you can use regular white sugar mixed with 2 tablespoons of molasses for each cup.
- All-purpose flour: You can substitute up to half the flour with whole wheat flour for a nuttier taste, but don’t go beyond that or your cookies might get too dense.
- Milk chocolate: Feel free to use dark chocolate, white chocolate, or even chocolate chips instead of melted chocolate. If using chips, you might want to chop them up a bit for easier stuffing.
- Spices: Don’t have all the spices? You can use 2 teaspoons of pumpkin pie spice instead of the cinnamon, ginger, and nutmeg combo. Or just stick with cinnamon if that’s all you have.
- Eggs: Each egg can be replaced with 1/4 cup applesauce or 1 tablespoon ground flaxseed mixed with 3 tablespoons water (let it sit for 5 minutes first).
Watch Out for These Mistakes While Baking
The biggest mistake when making stuffed cookies is using chocolate that’s too hot, which will melt right through your dough – let that melted chocolate cool to room temperature and mix in the butter to create a firmer filling that won’t leak out during baking.
Another common error is rolling your dough too thin, so aim for about 1/4 inch thickness to ensure the cookies can hold their chocolate filling without breaking apart.
Don’t skip chilling the dough for at least 30 minutes before cutting, as warm dough is nearly impossible to work with and won’t hold its jack-o’-lantern shape properly.
Finally, resist the urge to overbake these cookies – they should look slightly underdone when you pull them out since they’ll continue cooking on the hot pan, and this keeps them soft and chewy rather than hard and crispy.
What to Serve With Jack O’ Lantern Halloween Cookies?
These spiced cookies are perfect on their own, but they’re even better with a tall glass of cold milk for dunking or a warm mug of apple cider to play up those cozy fall flavors. If you’re hosting a Halloween party, set them out alongside other seasonal treats like caramel apples, candy corn, or pumpkin-flavored snacks for a fun dessert spread. The warm spices in these cookies also pair nicely with vanilla ice cream if you want to turn them into an extra special dessert. For a cozy movie night, serve them with hot chocolate topped with marshmallows – the milk chocolate filling makes them a natural match!
Storage Instructions
Keep Fresh: These spooky cookies stay soft and chewy when stored in an airtight container at room temperature for up to one week. I like to layer them between sheets of parchment paper to keep the chocolate filling from sticking together. They’re perfect for Halloween parties since they hold up so well!
Freeze: You can freeze these jack o’ lantern cookies for up to 3 months in a freezer-safe container or zip-top bags. Just make sure they’re completely cooled first, and separate the layers with parchment paper. This is great when you want to get ahead on your Halloween baking!
Enjoy: Frozen cookies taste amazing straight from the freezer, or you can let them thaw at room temperature for about 20 minutes. The chocolate center gets nice and soft again once they warm up. I actually love eating them slightly chilled because the chocolate stays firm and gives a nice contrast to the spiced cookie.
| Preparation Time | 30-40 minutes |
| Cooking Time | 8-12 minutes |
| Total Time | 38-52 minutes |
| Level of Difficulty | Medium |
Estimated Nutrition
Estimated nutrition for the whole recipe (without optional ingredients):
- Calories: 4600-5000
- Protein: 45-55 g
- Fat: 270-300 g
- Carbohydrates: 520-560 g
Ingredients
For the cookie dough:
- 1 1/2 cups salted butter, softened (3 sticks)
- 1 1/4 cups packed light brown sugar
- 1 tbsp pure vanilla extract
- 2 large eggs, room temperature
- 4 1/2 cups all-purpose flour
- 1 tsp baking soda
- 1 tsp ground cinnamon
- 1/2 tsp ground ginger
- 1/4 tsp ground nutmeg
- 1/2 tsp salt
For the chocolate filling:
- 12 oz melted milk chocolate
For the topping:
- 2 tbsp salted butter
- 3 tbsp cinnamon sugar
Step 1: Make the Cookie Dough
- 1 1/2 cups salted butter, softened (3 sticks)
- 1 1/4 cups packed light brown sugar
- 1 tbsp pure vanilla extract
- 2 large eggs, room temperature
- 4 1/2 cups all-purpose flour
- 1 tsp baking soda
- 1 tsp ground cinnamon
- 1/2 tsp ground ginger
- 1/4 tsp ground nutmeg
- 1/2 tsp salt
In a large mixing bowl, cream together the softened butter, brown sugar, and vanilla extract until the mixture is light and fluffy, about 3-5 minutes.
Beat in the eggs, one at a time, mixing until fully incorporated.
Add the flour, baking soda, ground cinnamon, ground ginger, ground nutmeg, and salt.
Mix until just combined and the dough forms a cohesive ball.
I recommend scraping the bowl a few times to make sure everything is well incorporated.
Step 2: Shape and Cut the Cookies
- cookie dough from Step 1
- additional all-purpose flour for dusting (from the 4 1/2 cups all-purpose flour)
Generously flour your work surface to prevent sticking.
Divide the cookie dough from Step 1 in half and flatten each portion into a disk.
Roll out each disk to about 1/4-inch thickness.
Use a pumpkin-shaped cookie cutter to cut out cookies, transferring them carefully to a parchment-lined baking sheet.
For half of the cookies, use a paring knife or small cutter to cut out eyes and a mouth.
Place the baking sheet in the freezer and chill for 15-20 minutes until the dough is firm.
Gather scraps, reroll, and repeat with remaining dough.
Step 3: Bake and Cool the Cookies
- cut cookies from Step 2
Preheat your oven to 350°F (175°C).
Bake the chilled cookies from Step 2 on the middle rack for 8-12 minutes, or until just lightly golden brown.
Avoid overbaking to keep the cookies soft.
Allow the cookies to cool on the baking sheet for 5 minutes, then transfer them to a wire rack to cool completely.
Step 4: Brown the Butter and Coat the Cookies
- 2 tbsp salted butter
- 3 tbsp cinnamon sugar
- baked cookies from Step 3
In a medium pot, melt the salted butter over medium heat.
Cook, stirring often, until the butter begins to brown and smells toasted, about 2-3 minutes.
Remove from heat and let it cool for 5 minutes.
Brush the tops of the pumpkin-face (top half) cookies from Step 3 with the browned butter, then sprinkle generously with cinnamon sugar.
I love how browning the butter adds a deep, nutty flavor to the finished cookies.
Step 5: Assemble the Sandwich Cookies
- 12 oz melted milk chocolate
- sandwiched cookies from Step 3 (plain base cookies)
- decorated cookies from Step 4 (pumpkin face tops)
Spread the melted milk chocolate over the base of the plain cookies (the ones without faces) from Step 3.
Place the decorated pumpkin-face cookies (from Step 4) on top of the chocolate-covered bases, pressing gently to create a sandwich.
Serve immediately, or let the chocolate set before storing cookies in an airtight container for up to 3 days.
For a fun twist, sometimes I pop them in the fridge for 10 minutes to make the chocolate set extra fast.

Easy Milk Chocolate Stuffed Jack O' Lantern Halloween Cookies
Ingredients
For the cookie dough:
- 1 1/2 cups salted butter, softened (3 sticks)
- 1 1/4 cups packed light brown sugar
- 1 tbsp pure vanilla extract
- 2 large eggs, room temperature
- 4 1/2 cups all-purpose flour
- 1 tsp baking soda
- 1 tsp ground cinnamon
- 1/2 tsp ground ginger
- 1/4 tsp ground nutmeg
- 1/2 tsp salt
For the chocolate filling:
- 12 oz melted milk chocolate
For the topping:
- 2 tbsp salted butter
- 3 tbsp cinnamon sugar
Instructions
- In a large mixing bowl, cream together the softened butter, brown sugar, and vanilla extract until the mixture is light and fluffy, about 3-5 minutes. Beat in the eggs, one at a time, mixing until fully incorporated. Add the flour, baking soda, ground cinnamon, ground ginger, ground nutmeg, and salt. Mix until just combined and the dough forms a cohesive ball. I recommend scraping the bowl a few times to make sure everything is well incorporated.
- Generously flour your work surface to prevent sticking. Divide the cookie dough from Step 1 in half and flatten each portion into a disk. Roll out each disk to about 1/4-inch thickness. Use a pumpkin-shaped cookie cutter to cut out cookies, transferring them carefully to a parchment-lined baking sheet. For half of the cookies, use a paring knife or small cutter to cut out eyes and a mouth. Place the baking sheet in the freezer and chill for 15-20 minutes until the dough is firm. Gather scraps, reroll, and repeat with remaining dough.
- Preheat your oven to 350°F (175°C). Bake the chilled cookies from Step 2 on the middle rack for 8-12 minutes, or until just lightly golden brown. Avoid overbaking to keep the cookies soft. Allow the cookies to cool on the baking sheet for 5 minutes, then transfer them to a wire rack to cool completely.
- In a medium pot, melt the salted butter over medium heat. Cook, stirring often, until the butter begins to brown and smells toasted, about 2-3 minutes. Remove from heat and let it cool for 5 minutes. Brush the tops of the pumpkin-face (top half) cookies from Step 3 with the browned butter, then sprinkle generously with cinnamon sugar. I love how browning the butter adds a deep, nutty flavor to the finished cookies.
- Spread the melted milk chocolate over the base of the plain cookies (the ones without faces) from Step 3. Place the decorated pumpkin-face cookies (from Step 4) on top of the chocolate-covered bases, pressing gently to create a sandwich. Serve immediately, or let the chocolate set before storing cookies in an airtight container for up to 3 days. For a fun twist, sometimes I pop them in the fridge for 10 minutes to make the chocolate set extra fast.
