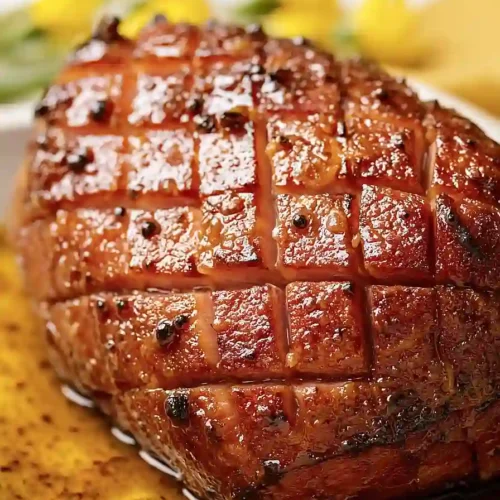
Mouthwatering Vegan Glazed Ham
Delicious Mouthwatering Vegan Glazed Ham recipe with step-by-step instructions.
Ingredients
For the ham:
- 1 tsp smoked paprika (for authentic ham color and taste)
- 1.5 cups vital wheat gluten (creates the firm, meaty texture)
- 3 cups vegetable broth for steaming
- 1/4 cup tomato paste
- 2 tbsp nutritional yeast (for savory umami flavor)
- 1 tbsp liquid smoke (I use Colgin hickory)
- 1 tbsp maple syrup
- 1/2 tsp garlic powder
- 1 tsp onion powder
- 2 tbsp olive oil
- 1/4 tsp ground cloves
- 15 oz chickpeas (canned, drained and rinsed)
- 3/4 cup vegetable broth
For the glaze:
- 1/4 tsp ground cinnamon
- 1/2 cup brown sugar (packed)
- 1 tbsp Dijon mustard (for tang and depth)
- 4 tbsp vegan butter (melted)
- 1/2 cup maple syrup
For toppings (optional):
- 10 pineapple rings (optional, adds sweetness and tropical flavor)
- 20 whole cloves (optional but traditional for presentation)
Instructions
- Combine the chickpeas, 3/4 cup vegetable broth, olive oil, nutritional yeast, tomato paste, liquid smoke, maple syrup, smoked paprika, ground cloves, onion powder, and garlic powder in a blender. Blend until completely smooth—this creates the flavorful base that will give your ham its savory, umami-rich character. Pour the blended mixture into a large bowl, then add the vital wheat gluten and mix with your hands until a shaggy dough forms. Knead the dough about 10 times on a clean surface until it comes together into a firm, cohesive mass, then shape it into a compact loaf. This kneading step develops the gluten structure, which is what gives the ham its authentic firm, sliceable texture.
- Fill a pot with 3 cups of vegetable broth and bring it to a boil. Place a steamer basket inside the pot and carefully set your shaped loaf on the basket, making sure it doesn't touch the boiling water. Cover the pot, bring the broth back to a boil, then immediately lower the heat to a simmer. Steam the loaf for 1 hour, checking occasionally and adding more broth if the liquid level drops too low—you want steam to keep circulating throughout the cooking time. This steaming process cooks the vital wheat gluten evenly and prevents the exterior from drying out.
- While the ham is steaming, prepare your glaze by whisking together the melted vegan butter, 1/2 cup maple syrup, brown sugar, Dijon mustard, ground cinnamon, and the remaining 1/4 tsp ground cloves in a bowl. Whisk until the sugar is fully dissolved and the glaze is smooth and glossy—this combination creates the sweet and savory coating that makes baked ham so irresistible. Once the steaming time is complete, remove the pot from heat and let the loaf cool in the pot for about 10 minutes with the lid off. This cooling allows the exterior to set slightly, making it easier to score and glaze.
- Preheat your oven to 425°F. Transfer the cooled steamed loaf to a baking dish or roasting pan. Using a sharp knife, score the top of the ham with a crisscross pattern, cutting about 1/4 inch deep—I like to make diamonds rather than squares, as they catch more glaze and create a more visually appealing presentation. Pour about half of the glaze from Step 3 over the loaf, making sure it seeps into the scored lines. Arrange the pineapple rings around and on top of the ham, and if using them, press whole cloves into the intersection points of your scoring pattern for that classic glazed ham look.
- Place the prepared ham in the 425°F oven and bake for 30 minutes, basting it with the remaining glaze every 10 minutes. Each time you baste, spoon the glaze that has pooled in the bottom of the pan over the top and sides of the ham, allowing the maple-brown sugar mixture to caramelize and build layers of flavor. By the end of the baking time, the exterior should be deeply caramelized with a sticky, glossy coating.
- Remove the ham from the oven and let it rest in the baking dish for about 15 minutes before serving. This resting period allows the exterior to set and firms up slightly, making it easier to slice cleanly and ensuring each piece holds its shape beautifully. Serve warm, spooning any pan drippings over individual slices.