Finding a dessert that’s both paleo-friendly and packed with fresh spring flavor can feel nearly impossible. Most paleo treats lean heavily on chocolate or nuts, and while there’s nothing wrong with that, sometimes you just want something a little lighter and more seasonal, especially when rhubarb starts popping up at the farmers market.
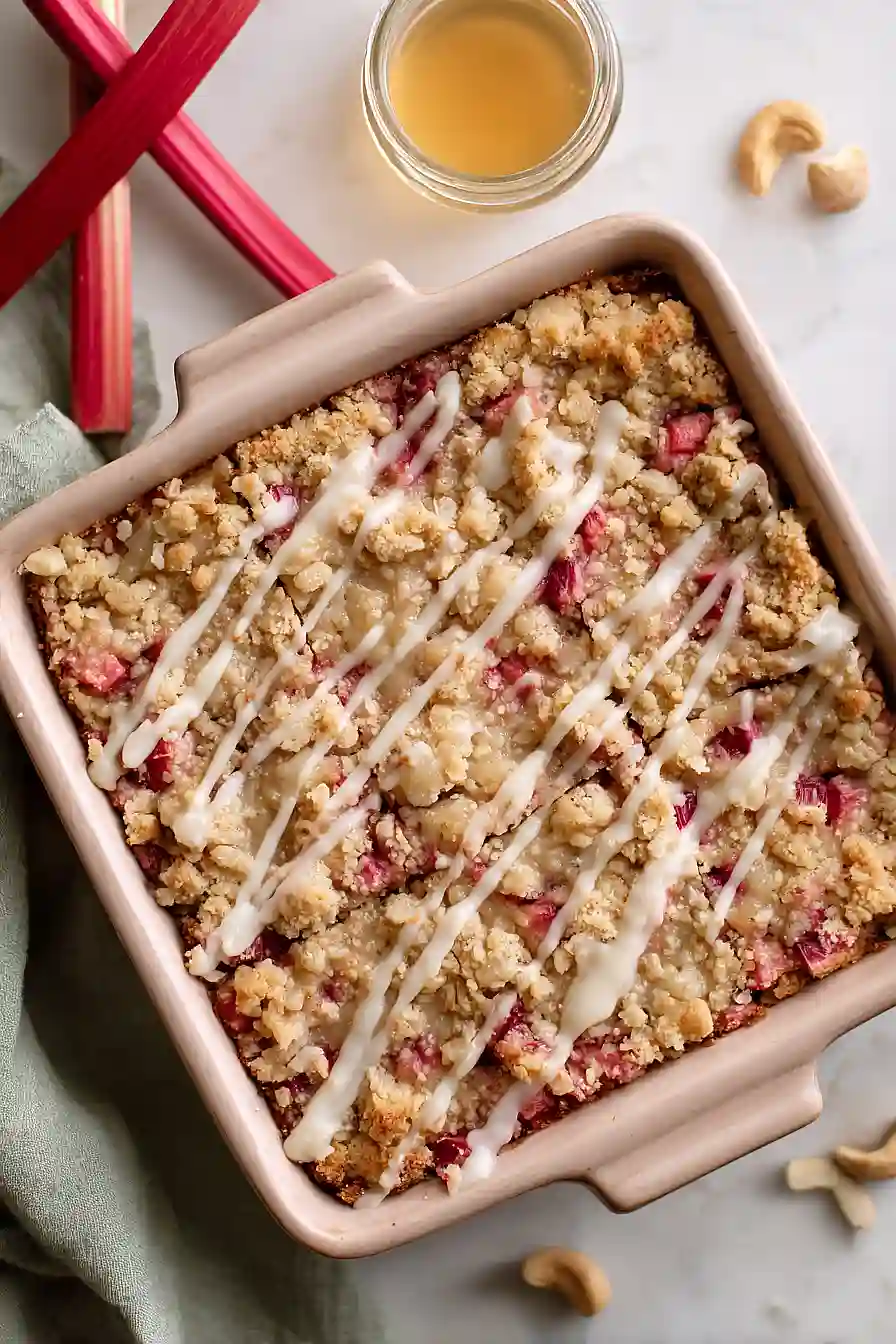
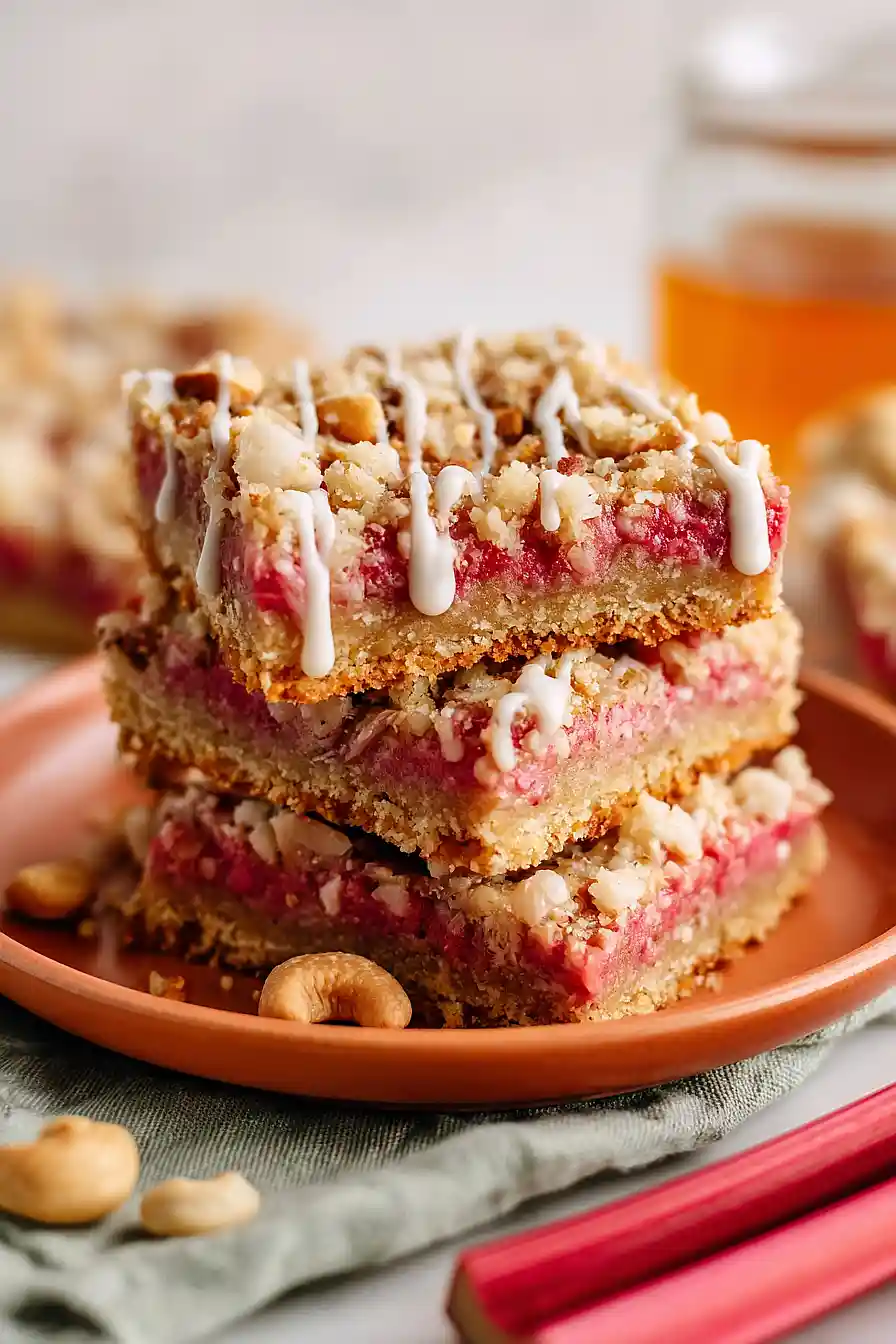
These paleo rhubarb bars are exactly what you need: they feature a buttery almond flour crust, a tangy strawberry-rhubarb filling that tastes like spring, and a simple maple glaze that ties everything together. They’re naturally sweetened, grain-free, and honestly taste like you spent way more time on them than you actually did.
Why You’ll Love These Rhubarb Bars
- Paleo-friendly dessert – These bars are made with almond flour, coconut flour, and natural sweeteners, so you can enjoy a treat that fits your paleo lifestyle without any guilt.
- Perfect balance of sweet and tart – The combination of strawberries and rhubarb creates a filling that’s not too sweet, while the maple syrup adds just the right amount of natural sweetness.
- Simple, wholesome ingredients – You probably have most of these pantry staples on hand already, and everything is real food you can feel good about eating.
- Great for spring and summer – When rhubarb is in season, these bars are the perfect way to use it up, and they make a refreshing dessert or snack for warmer weather.
- Ready in about an hour – From start to finish, you can have these bars cooling on your counter in just 50-70 minutes, making them doable even on busy days.
What Kind of Rhubarb Should I Use?
Fresh rhubarb is your best bet for these bars, and you’ll find it in season from spring through early summer at most grocery stores and farmers markets. The color of the stalks can range from deep red to light pink or even greenish, and while the red varieties look prettier, they all taste pretty much the same. When selecting rhubarb, look for firm, crisp stalks and avoid any that feel soft or look shriveled. If fresh rhubarb isn’t available, you can use frozen rhubarb – just make sure to thaw it completely and drain off any excess liquid before using it in the recipe.
Options for Substitutions
These paleo bars are pretty adaptable, so here are some swaps you can make:
- Almond flour: If you’re avoiding almonds, try using sunflower seed flour or a mix of cashew and coconut flour. Keep in mind that sunflower seed flour can turn green when baked (it’s harmless!) due to a reaction with baking soda.
- Coconut flour: You can use additional almond flour instead, but you’ll need about 4 times as much since coconut flour is super absorbent. Start with 1/2 cup and adjust if the dough seems too wet.
- Strawberries: Feel free to use all rhubarb for a more tart filling, or swap the strawberries for raspberries or blueberries. Just keep the total fruit amount at 2 cups.
- Maple syrup: Honey works as a one-to-one substitute throughout the recipe. It’ll give a slightly different flavor but still tastes great.
- Coconut oil: Ghee or grass-fed butter (if you’re not strictly paleo) can replace the coconut oil in the crust. Use the same amount and make sure it’s melted.
- Cashews: Macadamia nuts or blanched almonds work well in the topping. Just process them the same way you would the cashews.
- Tapioca starch: Arrowroot powder is a perfect substitute here – use the same amount to thicken your fruit filling.
Watch Out for These Mistakes While Baking
The biggest mistake with paleo bars is not pressing the crust firmly enough into the pan, which leads to crumbly bars that fall apart when you try to cut them – use the bottom of a measuring cup to really pack it down.
Another common error is skipping the tapioca starch slurry or adding it directly to the fruit without mixing it with water first, which creates clumps instead of a smooth, thickened filling that holds together nicely.
Make sure your coconut oil is melted but not hot when mixing the crust, as oil that’s too warm will make the dough greasy and difficult to work with.
Finally, let the bars cool completely in the pan before cutting – rushing this step results in messy squares with filling that oozes everywhere instead of neat, clean slices.

What to Serve With Rhubarb Bars?
These paleo rhubarb bars are perfect for an afternoon snack with a cup of hot tea or coffee – the tartness of the rhubarb really balances out the sweetness. I love serving them at brunch alongside fresh fruit like sliced melon or berries, which keeps things light and refreshing. They also make a great dessert option when you top them with a dollop of coconut whipped cream or a scoop of vanilla ice cream (dairy-free if you’re keeping it paleo). For a more filling breakfast or snack, pair them with some Greek yogurt or a handful of nuts for extra protein.
Storage Instructions
Store: Keep your rhubarb bars in an airtight container in the fridge for up to 5 days. The crust stays nice and firm when chilled, and the fruity filling holds together better too. I actually think they taste even better after a day or two when all the flavors have had time to meld together.
Freeze: These bars are perfect for freezing! Cut them into individual portions and wrap each one in parchment paper, then store in a freezer-safe container for up to 3 months. It’s great to have a stash ready whenever you need a quick dessert or snack.
Serve: You can enjoy these bars straight from the fridge for a firmer texture, or let them sit at room temperature for about 10 minutes if you prefer them a bit softer. If you’re eating them from frozen, just thaw in the fridge overnight or on the counter for 30-45 minutes.
| Preparation Time | 20-30 minutes |
| Cooking Time | 30-40 minutes |
| Total Time | 50-70 minutes |
| Level of Difficulty | Medium |
| Servings | 12 bars |
Estimated Nutrition
Estimated nutrition for the whole recipe (without optional ingredients):
- Calories: 1850-2050
- Protein: 24-28 g
- Fat: 125-135 g
- Carbohydrates: 170-185 g
Ingredients
For the crust and topping:
- 2 1/4 cups almond flour (I always use King Arthur for a finer grind)
- 2 tbsp coconut flour
- 1/2 tsp salt
- 1 tsp vanilla
- 1/4 cup maple syrup
- 1/3 cup coconut oil (melted and cooled to room temperature)
- 1/3 cup cashews (roughly chopped into 1/4-inch pieces)
For the fruit filling:
- 1 1/4 cups strawberries (hulled and sliced into 1/2-inch pieces)
- 1 1/4 cups rhubarb (cut into 1/2-inch slices)
- 1 tbsp lemon juice
- 2 tbsp maple syrup
- 1/8 tsp salt
- 1/4 tsp ground ginger
- 1 tbsp tapioca starch (I prefer Bob’s Red Mill for a smooth set)
For the glaze:
- 1/4 cup coconut butter (warmed until smooth and pourable)
- 2 tbsp maple syrup
- 1 tsp vanilla
- 4 tbsp water
- 1/4 tsp lemon zest
Step 1: Prepare Mise en Place and Preheat
- 1 1/4 cups rhubarb
- 1 1/4 cups strawberries
- 1/3 cup cashews
- 1/4 tsp lemon zest
Preheat your oven to 350°F and line a 9×13 inch baking dish with parchment paper.
While the oven heats, measure and prepare all your ingredients: slice the rhubarb into 1/2-inch pieces, hull and slice the strawberries into 1/2-inch pieces, roughly chop the cashews into 1/4-inch pieces, and zest the lemon.
Having everything ready before you start mixing ensures smooth assembly and prevents the base from over-baking while you’re still prepping.
Step 2: Make the Base Dough and Pre-Bake
- 2 1/4 cups almond flour
- 2 tbsp coconut flour
- 1/2 tsp salt
- 1 tsp vanilla
- 1/4 cup maple syrup
- 1/3 cup coconut oil
In a bowl, combine the almond flour, coconut flour, and salt.
Add the vanilla, maple syrup, and cooled melted coconut oil, stirring until the mixture resembles wet sand and comes together.
Press three-quarters of this mixture firmly and evenly into the prepared baking dish, creating an even layer about 1/4-inch thick.
Bake this base for 10-12 minutes until it turns light golden—it should be partially set but still slightly soft.
I like to use King Arthur almond flour specifically because it has a finer grind that creates a more tender crumb.
Step 3: Cook the Fruit Filling
- 1 1/4 cups strawberries
- 1 1/4 cups rhubarb
- 1 tbsp lemon juice
- 2 tbsp maple syrup
- 1/8 tsp salt
While the base bakes, add the sliced rhubarb and strawberries from Step 1 to a saucepan along with the lemon juice, maple syrup, and salt.
Bring to a simmer over medium heat and cook for about 7 minutes, stirring occasionally, until the fruit softens and releases its juices.
The mixture should break down slightly but still retain some fruit texture.
Step 4: Thicken the Fruit and Prepare Topping
- fruit filling from Step 3
- 4 tbsp water
- 1 tbsp tapioca starch
- 1/4 tsp ground ginger
- 1/3 cup cashews
- remaining base dough
In a small bowl, whisk together the water and tapioca starch until smooth with no lumps.
Stir this slurry into the fruit mixture and add the ground ginger, cooking for 1-2 minutes more until the sauce thickens slightly and the raw starch flavor is cooked out—it should coat the back of a spoon but still be pourable.
While this finishes, fold the chopped cashews from Step 1 into the remaining dough that wasn’t pressed into the pan.
Step 5: Assemble and Bake the Bars
- pre-baked base from Step 2
- fruit filling from Step 4
- cashew dough mixture from Step 4
Remove the pre-baked base from the oven and pour the thickened fruit filling over it, spreading it into an even layer.
Crumble the cashew dough mixture from Step 4 evenly over the fruit filling, leaving some texture rather than pressing it down—this creates nice crunchy bits on top.
Return to the oven and bake for 20 minutes until the top is golden and set.
I prefer Bob’s Red Mill tapioca starch because it creates a smooth, glossy set without any graininess.
Step 6: Make Glaze and Finish
- 1/4 cup coconut butter
- 2 tbsp maple syrup
- 1 tsp vanilla
- 4 tbsp water
- 1/4 tsp lemon zest
While the bars bake, warm the coconut butter until it’s smooth and pourable, then stir in the maple syrup, vanilla, water, and lemon zest until you have a drizzleable glaze with a smooth consistency.
Remove the baked bars from the oven and let them cool for 10-15 minutes so the glaze will set slightly rather than soak into the hot bars.
Drizzle the glaze over the cooled bars in a thin, decorative pattern.

Tasty Paleo Rhubarb Bars
Ingredients
For the crust and topping::
- 2 1/4 cups almond flour (I always use King Arthur for a finer grind)
- 2 tbsp coconut flour
- 1/2 tsp salt
- 1 tsp vanilla
- 1/4 cup maple syrup
- 1/3 cup coconut oil (melted and cooled to room temperature)
- 1/3 cup cashews (roughly chopped into 1/4-inch pieces)
For the fruit filling::
- 1 1/4 cups strawberries (hulled and sliced into 1/2-inch pieces)
- 1 1/4 cups rhubarb (cut into 1/2-inch slices)
- 1 tbsp lemon juice
- 2 tbsp maple syrup
- 1/8 tsp salt
- 1/4 tsp ground ginger
- 1 tbsp tapioca starch (I prefer Bob's Red Mill for a smooth set)
For the glaze::
- 1/4 cup coconut butter (warmed until smooth and pourable)
- 2 tbsp maple syrup
- 1 tsp vanilla
- 4 tbsp water
- 1/4 tsp lemon zest
Instructions
- Preheat your oven to 350°F and line a 9x13 inch baking dish with parchment paper. While the oven heats, measure and prepare all your ingredients: slice the rhubarb into 1/2-inch pieces, hull and slice the strawberries into 1/2-inch pieces, roughly chop the cashews into 1/4-inch pieces, and zest the lemon. Having everything ready before you start mixing ensures smooth assembly and prevents the base from over-baking while you're still prepping.
- In a bowl, combine the almond flour, coconut flour, and salt. Add the vanilla, maple syrup, and cooled melted coconut oil, stirring until the mixture resembles wet sand and comes together. Press three-quarters of this mixture firmly and evenly into the prepared baking dish, creating an even layer about 1/4-inch thick. Bake this base for 10-12 minutes until it turns light golden—it should be partially set but still slightly soft. I like to use King Arthur almond flour specifically because it has a finer grind that creates a more tender crumb.
- While the base bakes, add the sliced rhubarb and strawberries from Step 1 to a saucepan along with the lemon juice, maple syrup, and salt. Bring to a simmer over medium heat and cook for about 7 minutes, stirring occasionally, until the fruit softens and releases its juices. The mixture should break down slightly but still retain some fruit texture.
- In a small bowl, whisk together the water and tapioca starch until smooth with no lumps. Stir this slurry into the fruit mixture and add the ground ginger, cooking for 1-2 minutes more until the sauce thickens slightly and the raw starch flavor is cooked out—it should coat the back of a spoon but still be pourable. While this finishes, fold the chopped cashews from Step 1 into the remaining dough that wasn't pressed into the pan.
- Remove the pre-baked base from the oven and pour the thickened fruit filling over it, spreading it into an even layer. Crumble the cashew dough mixture from Step 4 evenly over the fruit filling, leaving some texture rather than pressing it down—this creates nice crunchy bits on top. Return to the oven and bake for 20 minutes until the top is golden and set. I prefer Bob's Red Mill tapioca starch because it creates a smooth, glossy set without any graininess.
- While the bars bake, warm the coconut butter until it's smooth and pourable, then stir in the maple syrup, vanilla, water, and lemon zest until you have a drizzleable glaze with a smooth consistency. Remove the baked bars from the oven and let them cool for 10-15 minutes so the glaze will set slightly rather than soak into the hot bars. Drizzle the glaze over the cooled bars in a thin, decorative pattern.
